Lace Nails: The Delicate Trend, From Barely-There to Statement
Lace nails are the quietest statement in manicures right now: a fine lace pattern — printed, painted or raised in 3D — worn over a nude, milky or dark base, so the nail looks like fabric rather than paint. The trend has official backing: Pinterest Predicts 2026 names lace nails up 215% under its ‘Laced Up’ trend. This guide covers the whole delicate range — printed, painted and 3D lace, sheer lace over nude for brides, white lace on milky and blush bases, black lace for a vamp-romantic look, lace accent nails, lace French and lace-tipped designs, the three methods honestly compared, the exact wording for your nail tech, and how to style lace for Valentine’s and weddings. For more beauty inspiration, start at AboutSuperstars.
Quick answer: Lace nails are a fine lace pattern worn over a nude, milky or dark base — printed with stickers, stamped, painted freehand, or raised in 3D. Start with one sheer lace accent nail, keep the base neutral, and seal it glossy, and the pattern reads as delicate fabric, not busy nail art.
Lace on Nails: Printed, Painted & 3D Versions
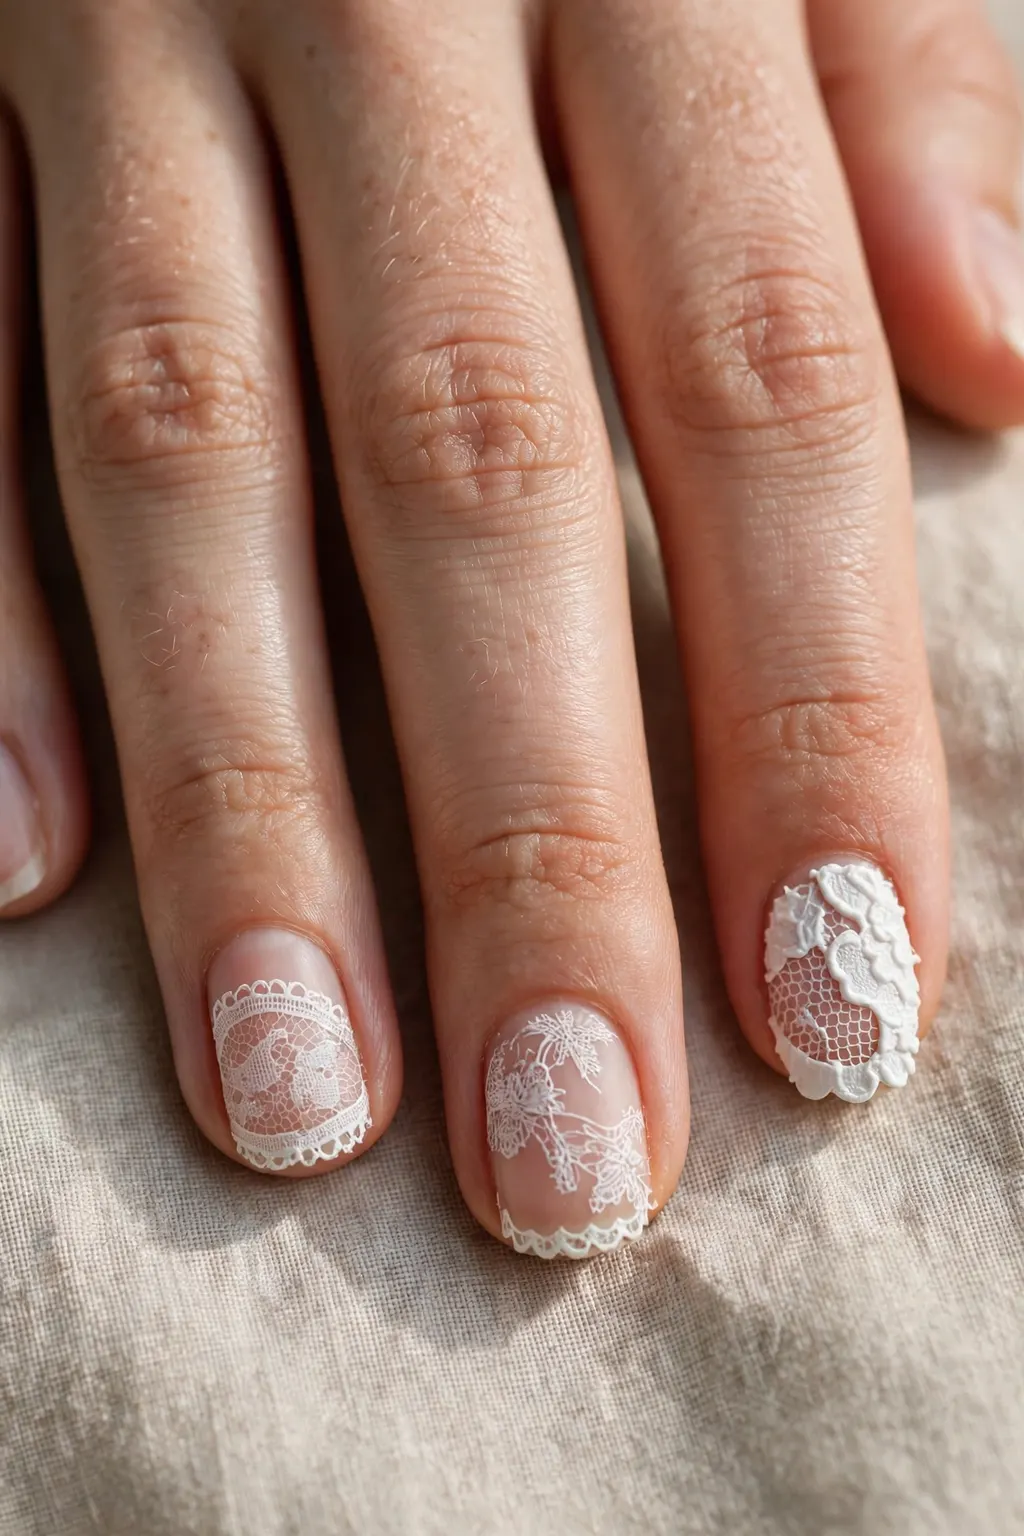
Lace on nails comes in three versions, and they look nothing alike up close. Printed lace uses stickers or water decals: a real lace photograph printed onto a thin film, laid over the nail and sealed. Painted lace is drawn on with a fine brush or stamped with a lace-pattern plate: the pattern is flatter, the lines are softer, and the artist controls exactly where the lace sits. 3D lace is raised — a lace appliqué, a textured gel, or a stamping plate pressed into a thick layer so the pattern stands off the nail and catches the light. Printed lace is the sharpest and the most even; painted lace is the softest and the most forgiving; 3D lace is the most dramatic and the least practical for everyday wear. The version to choose depends on the occasion: printed for a wedding, painted for every day, 3D for a party or a photoshoot where the nails will be seen up close and touched less.
Step by step
Prep the nails — file, push back the cuticles, wipe with remover so the base grips — then paint the base colour in two thin coats and let it dry fully. For printed lace: cut the decal to the nail, float it onto the wet top coat or a thin layer of clear polish, smooth it flat with a silicone tool, and trim the excess at the free edge. For painted lace: load a fine liner brush, draw the lace outline first — the scalloped edge, then the mesh — and fill in the pattern in short strokes, not long ones. For 3D lace: press the appliqué or stamp into a thick uncured gel layer, cure it, then seal with a top coat that floods around the raised pattern without flattening it.
Common mistakes to avoid
The most common mistake is a base that is still tacky when the lace goes on — a decal slides, a painted line drags, and a 3D appliqué sinks unevenly. The second is a pattern that is too large for the nail: lace designed for a long almond nail turns into a single blob on a short nail, so scale the pattern down or use it on one accent nail only. And the third is skipping the seal: lace without a top coat catches on clothes and hair within a day, and a decal without a sealed edge lifts at the tip first. Seal twice — once to fix the lace, once to smooth it.
Products and tools that help
A sheer nude or milky base polish, lace decals or a lace stamping plate and stamper, a fine liner brush for painted lace, and a glossy top coat that self-levels — it floods around a raised pattern without leaving a ridge. A silicone tool or an orange stick helps press a decal flat without tearing it, and a clean-up brush with remover keeps the lace off the skin. Keep the lace pattern small: a fine mesh reads as lace, a chunky pattern reads as a doily.
Sheer Lace Over a Nude Base: The Bridal Entry Point
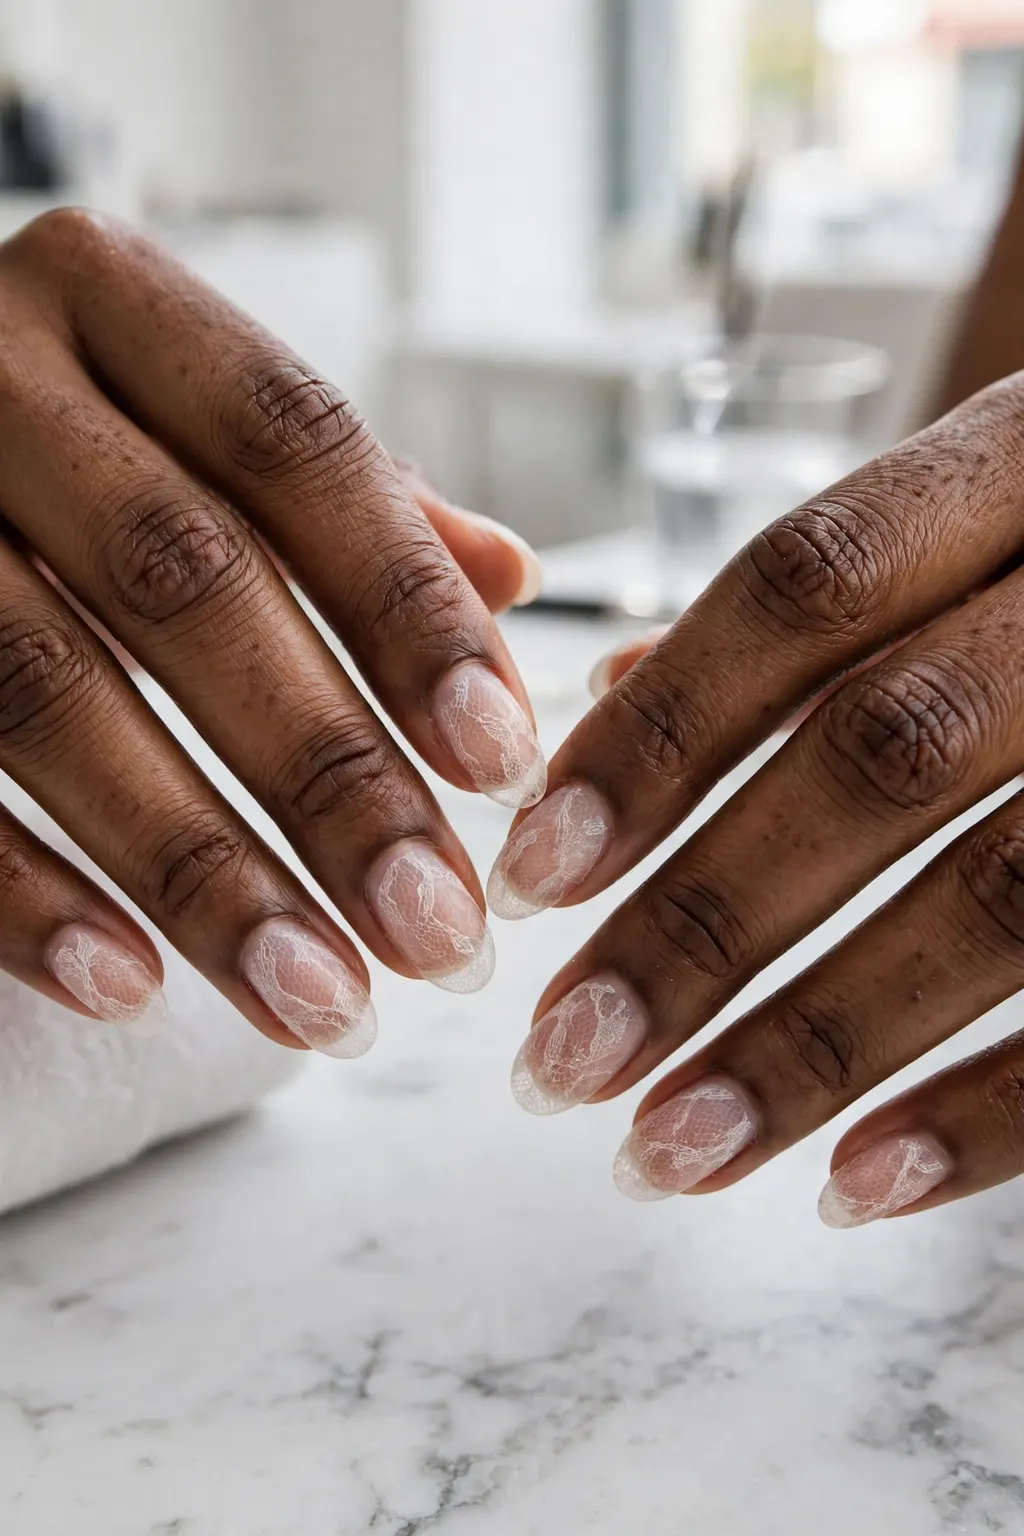
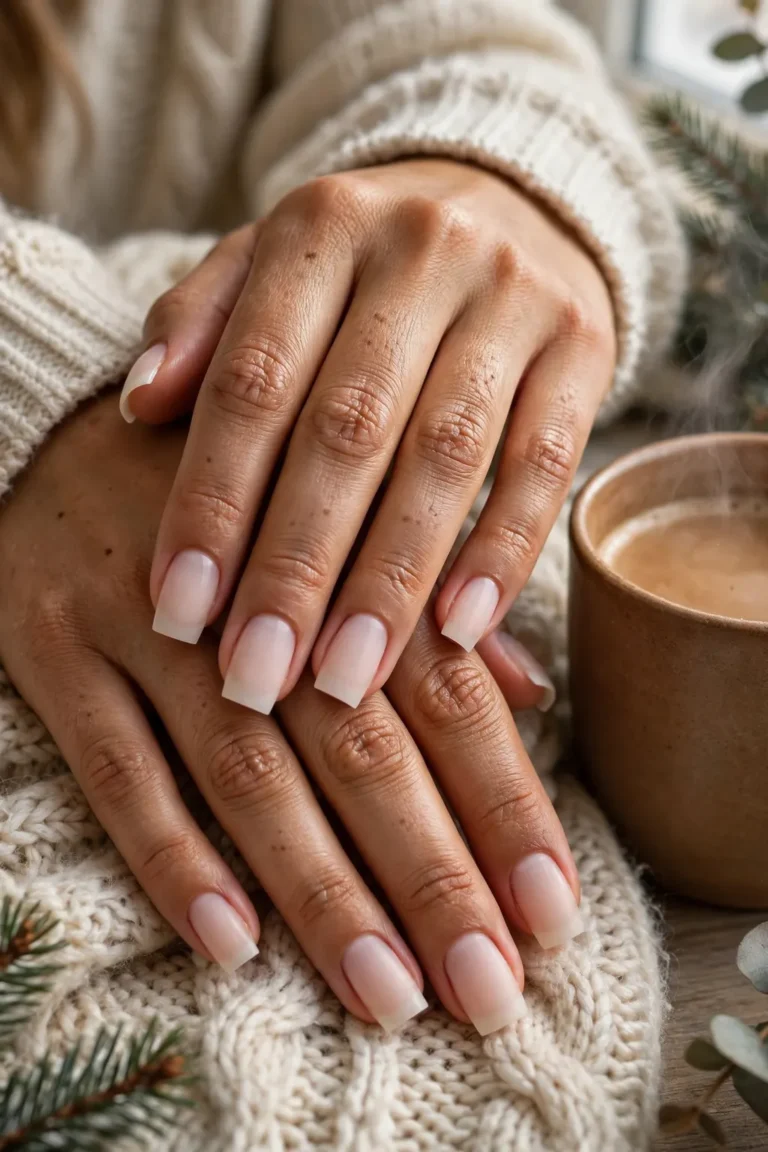
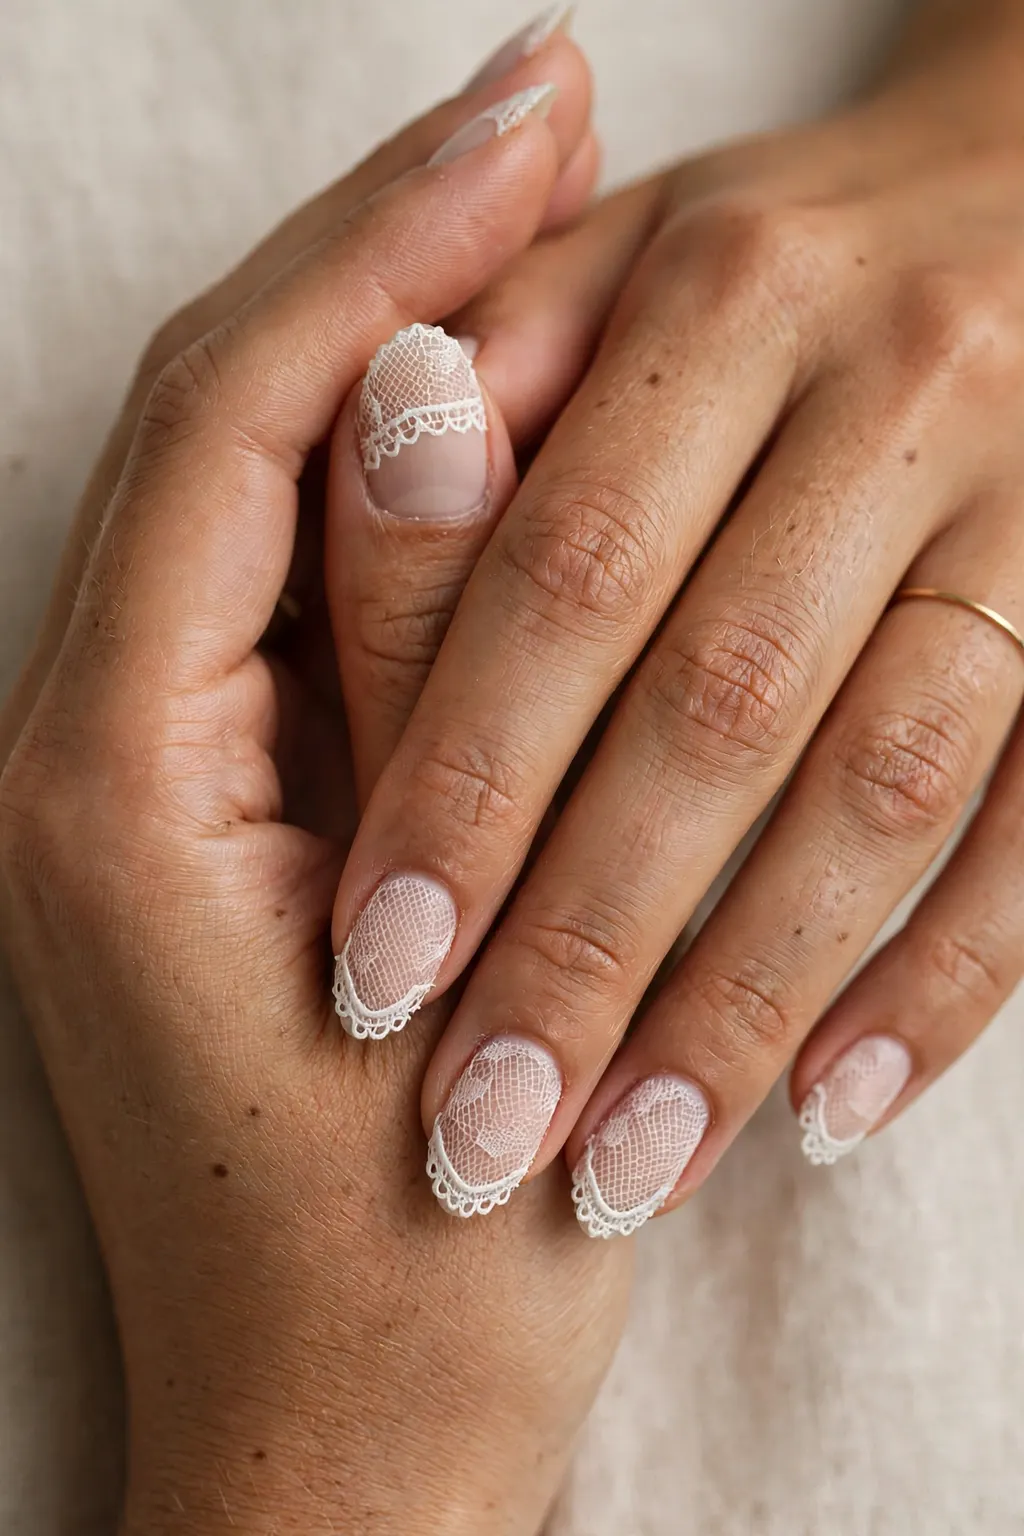
Sheer lace over a nude base is the bridal entry point, and it is the version to start with if you have never worn lace nails. The nude base is your own nail colour, deepened slightly — a sheer pink-beige that makes the hand look healthy — and the lace sits over it in white or ivory, so fine that it reads as a veil rather than a pattern. It suits a wedding because it photographs like the dress: white on skin, detailed up close, invisible from a distance. It suits a bride who does not want colour on her hands, because the nude base is barely there and the white lace is the only decoration. And it suits anyone who wants lace without committing to a look, because a sheer lace accent nail on a nude base is the easiest version to remove, to grow out, and to wear again for a different occasion.
Who should skip this version
Skip sheer lace over nude if you want your nails to read as a colour — the whole point of this version is that it barely reads at all, and if you love a bold manicure, it will feel like nothing is there. Skip it too if your nails are stained or uneven in tone: a sheer nude base shows every stain and ridge underneath it, and the lace cannot hide them. In both cases the fix is a more opaque base — a milky or blush base under the same lace, which covers the nail and still keeps the lace delicate.
Works best on: shapes and lengths
Sheer lace over nude suits every shape and length, because the pattern is fine and the base is sheer. It suits short nails best of all: a fine lace pattern needs very little room, and on a short nail it looks intentional rather than crowded. It suits almond and oval nails well, because the soft curve suits the soft pattern, and it suits square nails too, as long as the lace is kept fine — a chunky pattern on a square nail can look heavy. It suits every skin tone, because the nude base is matched to the hand: fair skin takes a pink-nude, medium skin takes a beige-nude, deep skin takes a warm caramel-nude, and the white lace sits over all of them the same way.
Maintenance schedule
A regular-polish sheer lace manicure lasts three to five days; a gel version lasts two to three weeks. The weak point is the tip, where the lace meets the free edge — refresh the top coat at day three, wrapped over the edge, and the lace stays sealed. Keep cuticle oil on daily, because a sheer base shows dry skin around the nail more than an opaque colour does: there is nothing else to look at, and neat skin is what makes a barely-there manicure look expensive.
White Lace on Milky & Blush Bases
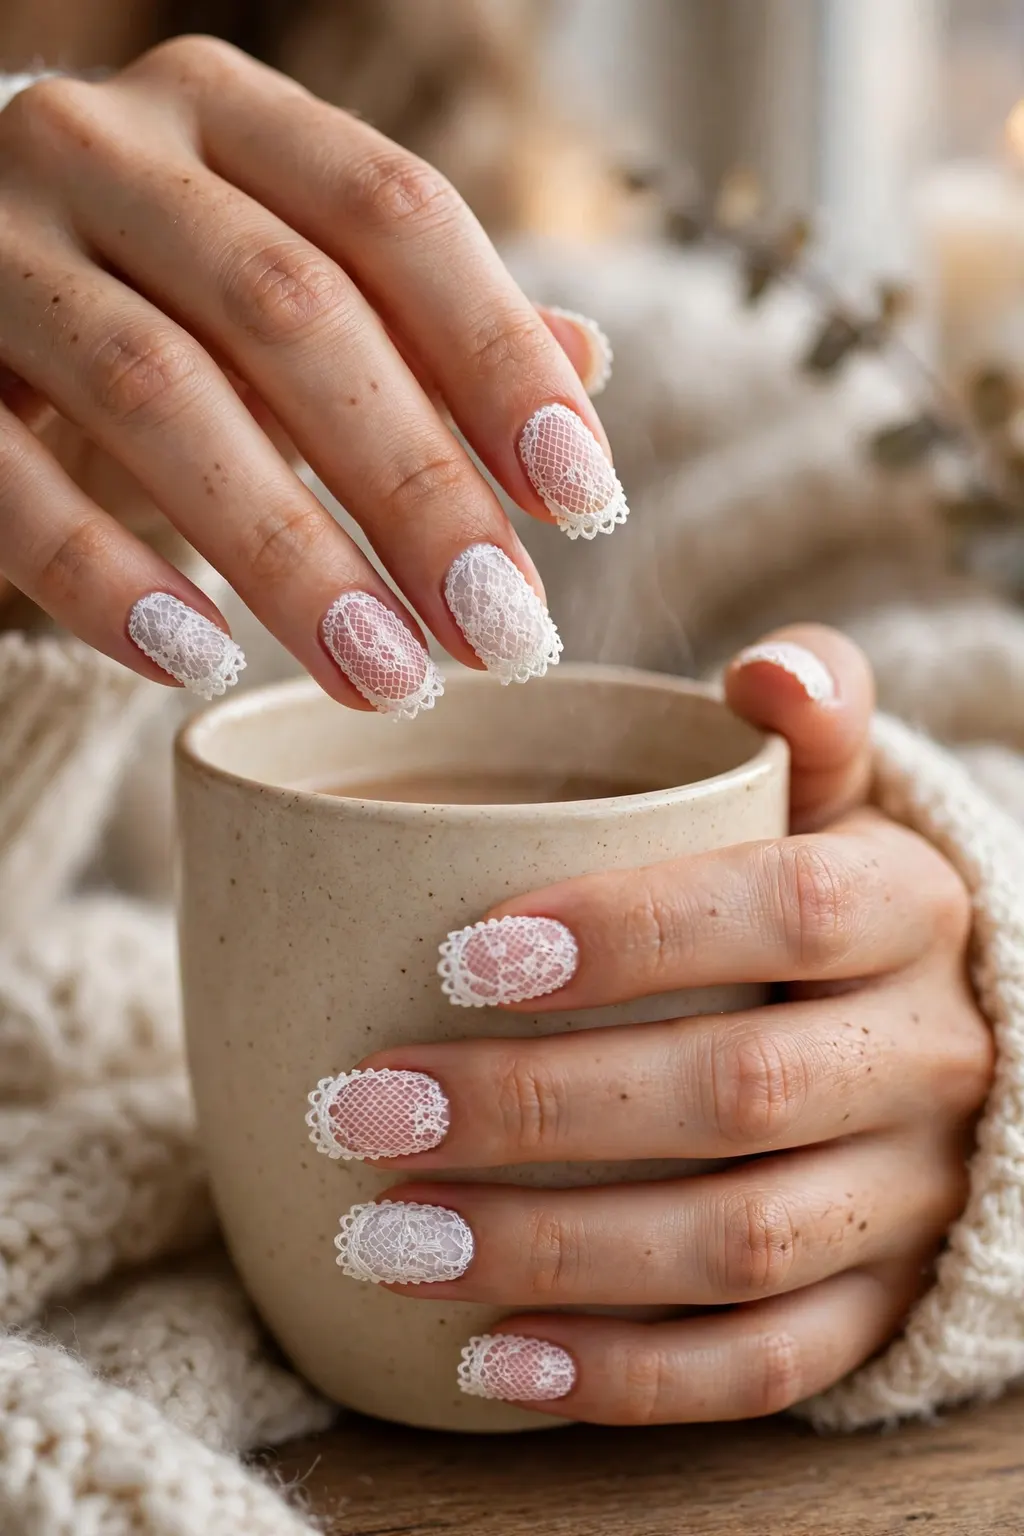
White lace on a milky or blush base is the softest full-coverage version of the trend: the base is opaque enough to cover the nail — a milky white or a soft blush pink — and the white lace sits over it in the same white family, so the pattern shows as texture and shadow rather than as contrast. It suits winter especially well, because a milky base looks like fresh snow and the lace looks like frost on it. It suits a bride who wants more presence than the sheer version, because the milky base reads as a colour in photographs while the lace still reads as lace. And it suits anyone who loves the milky, glazed family of finishes: the same sheer milky base that carries a chrome veil in our Jelly Pink Chrome Nails guide carries white lace just as well — the base is the same, the finish is the choice.
Best for: nail shapes, lengths and skin tones
White lace on milky and blush suits short to medium nails best, because a milky base on a very long nail can look washed out, while on a short or medium nail it looks clean and deliberate. It suits almond and round nails well, because the soft curve suits the soft colour, and it suits square nails too, as long as the corners are kept soft rather than sharp. It suits fair and light skin tones best of all, and it suits cool undertones especially well — the milky white flatters a cool hand in a way a warm nude cannot. On deep skin, white lace still works, but it needs a blush base rather than a milky one, so the lace shows against a base that has some warmth in it.
The exact wording to show your nail tech
Say: “White lace over a milky base — not sheer, full coverage — on almond nails” — or your shape — “fine lace, not chunky, and I want the lace in white, not ivory.” The three phrases that matter are the base, the lace colour and the scale: if your tech hears only “white lace”, you may get a sheer base that shows the nail through it; if they hear only “milky”, you may get a plain milky manicure with no lace at all. Showing a photo helps here, because the difference between milky and sheer is a matter of one coat, and a photo shows exactly how much base should show.
How long it lasts and what it costs
A regular-polish white lace manicure lasts three to five days; a gel version lasts two to three weeks. The lace itself does not change the schedule — a white lace pattern chips at the same rate as a plain milky manicure — but white shows chips more clearly, so a top coat wrapped over the free edge matters more here than with a darker design. Cost is a standard manicure or gel set plus a small add-on for the lace work, because the pattern is hand-applied or decalled nail by nail; a single accent nail is normally a smaller add-on than a full set of lace.
Black Lace: The Vamp Romantic Version
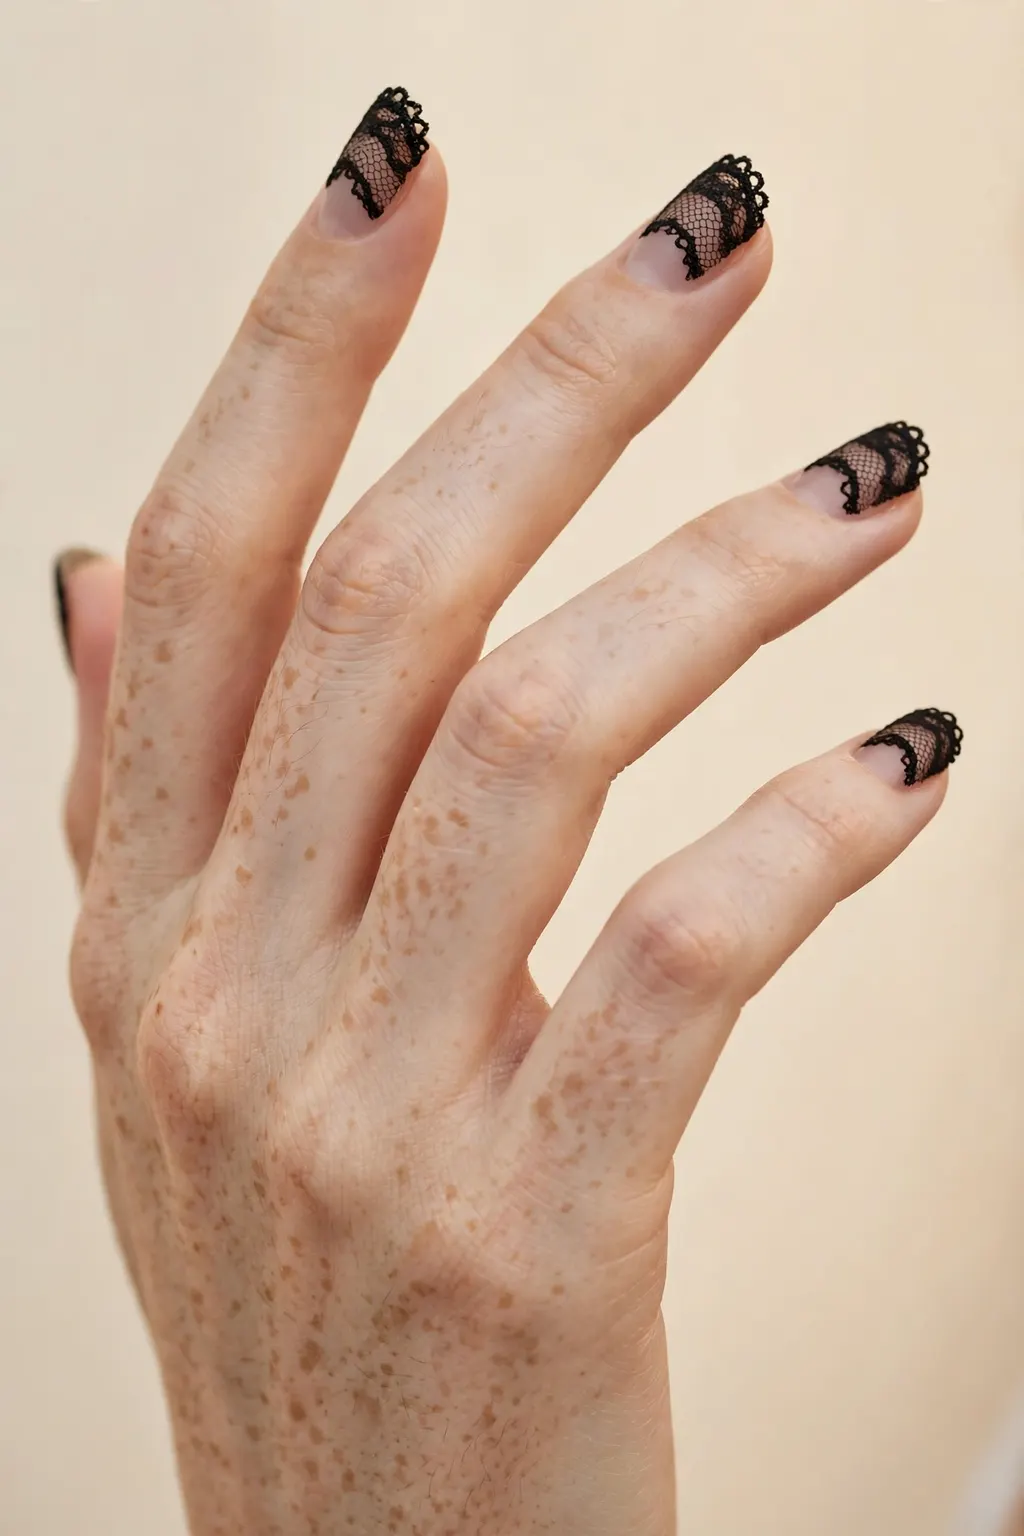
Black lace is the vamp-romantic version: the same fine lace pattern, drawn or decalled in black over a nude, blush or deep red base, so the nail looks like a piece of dark lingerie rather than a decoration. It suits evening best, because black lace shows up in low light where white lace disappears. It suits a wedding guest who wants romance without bridal white, because black lace on a nude base is dramatic without being bridal. And it suits anyone who loves the dark romantic side of winter — black lace with a deep red base is the nail version of a velvet dress. The key is the base: black lace on a nude base reads as delicate and romantic, while black lace on a black base disappears entirely, so the base must be lighter than the lace by a clear margin.
Step by step
Prep the nails, then paint the base — nude, blush or deep red — in two thin coats and let it dry fully. For decalled black lace: cut the decal, float it onto a thin layer of clear polish, smooth it flat, and trim at the free edge. For painted black lace: load a fine liner brush with black, draw the scalloped edge first, then the mesh, in short strokes — black shows every wobble, so work slowly and let the brush do the work. Then seal with a glossy top coat, wrapped over the free edge, because gloss is what makes black lace read as fabric rather than as a smudge: a matte black lace looks flat and muddy, while a glossy one shows the pattern in the light.
Common mistakes to avoid
The most common mistake is a base that is too dark for the lace — black lace on a deep burgundy base is beautiful, but black lace on a near-black base is invisible, and the manicure looks like a plain dark nail. The second is a pattern that is too heavy: thick black lines read as a tattoo rather than as lace, so keep the lines fine and the mesh open. And the third is skipping the top coat, or using a matte one by accident: black lace without gloss looks dull and almost grey, while the same pattern under a glossy top coat reads as sharp, dark lace.
Products and tools that help
A nude, blush or deep red base polish, black lace decals or a black stamping polish with a lace plate, a fine liner brush for painted lace, and a glossy non-yellowing top coat, because gloss is the finish that makes the black pattern visible. A clean-up brush with remover matters more with black than with white, because a black smudge on the skin shows instantly. Keep the pattern fine: a delicate black mesh reads as lace, a chunky black pattern reads as a spiderweb.
Lace Accent Nails With Plain Colour Elsewhere
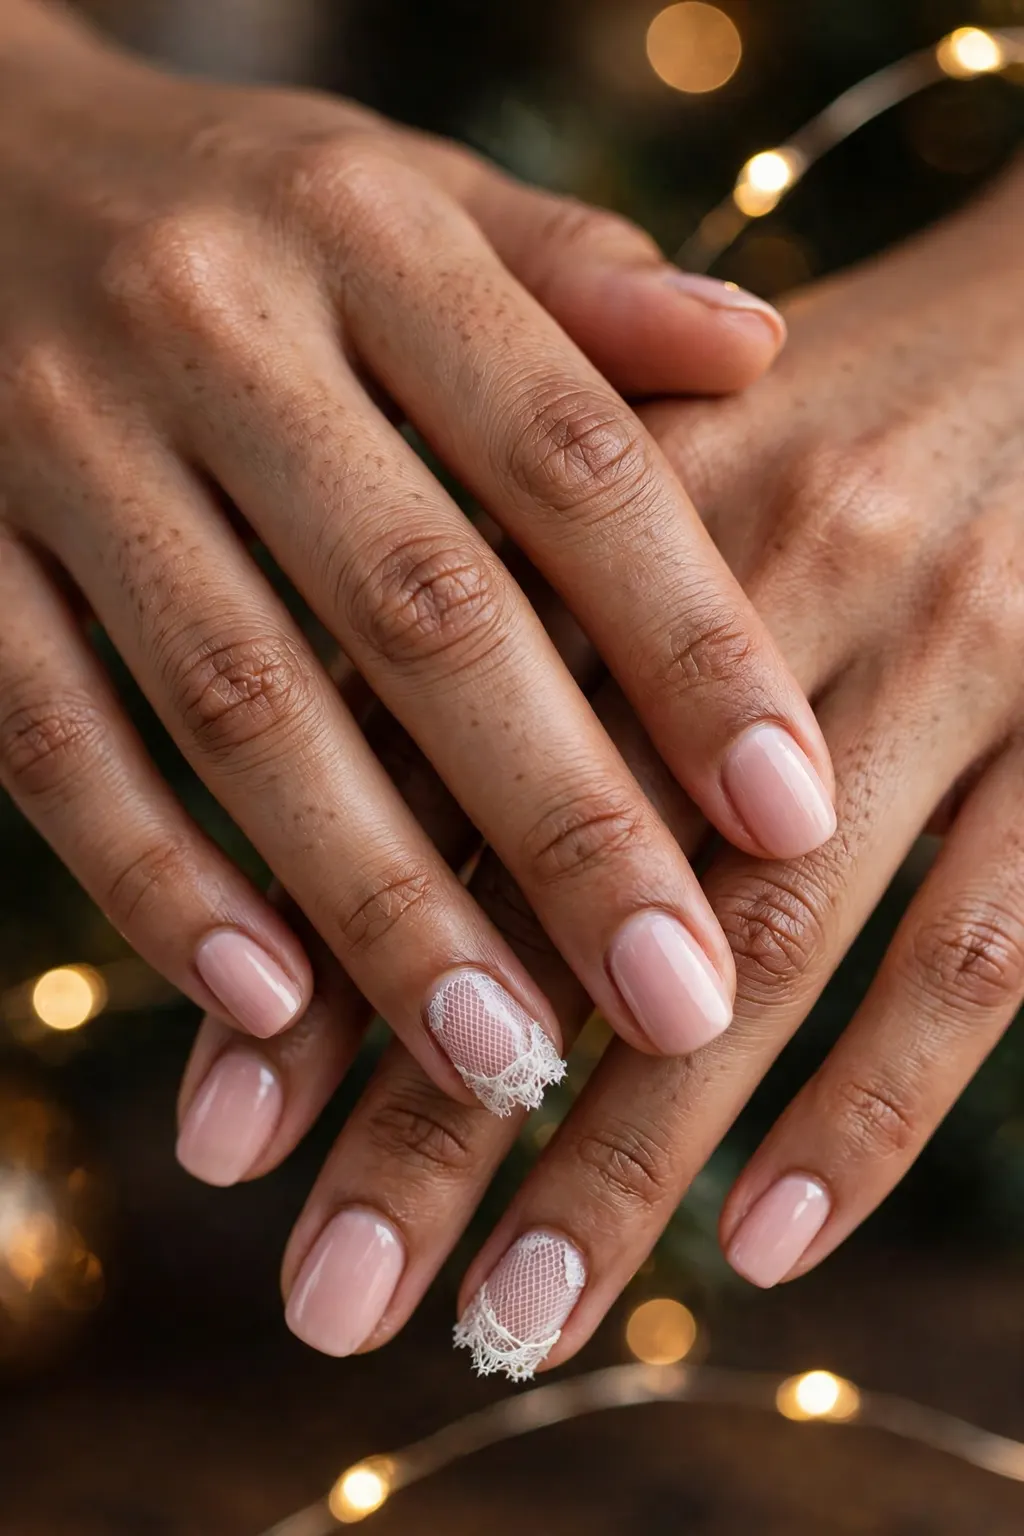
Lace accent nails are the easiest way into the trend: one or two nails carry the lace pattern, and the rest of the hand wears a plain colour — nude, milky, blush or deep red. The accent does all the talking, and the plain nails give the eye somewhere to rest. It suits a first try, because one lace nail is a small commitment and an easy fix if it goes wrong. It suits work, because a single lace accent reads as a detail rather than a statement, and it suits a wedding guest, because the accent can match the dress while the rest of the hand stays neutral. The usual choice is the ring finger, because it is the nail people look at first, but the middle finger works just as well — the rule is one accent per hand, not one per finger, because two lace nails on the same hand start to look like a half-finished full set.
Who should skip this version
Skip the accent version if you want the lace to be the whole look — one lace nail among nine plain ones will feel like a compromise, and a full set of lace is the honest choice. Skip it too if the plain colour is very dark: black lace on a nude accent nail beside nine deep-red nails can look like two different manicures on one hand, and the accent needs a plain colour in the same family as its own base to sit together. In both cases the fix is a matching base — the accent’s base and the plain colour should be the same polish, so the hand reads as one manicure with a detail, not two manicures side by side.
Works best on: shapes and lengths
Lace accents suit every shape and length, because the pattern lives on one nail and the shape of the other nine does not fight it. They suit short nails especially well, because a single lace accent on a short nail looks deliberate and polished, and it needs no length to read clearly. They suit almond nails well, because the accent nail’s curve shows the lace pattern at its best, and they suit square nails too, because the straight edge gives the lace a clean frame. They suit every skin tone, because the plain colour is matched to the hand and the lace sits over a base matched to that same hand.
Maintenance schedule
A regular-polish lace accent manicure lasts three to five days; a gel version lasts two to three weeks. The weak point is the accent nail itself — the lace edge lifts before the plain nails chip, so refresh the top coat on the accent nail at day three, wrapped over the edge, and the rest of the hand follows the normal schedule. Keep cuticle oil on daily, because a lace accent draws the eye to one nail, and neat skin around that nail is what makes the detail look expensive rather than fussy.
Lace French & Lace-Tipped Designs
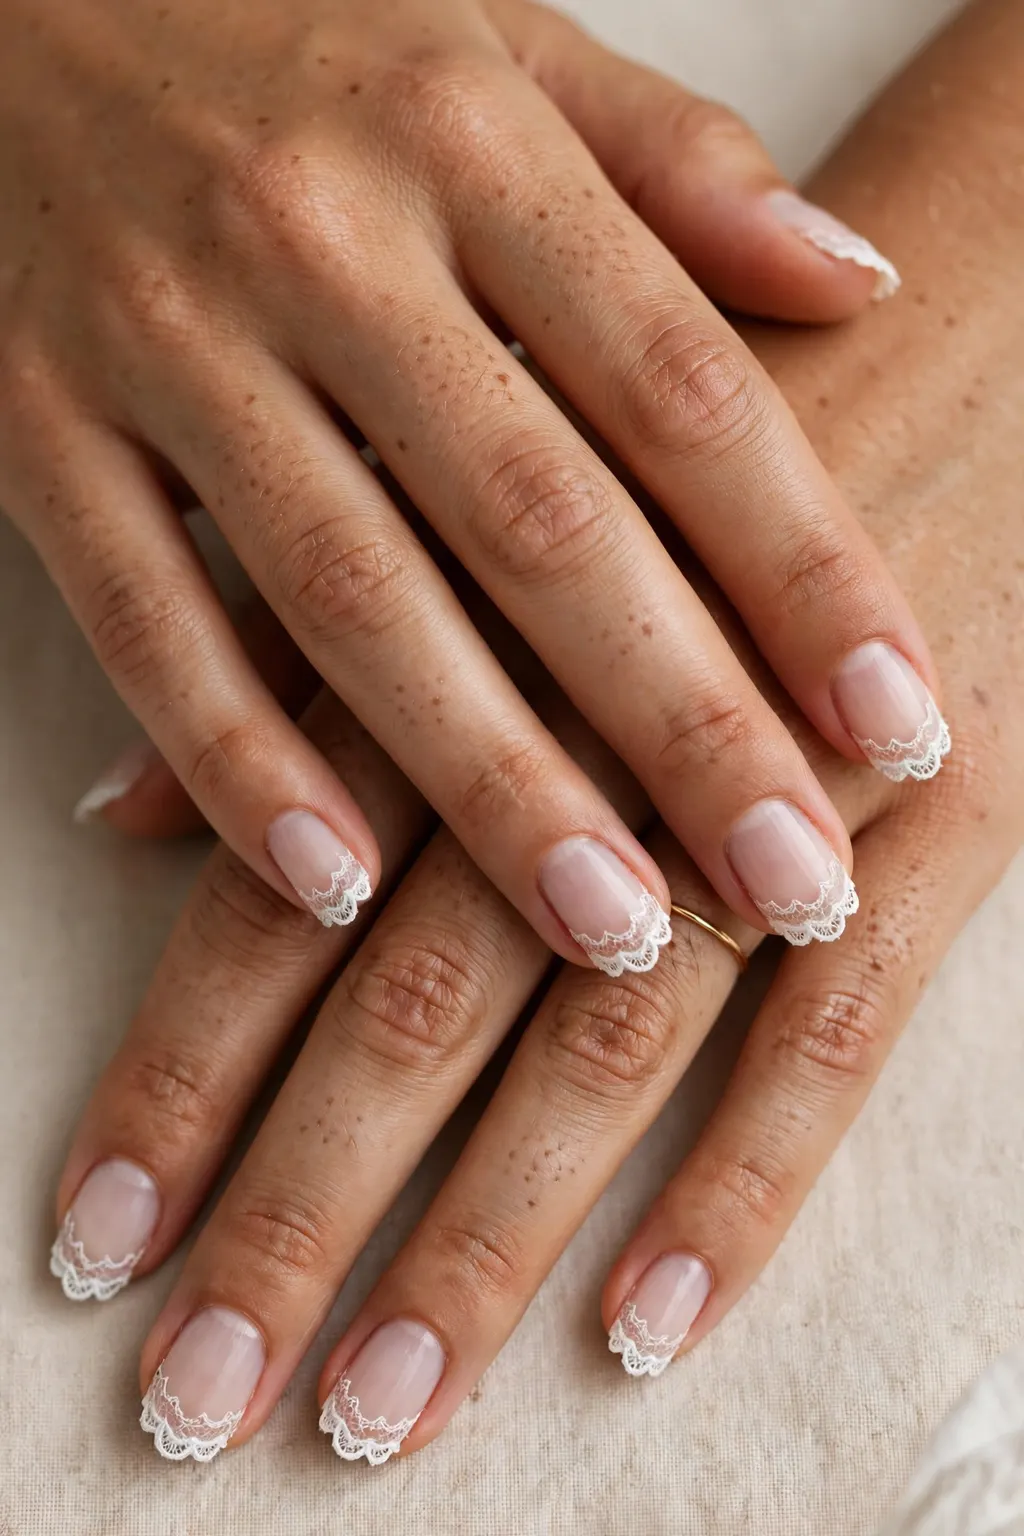
Lace French and lace-tipped designs are the two ways to put lace where a French tip would go: instead of a solid white tip, the tip carries a lace pattern — a scalloped lace edge, a lace band across the tip, or a lace motif that fades into the base. A lace French is a French manicure with the tip in lace: a sheer or milky base, and the tip drawn as lace rather than painted as a block. A lace-tipped design is looser: the lace sits only at the tip, with no French line underneath, so the pattern melts into the base. Both suit occasions best, because the lace tip reads as done on purpose in a way a plain French does not. The lace French is the easier of the two to ask for and the easier to maintain; the lace-tipped version is the softer, more forgiving one, because it has no line to keep straight. If you love square nails, the lace French is the natural partner — our Nail Inspo: Square Nails guide covers the shape the tip sits on, and a lace tip on a square nail is the cleanest version of this look.
Best for: nail shapes, lengths and skin tones
Lace French suits medium to long nails best, because the tip needs room to read as a tip rather than as the whole nail. It suits square and almond nails well, because the edge gives the lace a clean line to follow. Lace-tipped designs suit short to medium nails better, because the lace melts into the base and does not need tip room. Both suit every skin tone, because the base is sheer or milky and the lace tip can be white for fair skin, ivory for medium skin, or black for deep skin — the lace colour is the match, not the base.
The exact wording to show your nail tech
Say: “A lace French — a sheer base, and the tip in white lace, not a solid white tip” — or “lace-tipped, no hard line, the lace fading into the base.” The two phrases that matter are “lace tip” and “no solid tip”: if your tech hears only “French”, you may get a classic white tip with no lace at all; if they hear only “lace”, you may get a full lace nail instead of a tip. Showing a photo helps here, because the difference between a lace French and a lace-tipped nail is a matter of one line, and a photo shows exactly where the lace should stop.
How long it lasts and what it costs
A regular-polish lace French or lace-tipped manicure lasts three to five days; a gel version lasts two to three weeks. The weak point is the tip, where the lace meets the free edge — refresh the top coat at day three, wrapped over the edge, and the lace stays sealed. Cost is a standard manicure or gel set plus a small add-on for the lace tip work, because the tip is hand-drawn or decalled nail by nail; a full lace set costs more than a lace tip, because there is more pattern to apply.
Lace by Method: Stickers, Stamping & Freehand Honestly Compared
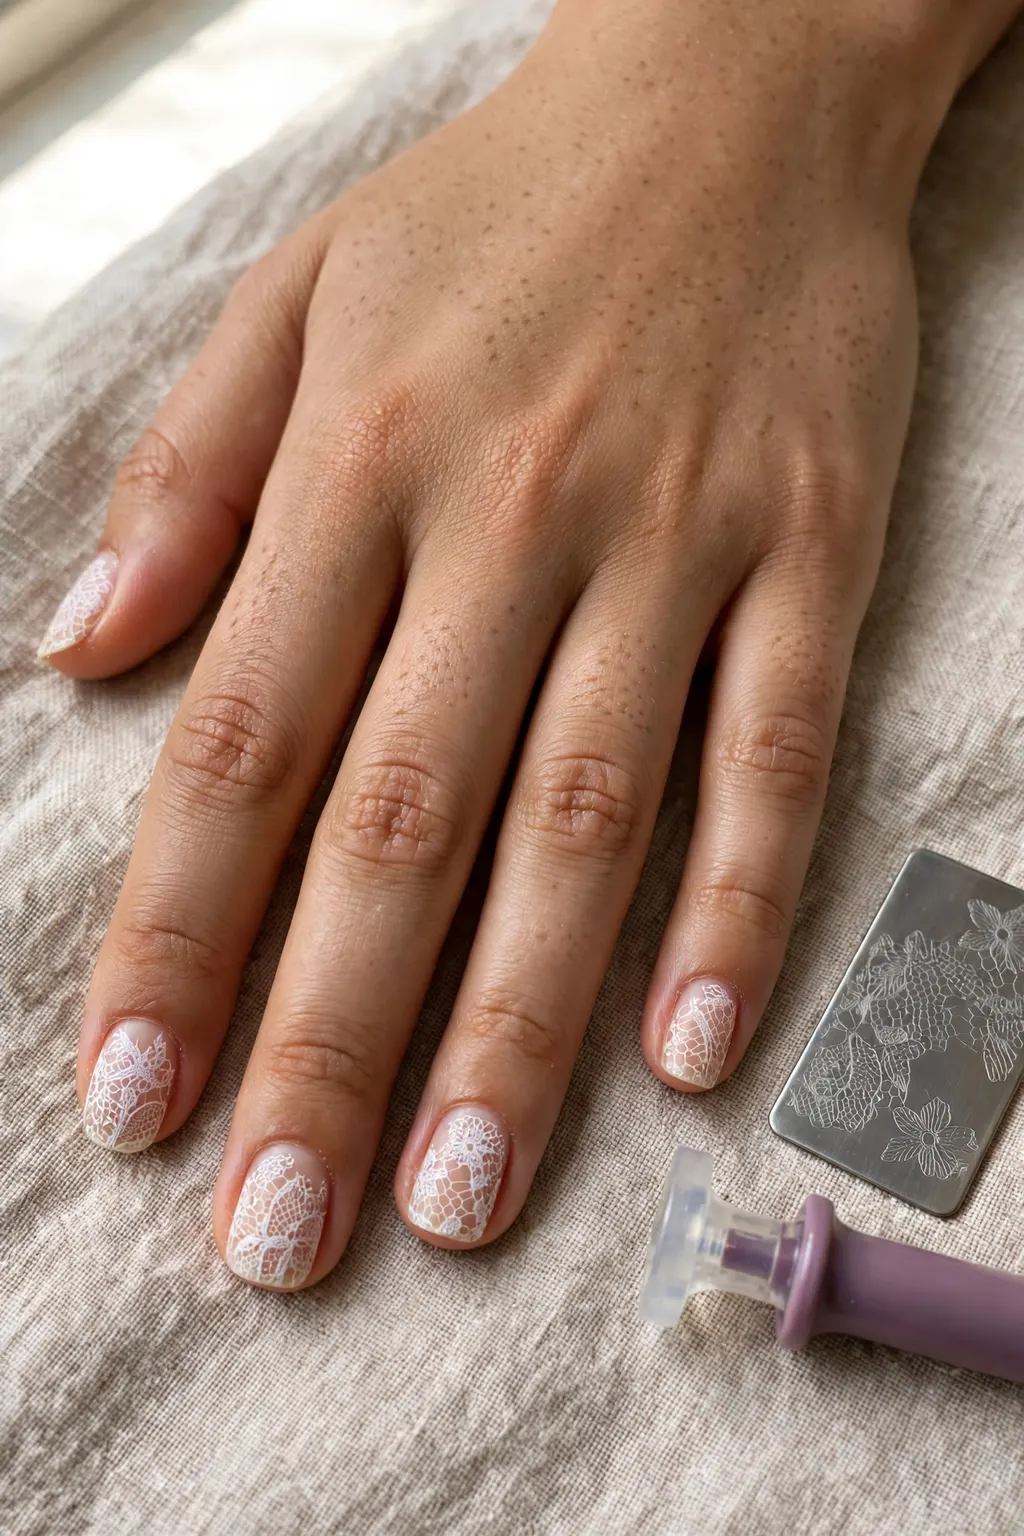
The three lace methods are not equal, and the honest comparison is about time, control and wear. Stickers and decals are the fastest and the sharpest: a real lace photograph, perfectly even, applied in a minute per nail — but the edge can lift, and a decal that is too thick looks like a sticker rather than a pattern. Stamping is the middle ground: a lace plate, a stamper, and a stamping polish, pressed onto the nail in seconds — even, repeatable, and thin enough to seal flat, but limited to the plates you own, and a plate that is too large for the nail wastes half its pattern. Freehand is the slowest and the most flexible: a fine brush draws exactly the lace you want, scaled to the nail, in any colour — but it needs a steady hand, and a wobbly line is visible in a way a decal never is. For a first try, use stickers. For a regular lace wearer, buy a stamping plate. For a special occasion, book a tech who paints freehand.
Step by step
For stickers: paint the base, let it dry fully, cut the decal to the nail, float it onto a thin layer of clear polish, smooth it flat with a silicone tool, trim the excess, and seal twice. For stamping: paint the base, let it dry, spread stamping polish over the lace plate, scrape it clean, pick the pattern up with the stamper, press it onto the nail in one firm roll, and seal. For freehand: paint the base, let it dry, load a fine liner brush, draw the scalloped edge first, then the mesh, in short strokes, let it dry, and seal. In all three methods, the base must be fully dry before the lace goes on — a tacky base is the single most common cause of a ruined lace manicure.
Common mistakes to avoid
The most common mistake with stickers is a decal that is too thick or too large: it lifts at the edges within a day, and it looks like a sticker rather than lace. With stamping, it is pressing too hard or too softly — too hard smudges the pattern, too soft leaves it patchy, and the fix is one firm roll, not a second press. With freehand, it is drawing the whole pattern in one long stroke: long strokes wobble, short strokes stay straight, and a lace pattern is built from short strokes. And across all three methods, the shared mistake is sealing too soon: a wet lace pattern under a top coat smears, so let the lace dry fully before the seal.
Products and tools that help
Lace decals or water-transfer stickers, a lace stamping plate with a stamper and a stamping polish, a fine liner brush for freehand, and a glossy top coat that self-levels. A silicone tool for pressing decals flat, a scraper for the stamping plate, and a clean-up brush with remover for the skin. Keep the lace scale small: a fine mesh reads as lace in all three methods, a chunky pattern reads as a doily in all three.
What to Ask Your Nail Tech: Bring Two References, Not Ten
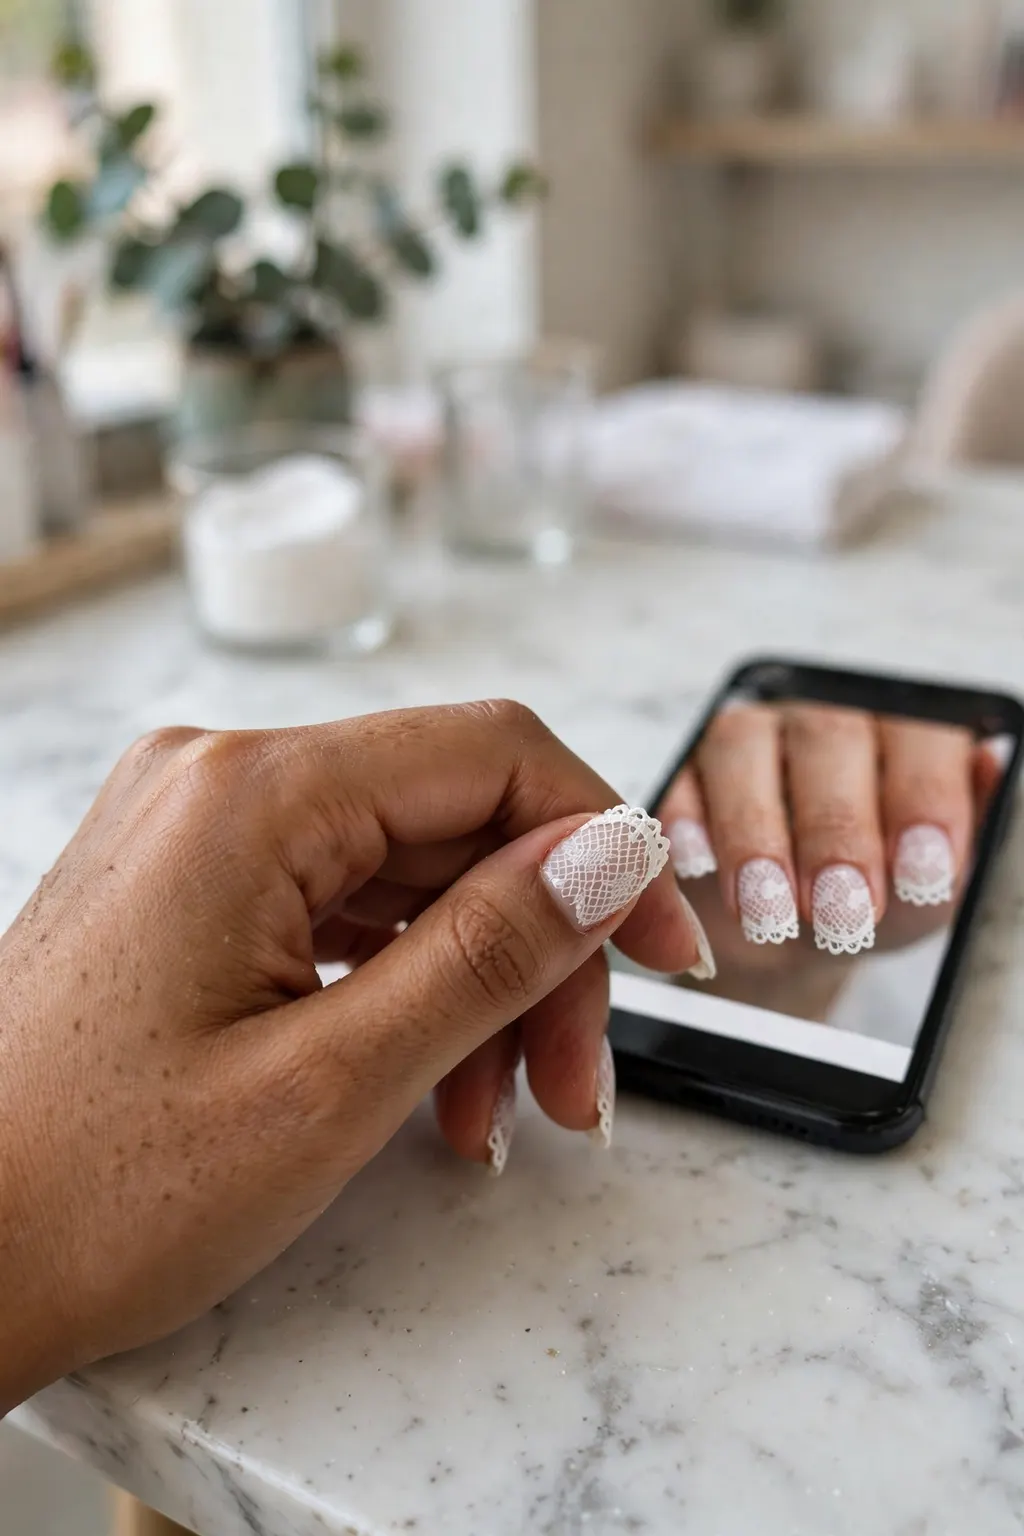
The lace appointment goes wrong in one specific way: the client shows ten reference photos, each a different lace, and the tech has to guess which one the client actually wants. Bring two references, not ten — one for the lace pattern and one for the base colour — and the appointment works. The pattern photo settles the lace: printed or painted, white or black, fine or chunky. The base photo settles the colour: sheer nude, milky, blush or deep red. Say the method out loud too — stickers, stamping or freehand — because the method changes the price and the time, and a tech who hears only “lace” will choose the method they prefer, not the one you want. And say the scale: fine lace on short nails, or a larger pattern on long nails, because a pattern designed for a long nail turns into a blob on a short one.
Your lace nails salon brief: “Lace nails in [white / black / ivory] lace, [printed / stamped / freehand], over a [sheer nude / milky / blush / deep red] base, on [almond / square / round] nails — fine lace, not chunky, sealed glossy.” Fill in the brackets before your appointment, show two photos — one of the lace, one of the base — and ask the tech to hold the lace sample against your hand before starting.
Who should skip this version
Skip the two-reference rule if you genuinely have no preference and want the tech to choose — then say so out loud, and let the tech pick the lace that suits your nails, because a tech choosing freely does better work than a tech guessing from ten photos. Skip the salon altogether if you want stickers: a lace decal is a home manicure, and paying salon prices for a sticker application is paying for a minute of work. In both cases, the brief still helps — even a free choice works better when the tech knows your base colour and your shape.
Works best on: shapes and lengths
The two-reference brief suits every shape and length, because it is a communication choice, not a design choice. It suits short nails best, because the scale question matters most on a short nail — a pattern that fits a long nail does not fit a short one, and the brief is where that gets settled. It suits a first lace appointment especially well, because the tech learns your taste from two photos rather than guessing from ten. And it suits every skin tone, because the base photo in the brief is the skin-tone match, and the tech can see it before any polish goes on.
Maintenance schedule
A salon lace manicure lasts as long as any other lace manicure: three to five days in regular polish, two to three weeks in gel. The brief does not change the schedule, but it changes how the wear reads — a lace pattern you chose deliberately shows a chip less, because the pattern is fine and the base is matched, while a lace pattern you did not choose draws the eye to the nail. Keep the top coat in your drawer at home, and refresh it at day three, wrapped over the free edge, because the refresh only happens if the bottle is there when you think of it.
Lace for Valentine’s & Weddings: Styling the Look
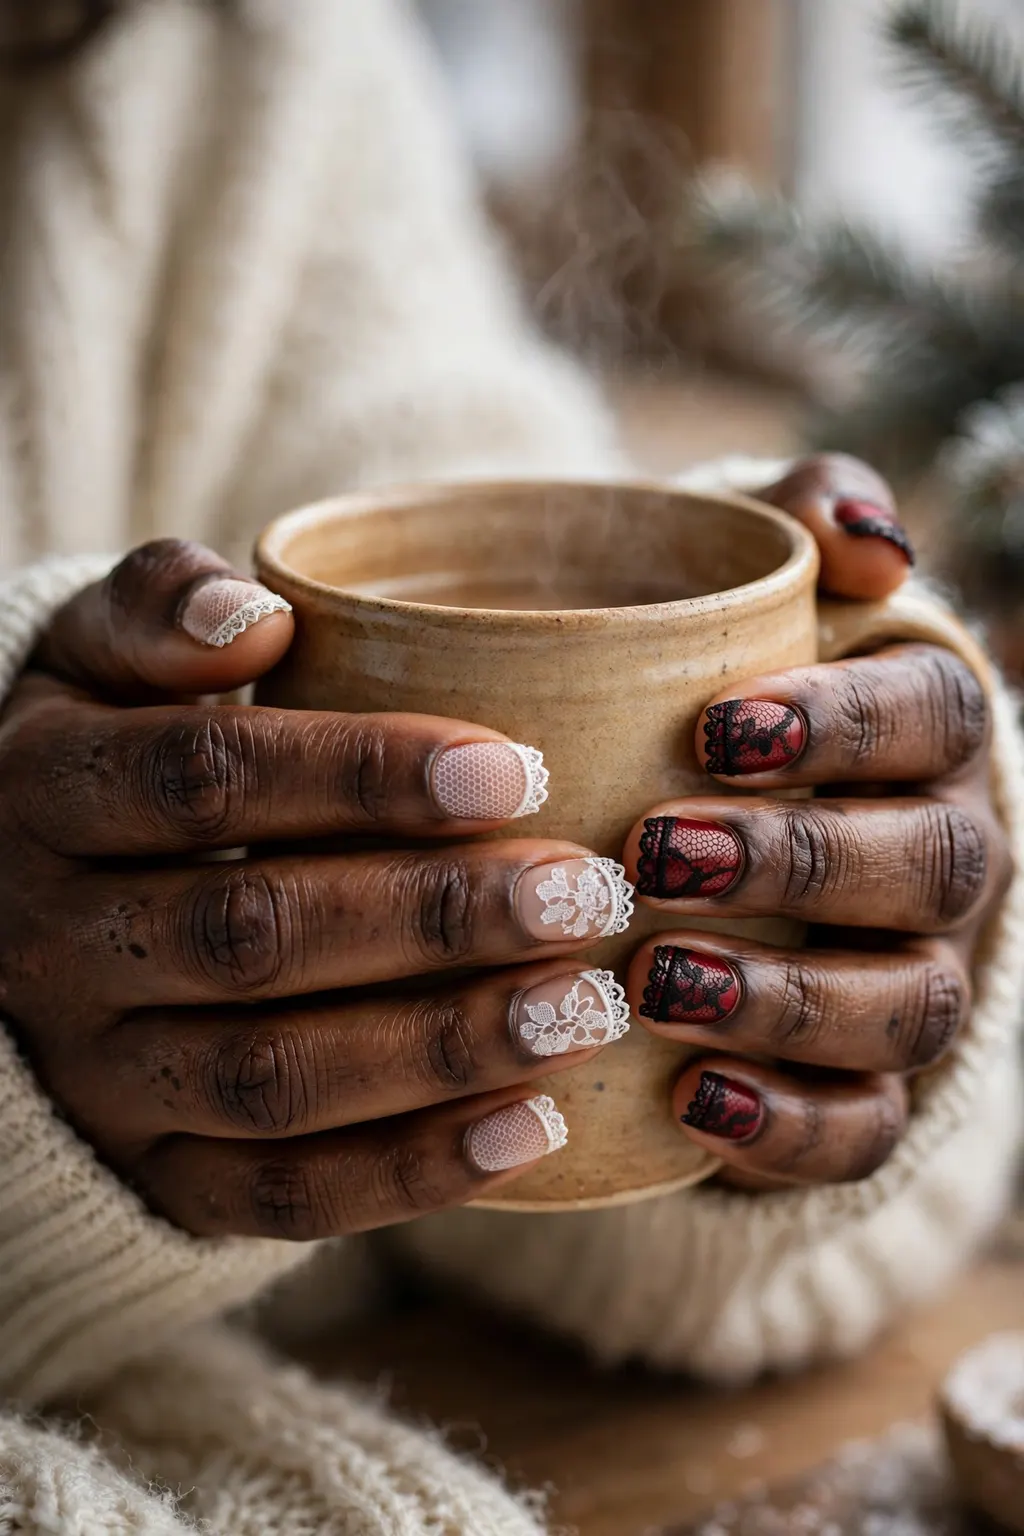
Lace for Valentine’s and weddings is the same trend styled two ways. For a wedding, lace is white or ivory over a sheer nude or milky base, on almond or oval nails, with the lace fine and the base barely there — the nail version of the dress, and the version that photographs best next to a bouquet. For Valentine’s, lace is black over a nude base, or white over a deep red base, on short square or almond nails — romantic without being bridal, and the version that suits an evening out. The styling rule is the same in both: match the lace to the outfit, not to the season. White lace with a white dress, black lace with a dark dress, and a plain colour on the rest of the hand so the lace has somewhere to rest. And keep the jewellery simple — one gold ring, not a stack — because lace is already a pattern, and a busy hand fights it.
Best for: nail shapes, lengths and skin tones
Wedding lace suits almond and oval nails best, because the soft curve suits the soft pattern, and it suits short to medium lengths, because a fine lace pattern needs very little room. Valentine’s lace suits short square and almond nails, because the dark lace needs a clean frame. Both suit every skin tone, because the base is matched to the hand: fair skin takes a pink-nude base with white lace, medium skin takes a beige-nude with ivory lace, deep skin takes a warm caramel-nude with white lace or a nude base with black lace — and the lace colour is the match, not the base.
The exact wording to show your nail tech
Say: “Wedding lace — white lace, fine, over a sheer nude base, on almond nails” — or “Valentine’s lace — black lace over a nude base, on short square nails.” The three phrases that matter are the occasion, the lace colour and the base: a tech who hears only “lace” will not know whether the look is bridal or vamp-romantic, and those are two different manicures. Showing a photo of the dress helps here, because the lace should match the outfit, and a photo of the dress settles the colour in one look.
How long it lasts and what it costs
A wedding or Valentine’s lace manicure lasts three to five days in regular polish, two to three weeks in gel — and for a wedding, book the manicure two days before, not the day before, so a chip has time to be fixed. Cost is a standard manicure or gel set plus a small add-on for the lace work; a full set of lace costs more than a lace accent, and a 3D lace costs more than a printed one, because there is more work in it. For a wedding, the add-on is worth it: the nails are in every photograph, and a fine lace pattern is the detail that shows up in the close-ups.
Frequently Asked Questions
How are lace nails done — painted or stickers?
Both, and stamping too. Stickers and water decals are the fastest and sharpest — a real lace photograph applied in a minute per nail. Stamping presses a lace plate’s pattern onto the nail in seconds and seals flat. Freehand painting draws the lace with a fine brush, scaled exactly to the nail, and is the most flexible but the slowest. For a first try, use stickers; for regular wear, buy a stamping plate; for a special occasion, book a tech who paints freehand.
Are lace nails suitable for a wedding?
Yes — sheer lace over a nude base is one of the most bridal manicures there is. The nude base is barely there, the white or ivory lace reads like the dress, and it photographs beautifully next to a bouquet. Keep the lace fine, the base sheer, and the shape almond or oval. Book the manicure two days before the wedding, not the day before, so a chip has time to be fixed, and seal it glossy so the lace stays put through the day.
Do lace nails work on short nails?
Yes — lace works better on short nails than most nail art does, because a fine lace pattern needs very little room. Keep the pattern fine, use it on one accent nail or as a lace tip, and match the base to your skin tone. A chunky pattern on a short nail turns into a blob, so scale the lace down or choose a decal designed for short nails. Short square nails with a lace French tip are one of the cleanest versions of the look.
Conclusion & Bottom Line
Lace nails are a delicate trend with a simple rule: fine pattern, neutral base, glossy seal. Printed lace is the sharpest, painted lace is the softest, 3D lace is the most dramatic — and the version to choose depends on the occasion, not on the trend. Start with one sheer lace accent nail over a nude base, bring two references to the salon instead of ten, match the lace to your outfit for a wedding or Valentine’s, and refresh the top coat at day three. Done that way, lace reads as fabric on the nail — delicate up close, invisible from a distance, and exactly the kind of detail that shows up in photographs.
Bottom line: pick a fine lace pattern, a neutral base matched to your skin, and a method you can actually wear — stickers for a first try, stamping for regular wear, freehand for the occasion — and seal it glossy, and lace nails stay delicate for two to three weeks.