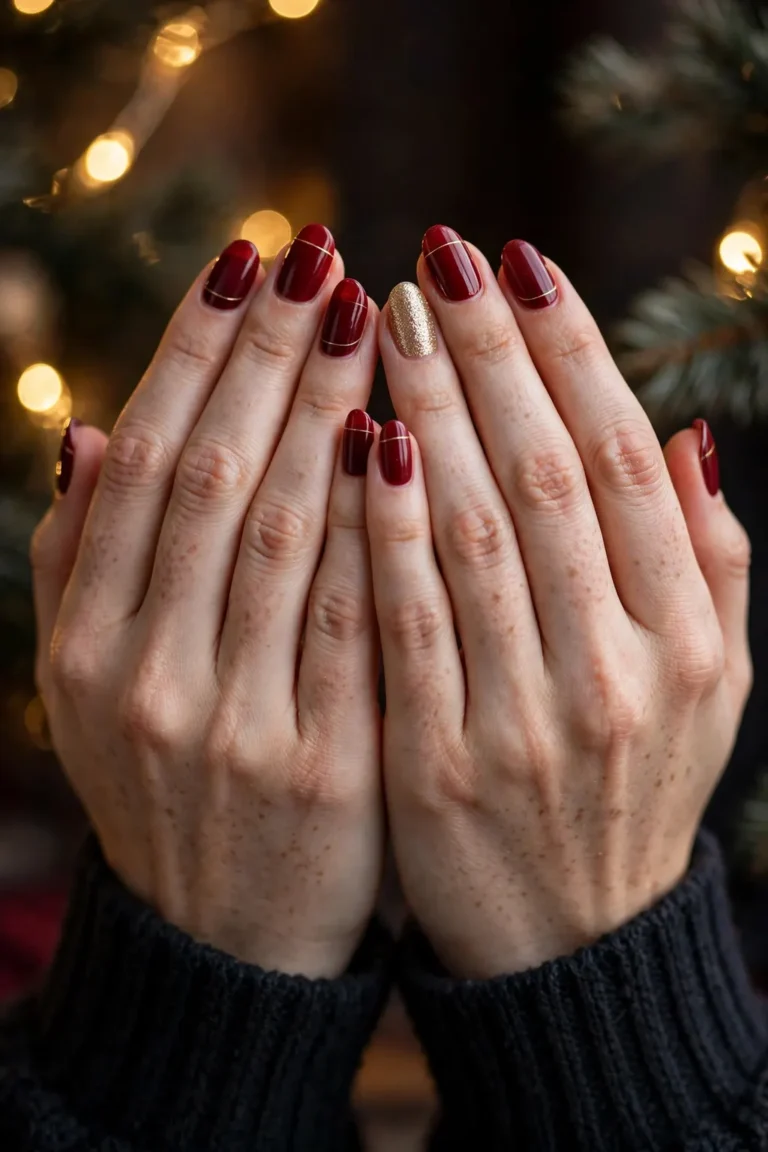
Simple Christmas Nails: Minimal Designs You Can Do at Home
Christmas nails do not have to be a full afternoon at the salon, a steady hand, or a drawer full of nail art tools. The simplest Christmas manicures — one accent nail, a milky base with a single gold dot, a hairline of red on the tip — are the ones that photograph best, survive the whole party week, and still look festive on a short nail with no length to spare. Searches for “simple christmas nails” sit inside the huge Christmas wave: “christmas nails” runs at 11,000,000 searches a month on Pinterest (Pinsearch, Nov 2026), and the live November search lists include simple and short Christmas variants, which is why this guide is built for beginners first. This guide covers the less-is-more rules, the 10-minute accent nail, the easiest elegant look, toothpick trees and snow dots, the quiet red-or-green micro French, the zero-skill sticker shortcut, simple designs by length and shape, the minimal kit to buy, and how to make a home manicure last through the holidays. For more beauty inspiration, start at AboutSuperstars.
Quick answer: Simple Christmas nails need one idea per manicure — a milky base with one gold dot, one red accent nail, or a micro French tip — on clean, short-to-medium nails. Use a base coat, two thin colour coats, and a top coat wrapped over the edge, and the look lasts a week or more at home.
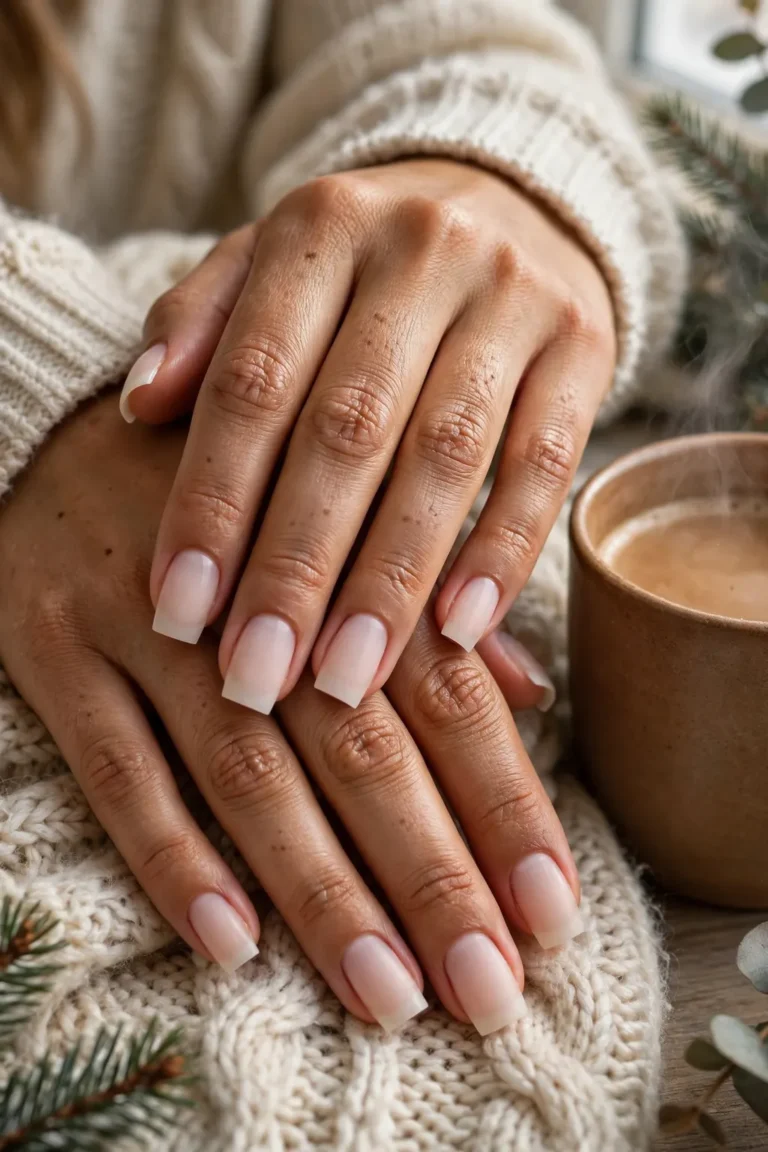
Minimal Christmas: The Less-Is-More Rules
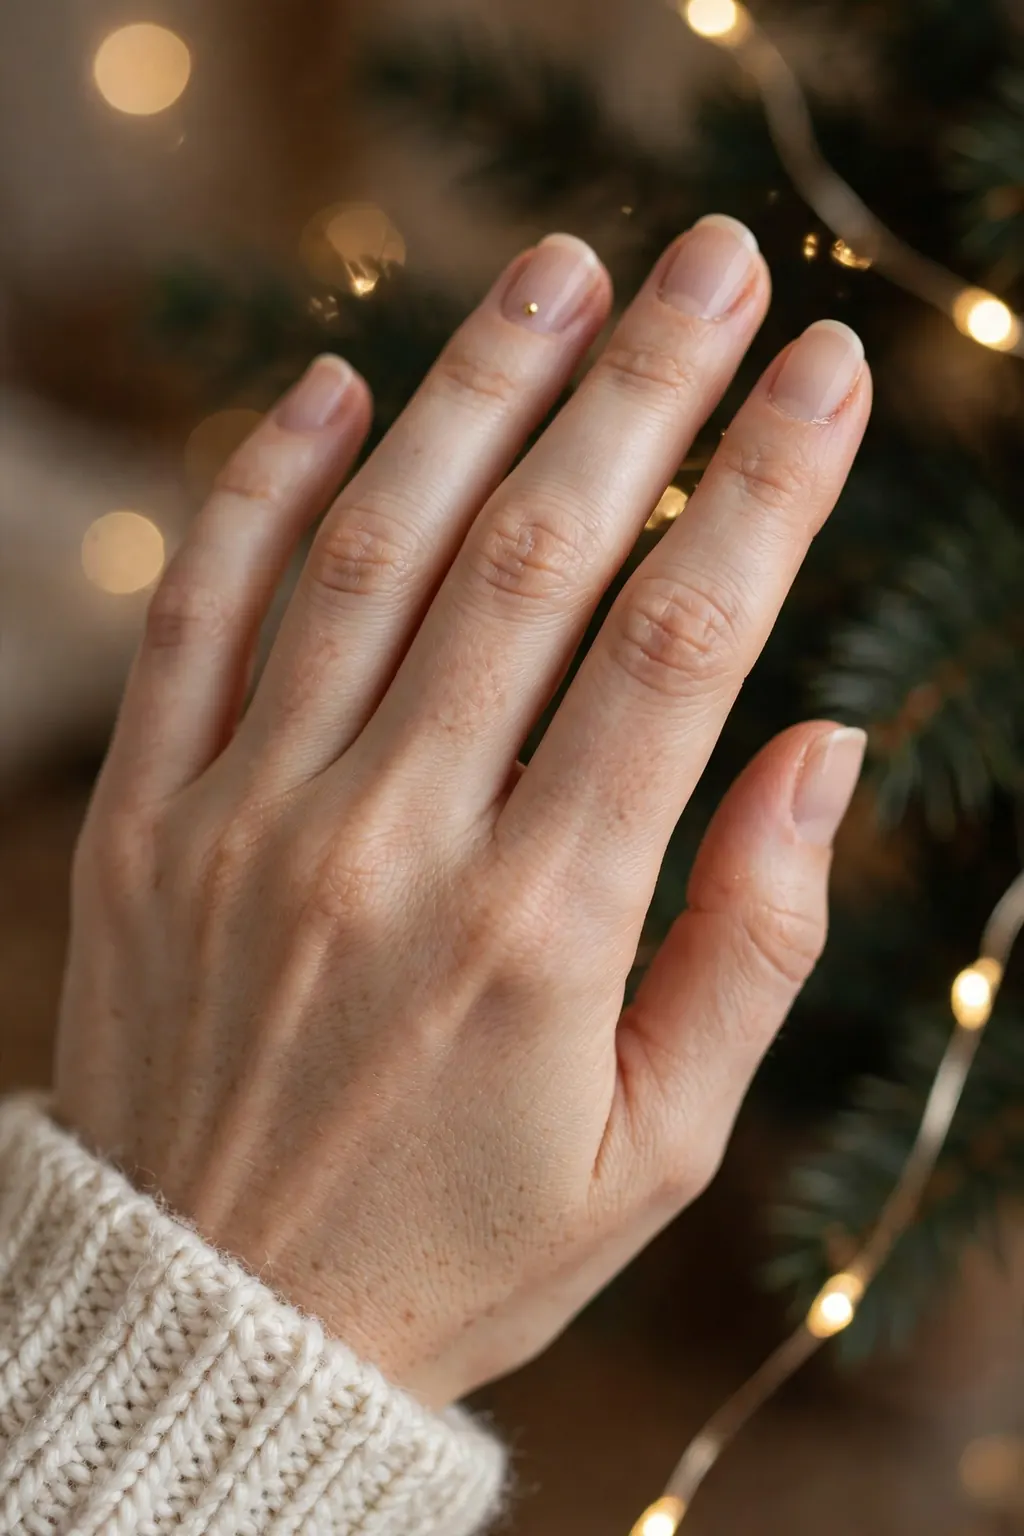
Minimal Christmas nails work because the restraint is the design. A plain milky base with one gold dot reads as deliberate in a way a nail covered in glitter, trees, snowflakes and a bow never does — the eye has somewhere to rest, the colour looks richer, and the manicure looks expensive instead of busy. The less-is-more rules are simple: one festive idea per manicure, not three; one accent nail, not five; one colour family, not the whole Christmas palette. If you already love the fuller Christmas looks, our Christmas Nails 2026 flagship guide covers the red velvet, icy chrome and party-week designs — this guide is the quiet version of the same season, for the woman who wants her nails to whisper Christmas rather than shout it. Minimal also forgives the beginner: a single dot is easier to place than a snowflake, a straight micro French is easier to draw than a reindeer, and a plain base with one gold detail hides a wobble that a full pattern would show. The other advantage is time: a minimal Christmas manicure takes ten to fifteen minutes, which means it gets done at all — and a finished simple manicure beats an ambitious design that never leaves the drawer.
Who should skip this version
Skip the minimal route if you genuinely love maximalist nail art — if your idea of Christmas is a different design on every nail, a minimal manicure will feel unfinished to you, and you will be happier with the full designs in the Christmas flagship guide. Skip it too if you are going to a themed party where the nails are part of the costume: a quiet gold dot will not read as a costume piece. In both cases the fix is not a different minimal design, it is a different article — go maximalist on purpose, not minimal by accident.
Works best on: shapes and lengths
Minimal Christmas designs suit every shape and length, because they are built from one small detail rather than a pattern that needs room. They suit short nails best of all: a short nail has no space for a scene, but it has exactly enough space for a dot, a tip, or one accent, and the design looks neat rather than crowded. They suit almond, square and round equally — the detail sits near the tip or the cuticle, where the shape does not fight it. They suit every skin tone, because the bases are milky, nude or sheer, and the festive detail is gold, red or green, which sits on any hand.
Maintenance schedule
A minimal home manicure with regular polish lasts three to five days; with a gel top coat over regular polish, or a full gel set, it lasts one to two weeks. The weak point is the tip, where a single dot or a micro French meets the free edge — refresh the top coat at day three, wrapped over the edge, and the detail stays sealed. Keep cuticle oil on daily, because a minimal manicure shows dry cuticles more than a busy one does: there is nothing else to look at.
One Accent Nail: The 10-Minute Festive Manicure
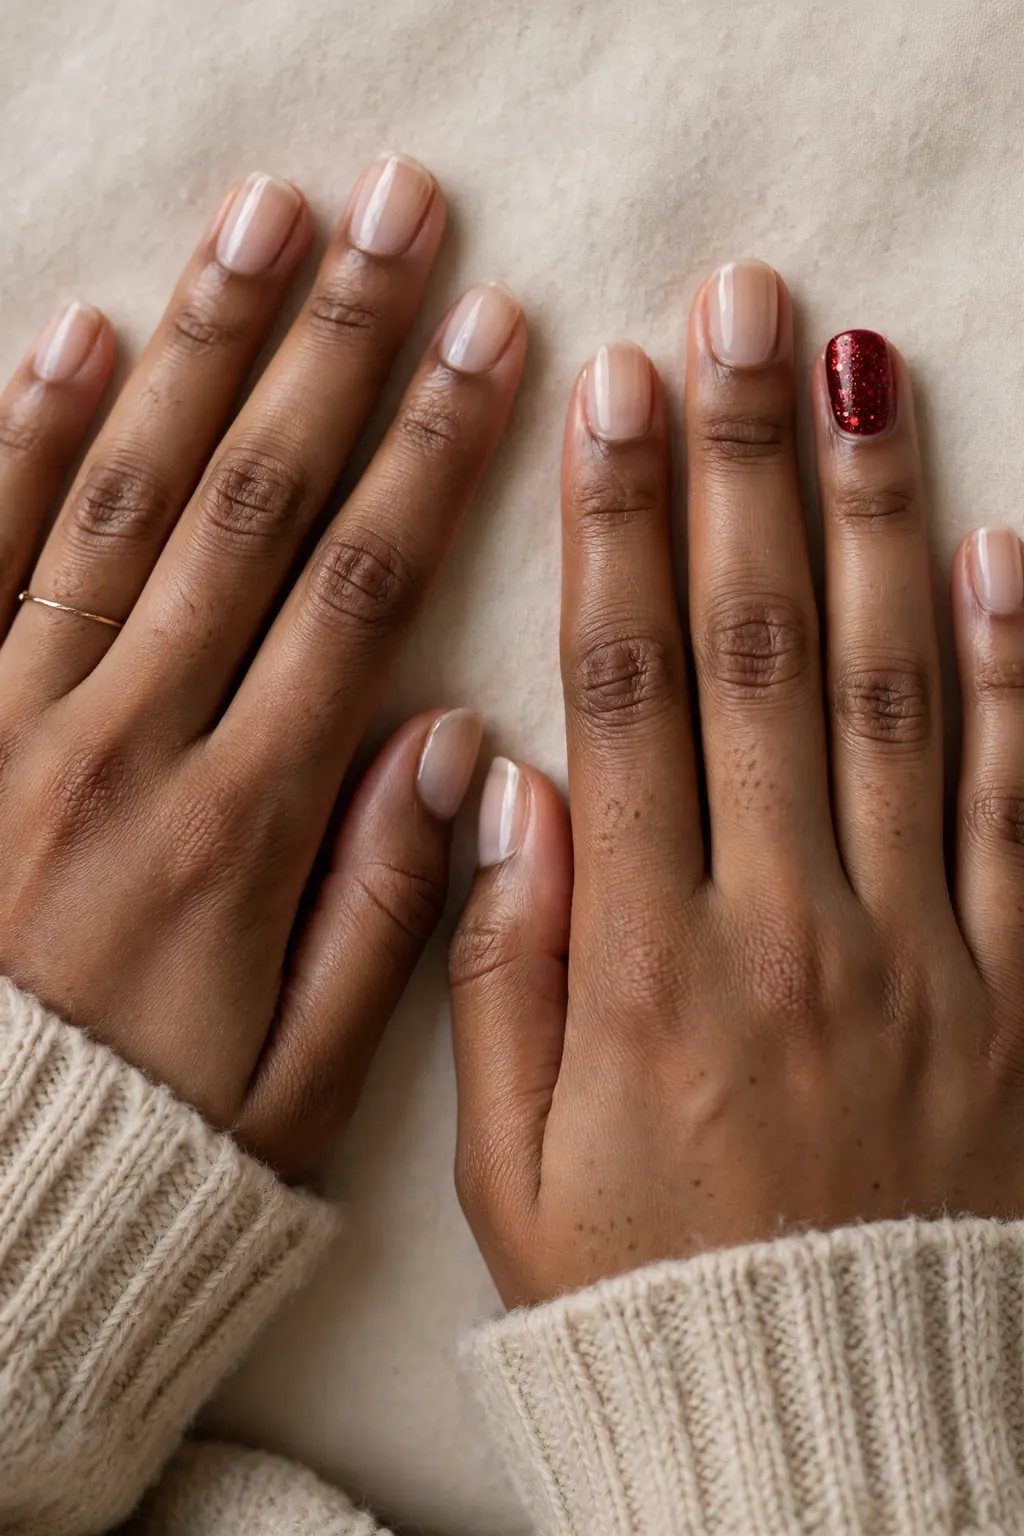
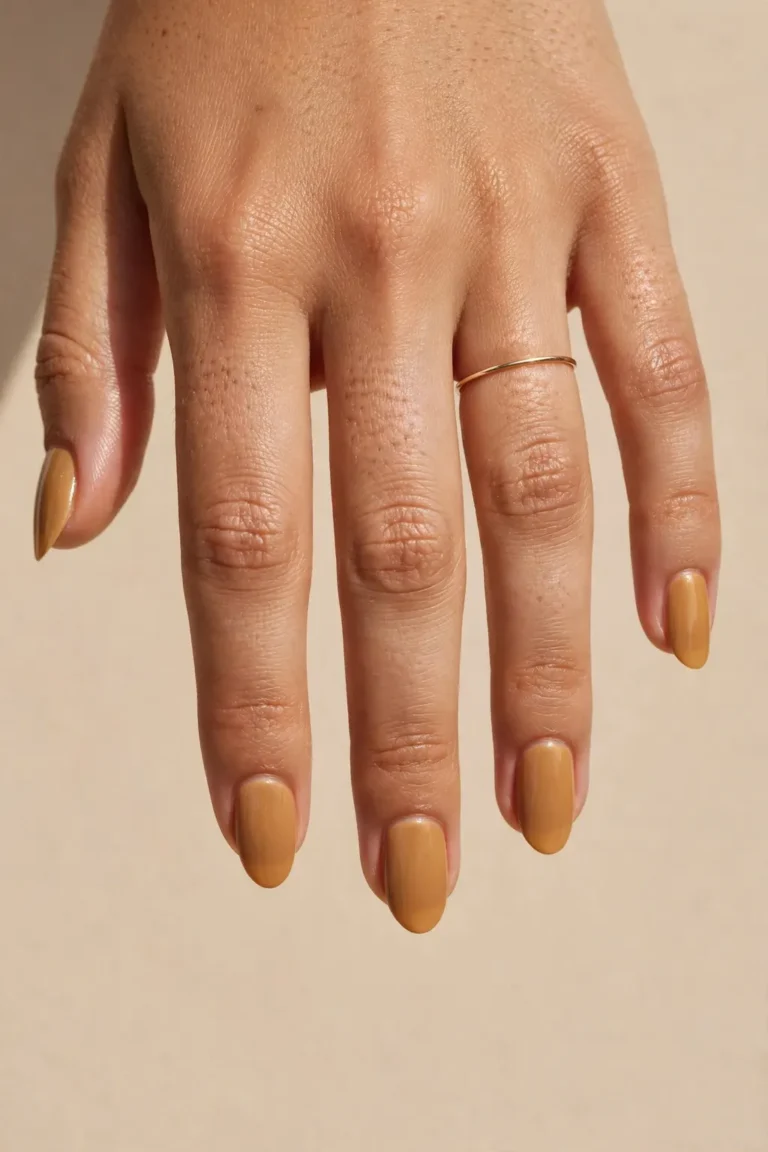
One accent nail is the fastest festive manicure there is, and it is the one to choose when you have ten minutes before the party and no nail art skills at all. The method is exactly what it sounds like: paint nine nails in a plain base — milky, sheer nude, or a soft red — and paint one nail differently, usually the ring finger. The accent can be a glitter polish, a deep red against a milky base, a gold chrome, or a single sticker. The contrast does all the work: the plain nails make the accent look deliberate, and the accent makes the plain nails look like a choice rather than a bare manicure. It is also the most forgiving design for a beginner, because only one nail carries any risk — if the accent smudges, you redo one nail, not ten. And it is the easiest design to wear to work: nine plain nails read as a professional manicure, and one festive nail reads as a quiet nod to the season rather than a statement.
Best for: nail shapes, lengths and skin tones
The accent nail suits short nails especially well, because the contrast is visible even on a very short nail — a glitter accent on a short nail reads just as clearly as one on a long nail. It suits every shape, because the accent is a colour change, not a shape change. It suits every skin tone with a milky or nude base, and it suits fair skin especially well with a red accent, which warms the hand, and deep skin especially well with a gold accent, which glows against it.
The exact wording to show your nail tech
Say: “Nine nails in a milky base, one accent nail on the ring finger in glitter red” — or whichever accent you have chosen — and add “keep the other nine plain, no art on them.” The two phrases that matter are “one accent nail” and “the rest plain”: if your tech hears only “festive”, you may get art on every nail; if they hear only “accent”, you may get a subtle accent that nobody can see. Showing a photo helps here, because the contrast between the base and the accent is the whole design, and a photo shows exactly how strong that contrast should be.
How long it lasts and what it costs
A regular-polish accent manicure lasts three to five days; a gel version lasts two to three weeks, the same as any gel manicure. The accent nail is the weak point only if the accent is glitter: glitter polish chips at the tip first, so ask for a top coat wrapped over the edge, or refresh the top coat yourself at day three. Cost is a standard manicure or gel set; a single accent nail is not an add-on, because it is just a different polish on one nail — if a salon charges extra for one accent, ask what it includes, because it should be part of the manicure.
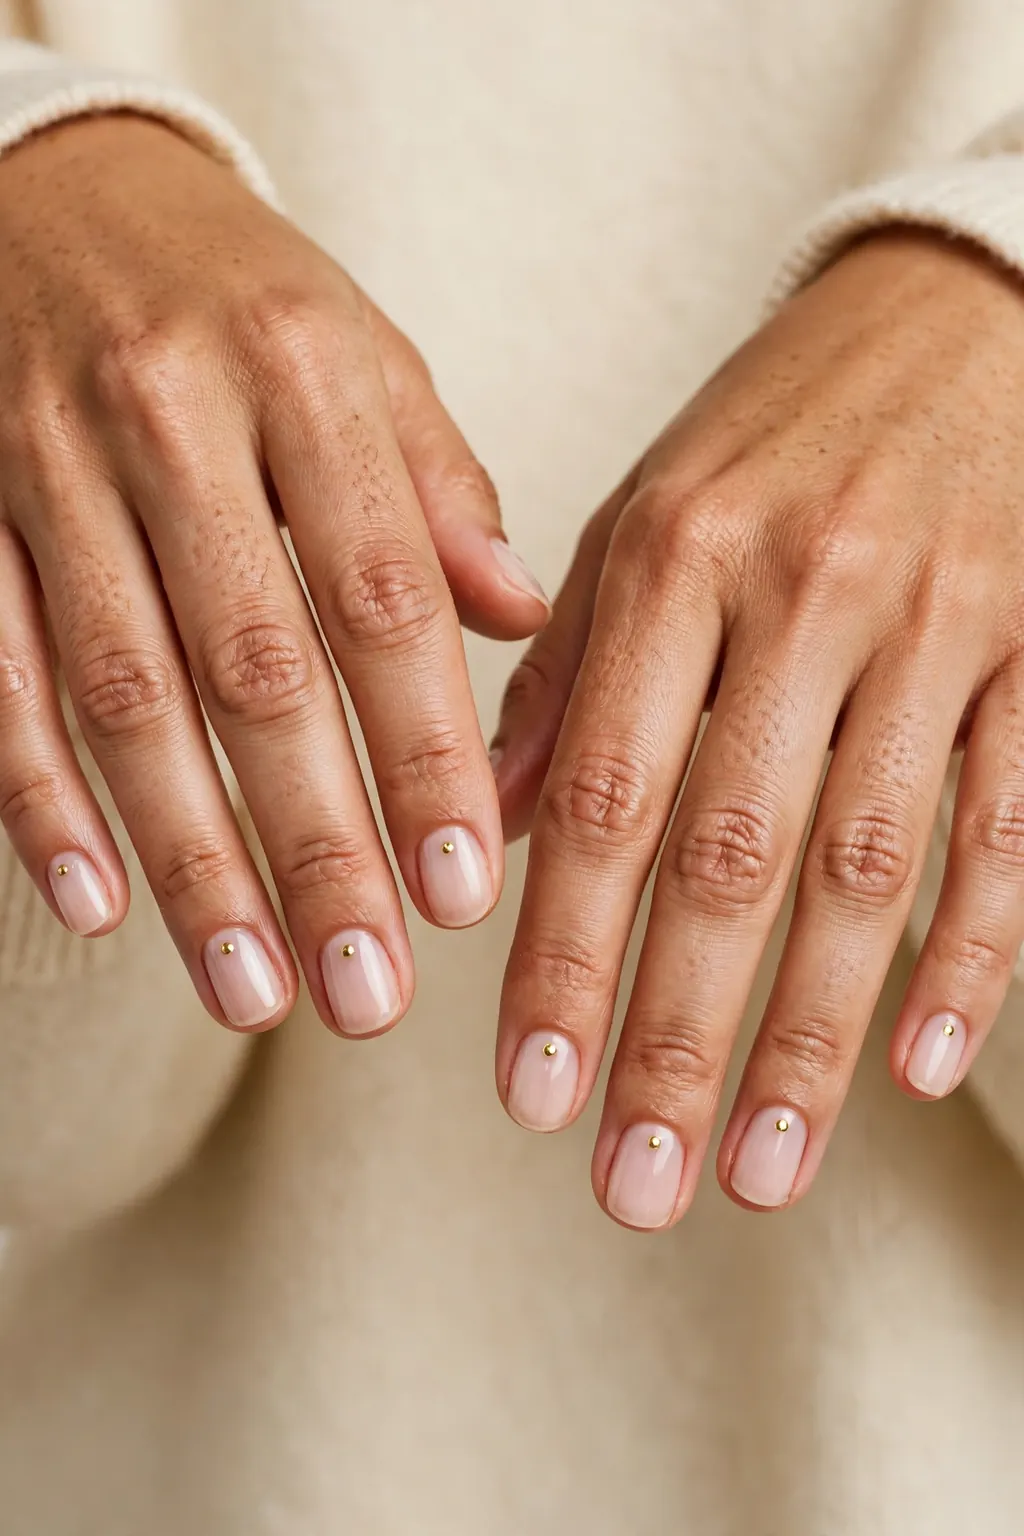
Milky Base + Gold Dot: The Easiest Elegant Look
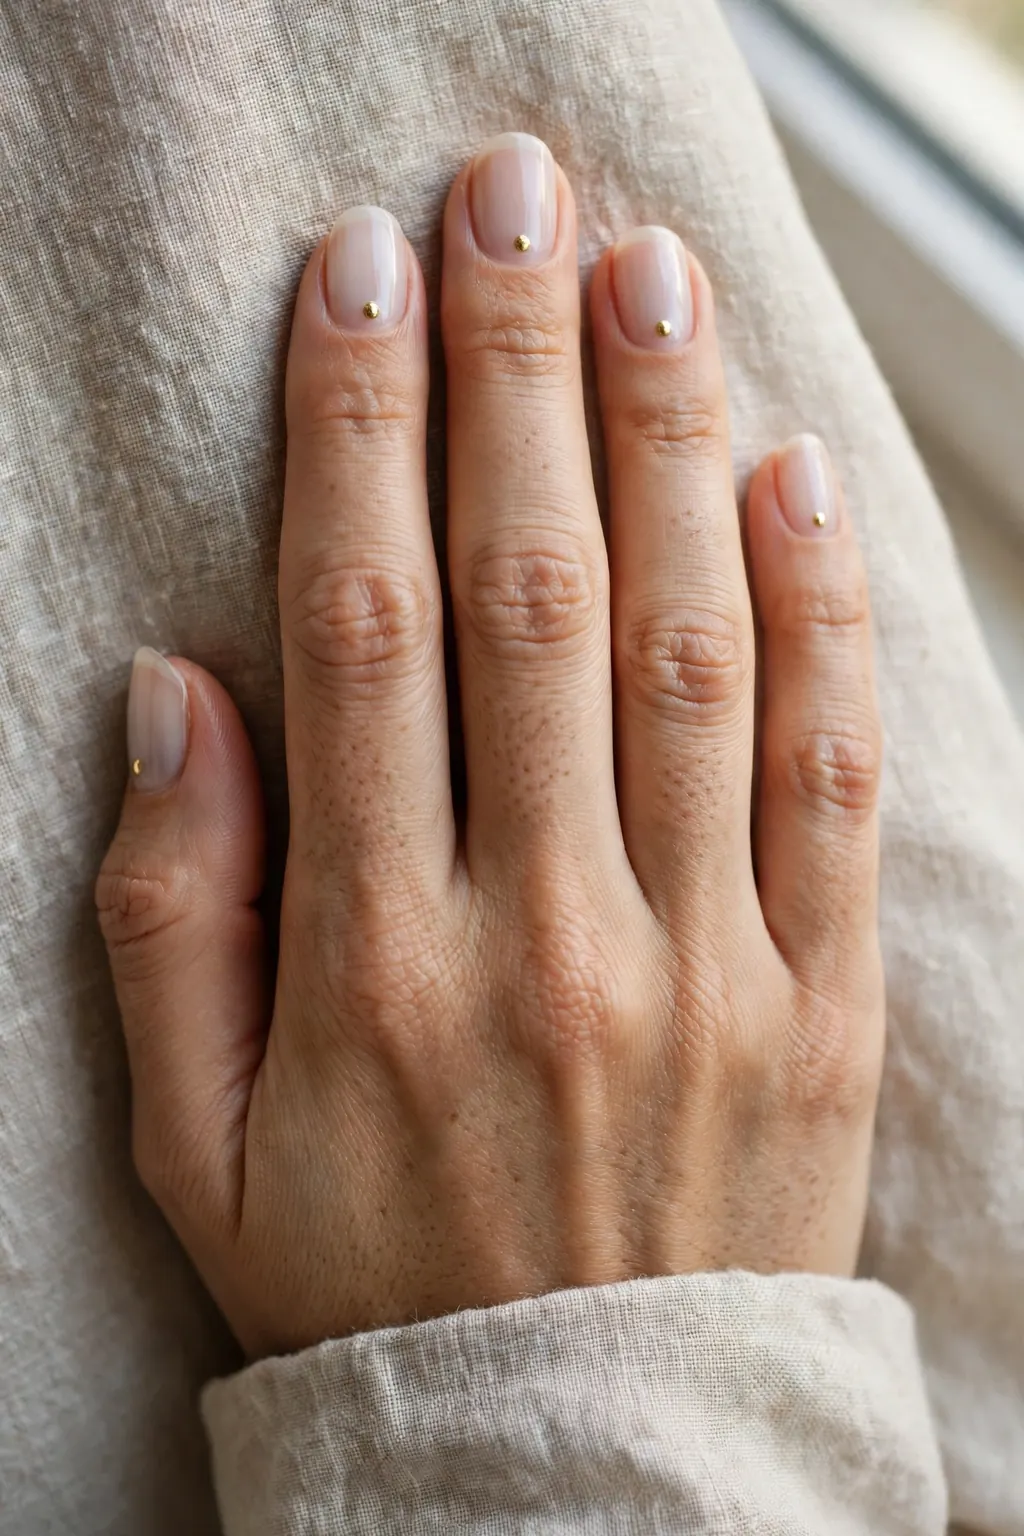
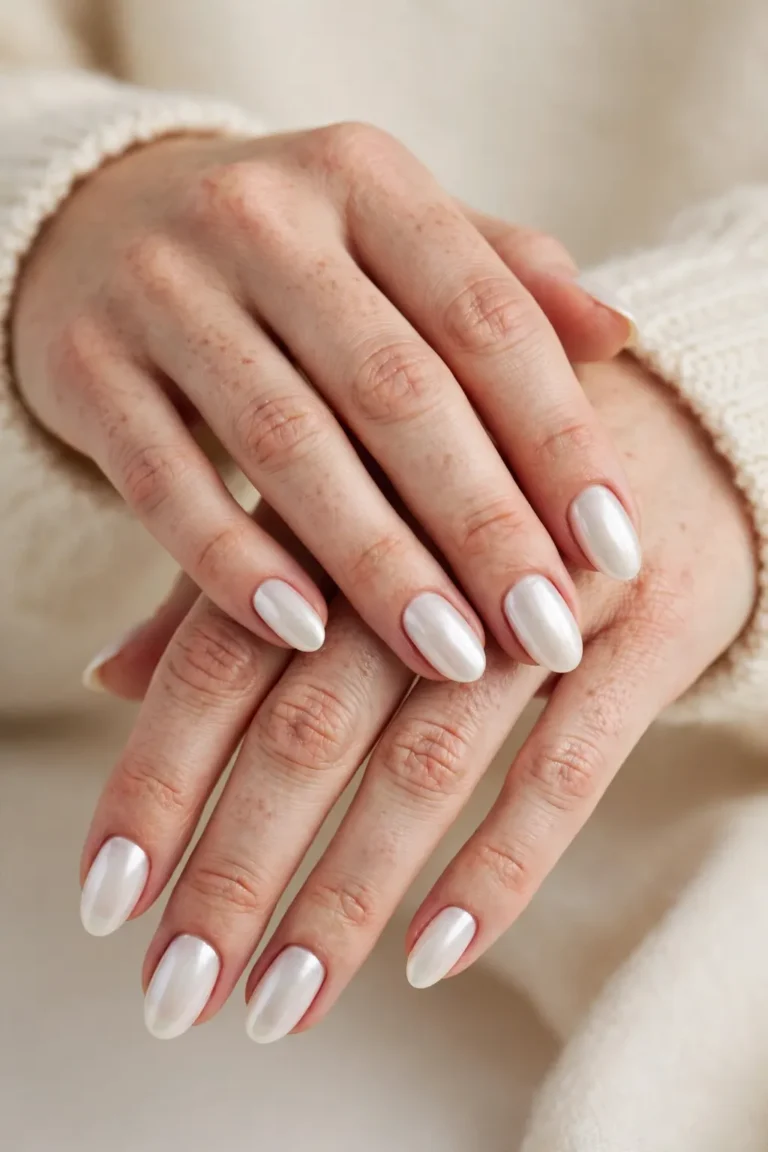
A milky base with a single gold dot is the easiest elegant Christmas look that exists, and it is the one this guide recommends first to anyone who has never done nail art. The base is a sheer milky white or milky pink — one or two thin coats, so the natural nail shows through softly. Then one gold dot, placed at the centre of the nail just above the cuticle, or at the tip, on every nail or on one accent nail. That is the whole design. It looks elegant because the milky base reads as clean, healthy nails, and the gold dot reads as jewellery: a single point of shine against a soft background. It suits work, weddings, family dinners and parties, because it is festive without being themed — nobody will read a gold dot as a costume, but everyone will read it as done on purpose. And it is genuinely easy at home: a dotting tool, a bobby pin, or the tip of a toothpick all make a clean dot, and a dot has no edges to wobble, no lines to keep straight, and no symmetry to match.
Step by step
Prep the nails — file, push back the cuticles, wipe with remover so the base grips — then a base coat, cured or dried. Then the milky base: one thin coat, let it dry, then a second thin coat if you want more coverage, but stop while the nail still shows through — a milky base that turns opaque white has lost the look. Then the dot: dip a dotting tool or a toothpick in gold polish, touch it once to the centre of the nail, and lift straight up without dragging. One dot per nail, same place on each, same size. Then a glossy top coat, wrapped over the free edge, so the dot is sealed and the milky base stays shiny.
Common mistakes to avoid
The most common mistake is a milky base that is too thick, which turns chalky white instead of sheer — two thin coats, not one thick one, and stop while you can still see the nail underneath. The second is a dot that is too big, which reads as a blob rather than a jewel: a small dot, about the size of a pinhead, is enough, and you can always add a second tiny dot rather than making the first one bigger. And the third is placing the dot in a different place on each nail — pick one spot, the centre above the cuticle, and use it on every nail, or the manicure looks accidental.
Products and tools that help
A sheer milky base polish, a gold polish (a metallic gold, not a glitter gold, because the dot needs to be a clean point of shine), a dotting tool or a toothpick for placing the dot, and a glossy top coat. A ridge-filling base coat helps here, because a smooth nail surface is what makes a sheer milky base look even. Keep the gold polish bottle clean around the neck, or the dot tool picks up dried polish and the dot comes out lumpy.
Tiny Trees, Stars & Snow Dots With a Toothpick
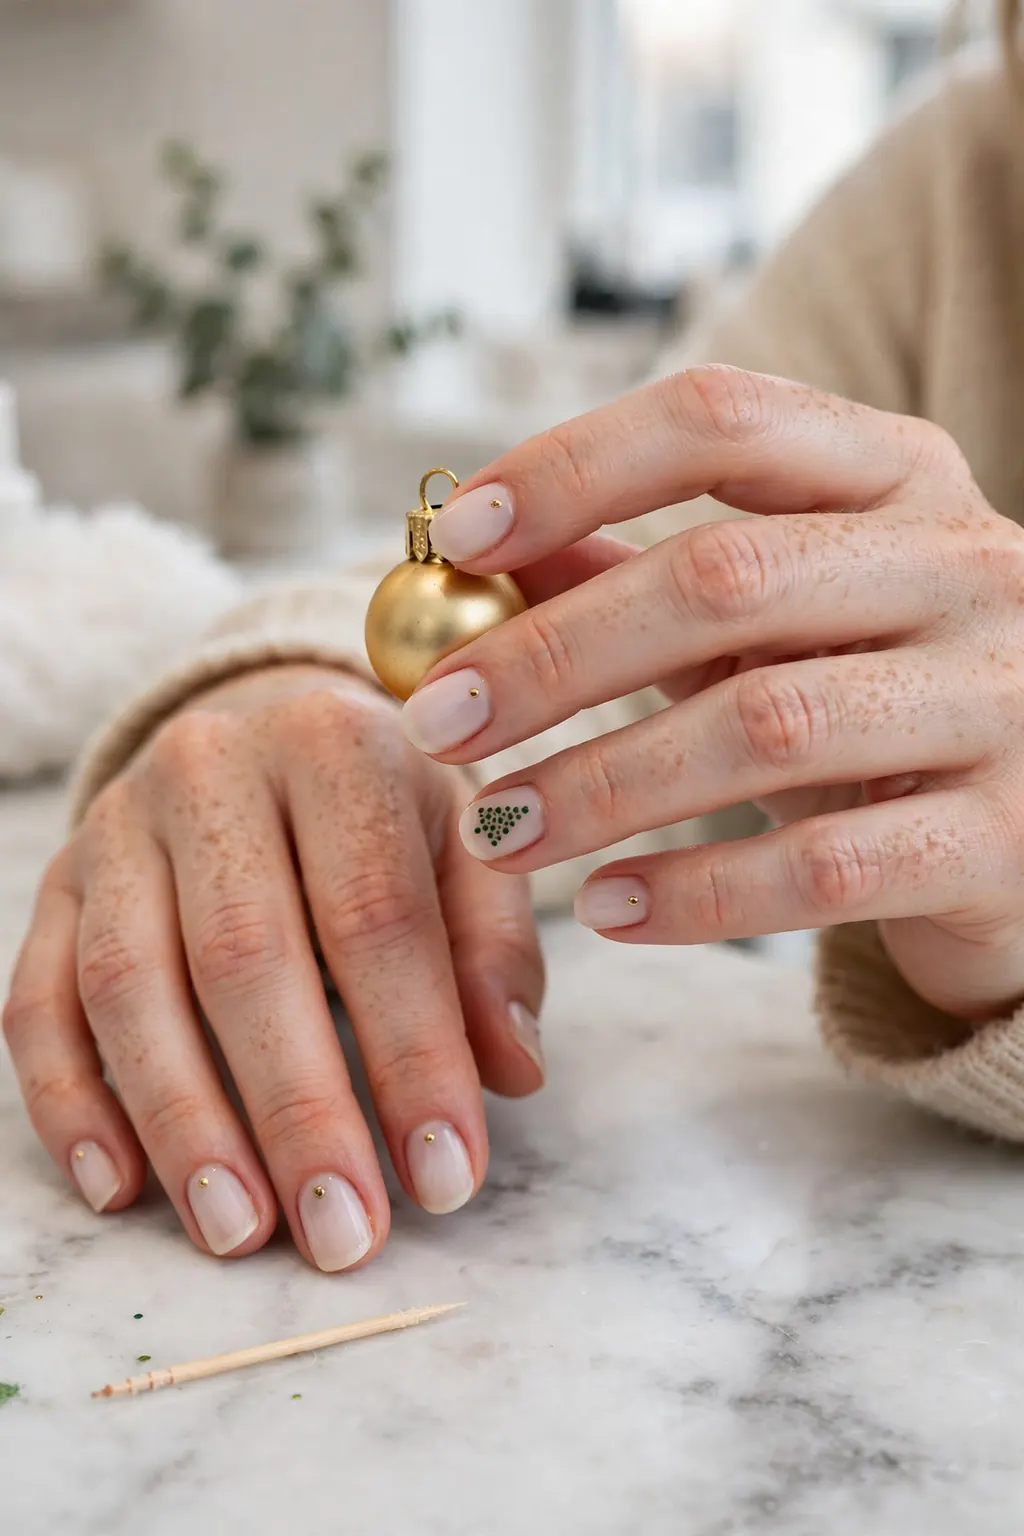
Tiny trees, stars and snow dots are the first hand-painted Christmas designs a beginner can actually do, because they are all made from dots and lines, and a toothpick is the tool. A snow dot is one dot. A star is five short lines meeting in the middle, or five dots arranged in a star. A tiny tree is a triangle of three dots getting smaller towards the tip, with a gold dot on top. None of them needs a brush, a steady hand, or any nail art training — they need a toothpick, a steady surface, and the patience to let each dot dry before adding the next. The rule that makes them look good instead of childish is restraint: one tiny design on one or two accent nails, on a plain milky or nude base, with the other nails left plain. A tree on every nail is a pattern; a tree on one nail is a detail. And the designs suit short nails, because they are small: a snow dot fits on the shortest nail there is, and a tiny tree fits on a nail that could never hold a full painted scene.
Who should skip this version
Skip hand-painted minis if you have very shaky hands or very poor close vision — the dots are small, and a dot placed in the wrong spot is hard to fix without removing the whole nail. Skip them too if you are in a hurry: each dot needs to dry before the next one goes on, and rushing turns distinct dots into one smudge. The fix in both cases is the sticker shortcut in the next-but-one section, which gives you the same tiny designs with no painting at all.
Works best on: shapes and lengths
Tiny trees and snow dots suit short to medium nails best, because the designs are small and the nail does not need length to hold them. They suit almond and round nails well, because the curved tip gives the tree a natural frame, and they suit square nails too, because the straight edge gives the design a clean baseline. They suit every skin tone with a milky or nude base, and they suit fair skin especially well with a red tree or a green star, which shows clearly against a pale base.
Maintenance schedule
A regular-polish hand-painted mini lasts three to five days; sealed under a gel top coat, it lasts a week or more. The weak point is the top coat: if the dots are not sealed, they catch on fabric and lift within days. Let the dots dry fully — ten minutes, not two — then seal with a glossy top coat wrapped over the free edge. If a dot chips, the fix is a single dot of the same colour, sealed again, not a full redo.
Red or Green Micro French for a Quiet Nod

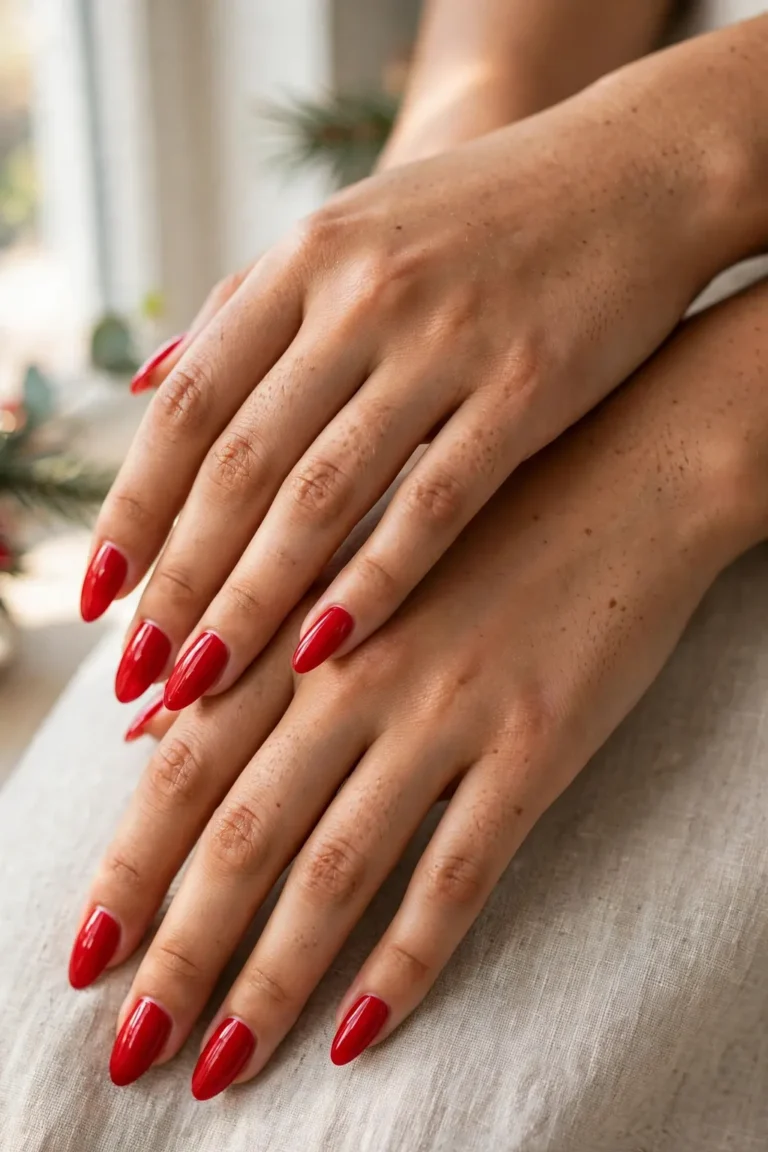
A micro French is a French manicure with the tip shrunk to a hairline — one to two millimetres of colour on the very edge of the nail — and in red or green it is the quietest way to wear Christmas on your nails. The base is sheer, milky or nude, and the tip is a thin line of deep red or forest green, drawn straight across the free edge. It reads as festive from across the room, because the colour at the tip catches the light, and it reads as groomed up close, because the line is so thin it looks like a detail rather than a design. It suits work better than any other Christmas design in this guide: a red micro French is a red tip, not a red nail, and it will not read as a statement in a conservative office. If you want the fuller red story, our Red Christmas Nails guide covers velvet, glitter and dark red designs for the holidays — this micro French is the quiet version of the same colour, for the days when you want the nod without the noise.
Best for: nail shapes, lengths and skin tones
The micro French suits short nails best, because the tip is so thin it does not eat the nail — on a short nail, a thick French tip takes over the whole nail, but a micro tip leaves the base to do the work. It suits square and almond nails well, because the straight or gently curved edge gives the thin line a clean path to follow. It suits every skin tone: red flatters fair to medium skin, green flatters medium to deep skin, and the sheer base underneath adapts to the hand.
The exact wording to show your nail tech
Say: “A micro French — a hairline tip, one to two millimetres, in deep red” — or forest green — “on a sheer base, not a thick white French.” The two phrases that matter are “micro” and “hairline”: if your tech hears only “French”, you may get a classic thick white tip; if they hear only “red”, you may get a full red nail. Showing a photo helps here, because the difference between a micro tip and a normal tip is a matter of millimetres, and a photo settles it instantly.
How long it lasts and what it costs
A regular-polish micro French lasts three to five days; a gel version lasts two to three weeks. The tip is the weak point: a thin line of colour at the very edge chips first, so a top coat wrapped over the free edge is not optional here, it is the design’s protection. Cost is a standard manicure or gel set with a French add-on at some salons — ask for the total before work starts, because a micro French takes the same skill as a full French, and some salons price it the same.
Stickers & Wraps: The Zero-Skill Shortcut
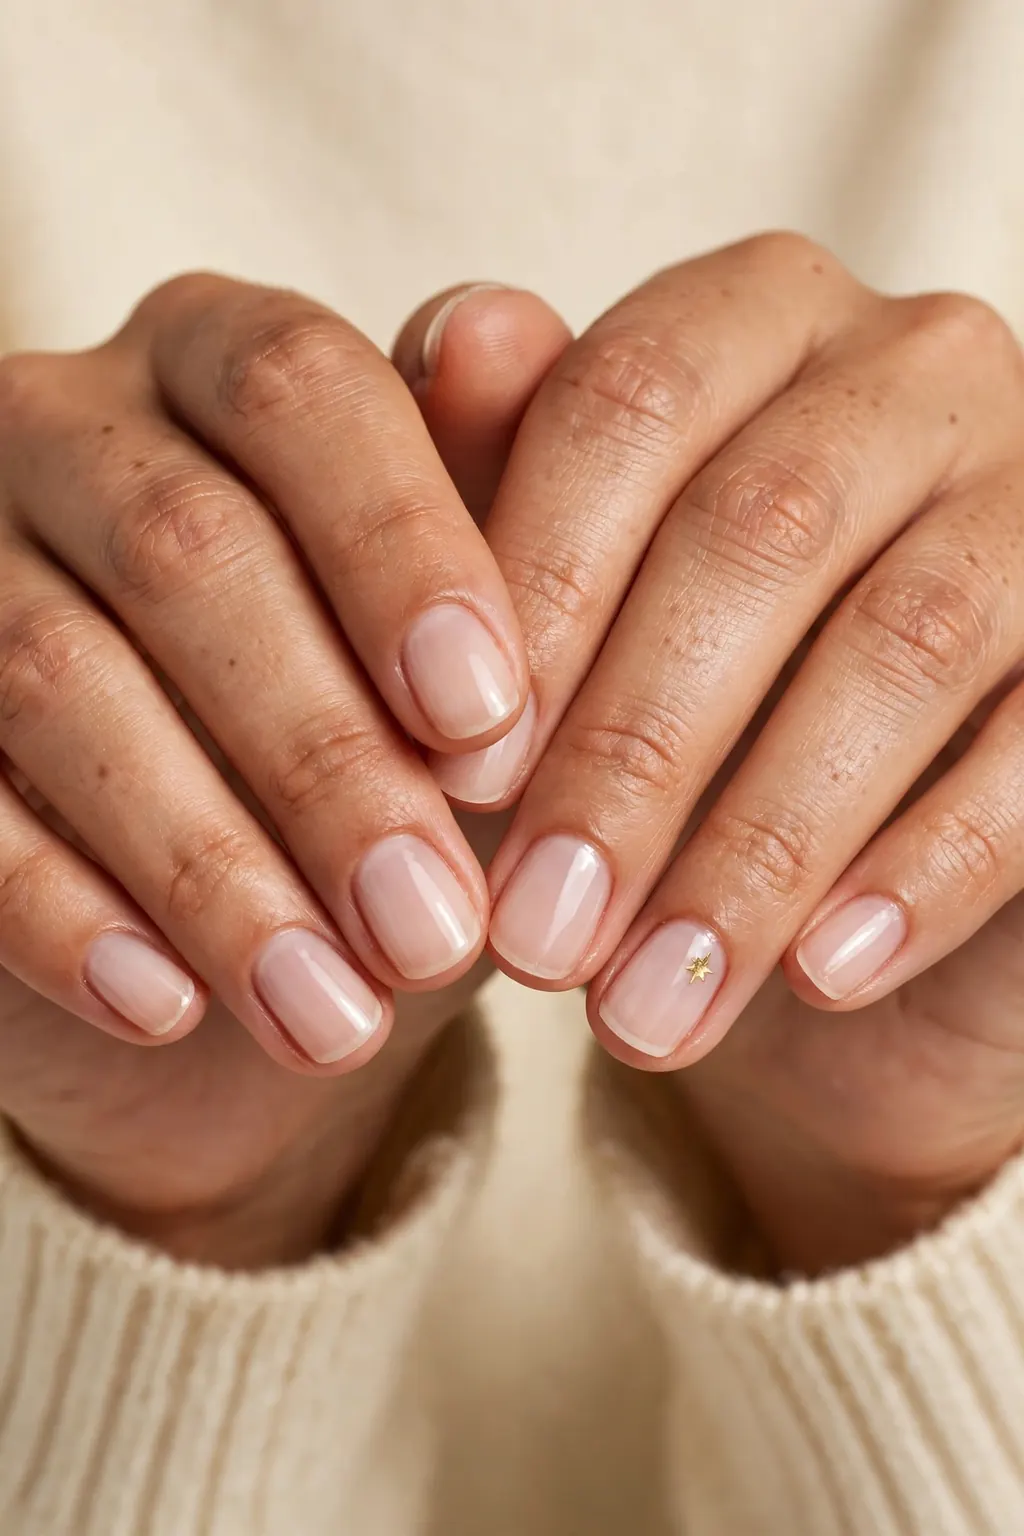
Stickers and wraps are the zero-skill shortcut to Christmas nails, and there is no shame in them: they are the fastest way to a festive manicure, and the good ones look better than a beginner’s hand-painted attempt. A sticker is a single tiny design — a star, a tree, a snowflake, a bow — that goes on one nail over a plain base. A wrap is a full-nail sticker that covers the whole nail with a pattern, usually glitter, plaid, or a Christmas print. The method for stickers is simple: base coat, colour, let it dry fully, place the sticker with tweezers, press it flat, seal with two coats of top coat. The method for wraps is: pick the right size for each nail, stick it on, file off the excess at the tip, seal with top coat. The seal is the step that decides whether they last: an unsealed sticker lifts at the edges within a day, and a sealed one lasts a week.
Step by step
For stickers: paint the base and let it dry completely — a tacky base is the most common reason a sticker slides out of place. Pick the sticker up with tweezers, place it on the nail, press it down from the centre outwards so no air is trapped underneath. Then two coats of top coat, the first thin so it does not drag the sticker, the second to seal the edges, both wrapped over the free edge. For wraps: match each wrap to its nail before you start, stick it on from the cuticle outwards, smooth it flat, then file the excess off at the free edge in one direction only, and seal with top coat.
Common mistakes to avoid
The most common mistake is placing a sticker on a tacky base, so it slides and then lifts — wait until the base is fully dry, even if that takes ten minutes. The second is skipping the seal: a sticker with no top coat over it is a temporary decoration, not a manicure, and it will peel at the first hand wash. And the third is a wrap that is too big for the nail, which overhangs the skin and lifts at the sides — pick the wrap a fraction smaller than the nail, not larger, and the edges stay down.
Products and tools that help
A pack of Christmas nail stickers in the designs you actually want — stars, trees, snowflakes, not a mixed pack of designs you will never use — or a set of wraps in one pattern, tweezers for placing stickers, a fine file for trimming wraps at the tip, and a glossy top coat for sealing. A base coat matters more with stickers than without, because the sticker needs a smooth, sealed surface to grip, and a bumpy base shows through a thin sticker.
Simple Designs by Nail Length & Shape
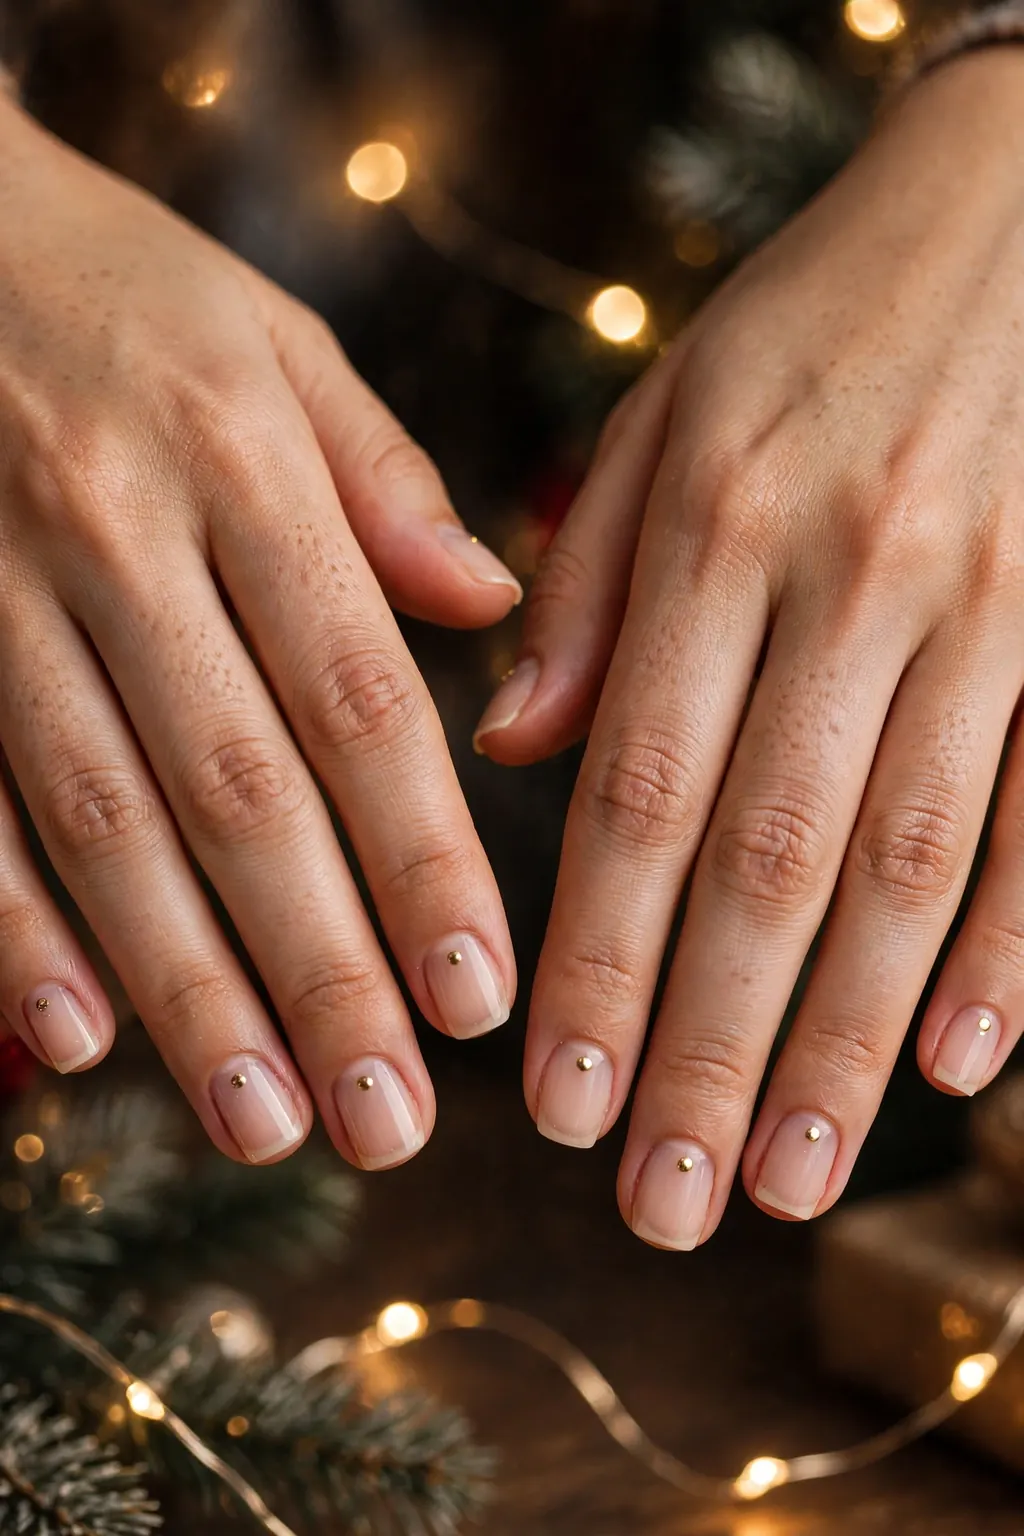
The right simple design depends on the nail it sits on, and the rule is that the shorter the nail, the simpler the design should be. On very short nails, the designs that work are a single gold dot, a micro French, or one glitter accent nail — all of them need almost no space, and all of them read clearly on a tiny canvas. On short to medium nails, the range opens up: a milky base with a gold dot on every nail, a tiny tree on one accent, a red micro French. On medium to long nails, the simple designs still work, but they need to be scaled up slightly — a dot that is invisible on a long nail looks like a mistake, so make the dot a little larger, or use two dots, or put the design on two accent nails instead of one. Shape matters too: square nails suit the micro French best, because the straight edge gives the thin tip a clean line; almond nails suit the gold dot best, because the dot sits naturally on the curve; round nails suit the accent nail best, because the colour change reads clearly on a soft shape. The test is a photo: take a picture of your hand in daylight, and look at whether the design reads from arm’s length — if it does, it is the right size for the nail.
Who should skip this version
Skip the length-and-shape matching if you already know what you like — if you have worn a gold dot on long nails for years and it suits you, the rule does not override your own experience. Skip it too if you are choosing a design for someone else, like a gift manicure: the matching rules are a guide for your own hands, not a prescription for someone else’s. In both cases, the design you love and will actually wear beats the design the rules say is correct.
Works best on: shapes and lengths
The matching rules suit every shape and length, because they are about scale, not about a single correct answer. They suit short nails best, because that is where the wrong choice shows most — a busy design on a very short nail looks crowded, and a single dot looks deliberate. They suit medium nails with the widest range, because a medium nail holds any simple design at its natural size. They suit every skin tone, because the designs are built from a sheer base and one festive colour, and both adapt to the hand underneath.
Maintenance schedule
A minimal design matched to its nail lasts as long as the manicure underneath it: three to five days in regular polish, two to three weeks in gel. The design itself does not change the schedule — a dot and a micro French chip at the same rate as the base — but a design that is the right size for the nail lasts longer in practice, because it is not catching on things: a dot placed too close to the free edge chips first, and a design scaled to the nail sits safely inside it. Refresh the top coat at day three, wrapped over the edge, and the design survives to the next manicure.
What to Buy: The Minimal Christmas Nail Kit
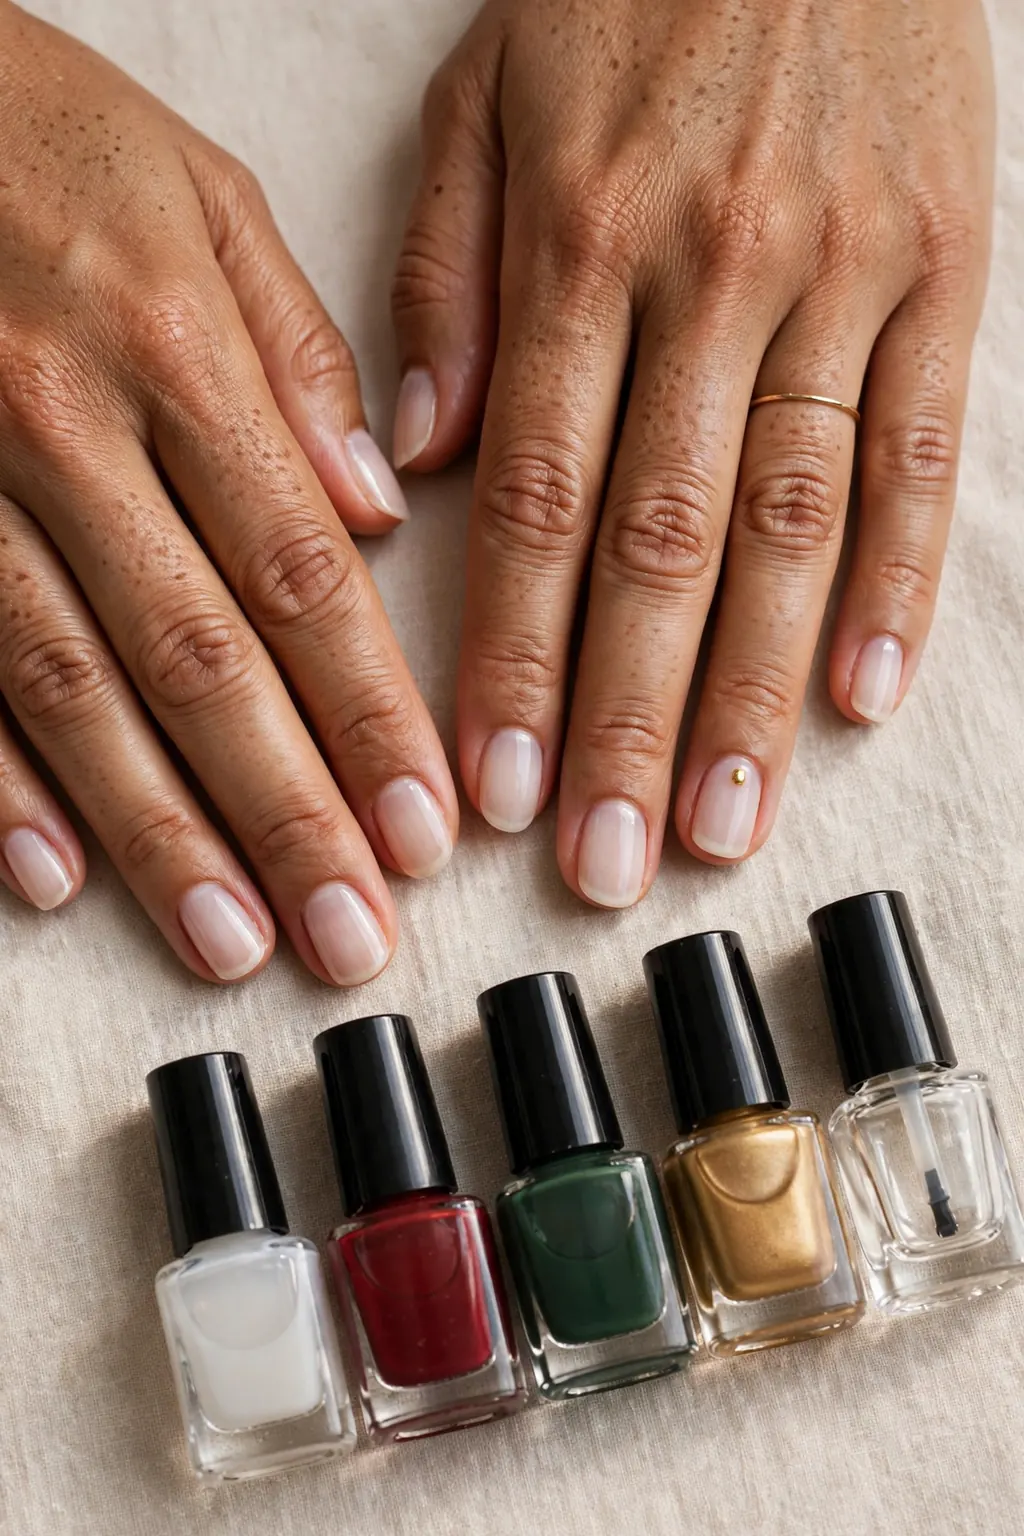
The minimal Christmas nail kit fits in a small pouch and costs less than one salon manicure, and it is everything this guide needs: a base coat, a milky sheer polish, a deep red, a forest green, a metallic gold, a glossy top coat, a dotting tool or toothpicks, a pack of Christmas stickers, cuticle oil, and a bottle of remover with cotton pads. That is the whole list. The milky sheer is the base for the gold dot, the tiny trees and the micro French. The red and green are the accent and tip colours. The gold is the dot and the star. The stickers are the backup for the days when painting feels like too much. The top coat is the seal that makes all of it last, and the cuticle oil is what makes a minimal manicure look finished, because there is nothing else to hide behind. Buy the polishes in small bottles if you can, because Christmas colours get used for a few weeks a year, and a small bottle is still half full when the season ends.
Your minimal Christmas nail kit: base coat · milky sheer polish · deep red polish · forest green polish · metallic gold polish · glossy top coat · dotting tool or toothpicks · Christmas stickers (stars, trees, snowflakes) · cuticle oil · remover and cotton pads. One of each, no duplicates, no gadgets — if a tool does a job a toothpick already does, leave it on the shelf.
Best for: nail shapes, lengths and skin tones
The kit suits every shape, length and skin tone, because it is built from sheer bases and one festive colour at a time rather than a single look. It suits beginners best, because every item in it has exactly one job, and there is nothing to learn beyond painting a base and placing a dot. It suits short nails especially well, because the kit’s designs are all small-scale: a dot, a tip, a sticker. And it suits anyone who wants Christmas nails at home without committing to a full nail art collection — the kit is a season’s worth of manicures, not a hobby.
The exact wording to show your nail tech
The kit is for home use, but the same wording works at the shop if you are buying it there: say “a sheer milky base, a metallic gold, and a glossy top coat” and add “small bottles, I only need them for the season.” The phrases that matter are “sheer” for the milky base — an opaque white is a different polish — and “metallic” for the gold, because a glitter gold makes a lumpy dot where a metallic gold makes a clean one. If the shop suggests a glitter top coat as well, ask whether you need it: for the designs in this guide, a plain glossy top coat does the sealing, and glitter is a different look.
How long it lasts and what it costs
A kit bought now lasts the whole Christmas season and into January, because the polishes are used a few drops at a time: a base coat and top coat last many manicures, and the colour bottles last the season. Cost is a standard set of polishes — no single item in the kit is expensive, and the whole kit costs less than one salon gel set, which is the comparison that matters. The stickers are the only item that runs out: a pack covers several manicures, and a second pack is the only thing you are likely to need before the season ends.
Make a Home Manicure Last Through the Holidays
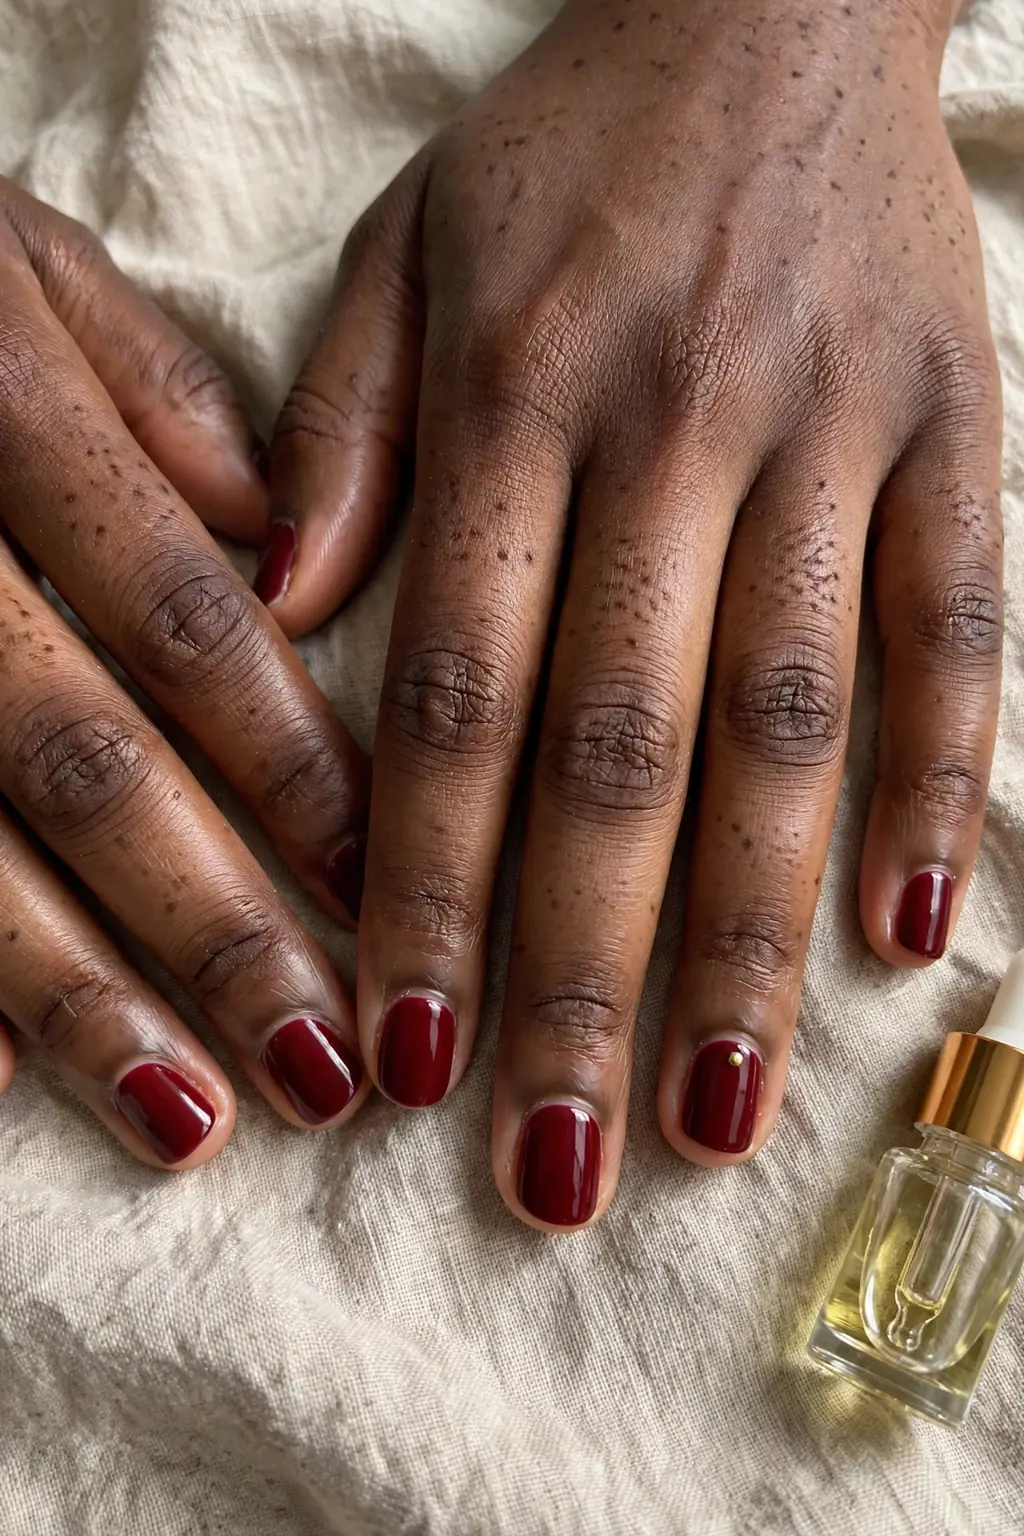
A home manicure lasts through the holidays when the prep is right and the top coat is refreshed — everything else is detail. The prep is the part most people skip: file the nails, push the cuticles back, wipe each nail with remover so the base coat grips a clean surface, and let the base coat dry before the colour goes on. Then two thin coats of colour, not one thick one, with a minute or two between them, and a top coat wrapped over the free edge so the tip is sealed on three sides. After that, the rules are about protection: wear gloves for washing up and cleaning, because hot water and detergent are the fastest way to lift a home manicure; do not use your nails as tools, because a nail used to open a can or scrape a label will chip at the tip; and refresh the top coat at day three and again at day six, wrapped over the edge each time, so the seal never wears thin. Cuticle oil daily keeps the skin around the nail neat, which matters more on a minimal manicure than on a busy one, because there is nothing else to look at. Done this way, a regular-polish Christmas manicure lasts a week, and a gel-topped one lasts into the second week — through the parties, the family dinners, and New Year.
Step by step
Prep: file, push back cuticles, wipe with remover, base coat, let it dry. Colour: two thin coats, drying between them, then the festive detail — dot, tip, accent or sticker — and let that dry fully before sealing. Seal: a glossy top coat, wrapped over the free edge, then a second thin top coat if the design has any height to it, like a sticker. Maintain: gloves for water and cleaning, cuticle oil daily, top-coat refresh at day three and day six. Remove: soak a cotton pad in remover, hold it on the nail, do not scrub, or the red and green will stain the skin around the nail.
Common mistakes to avoid
The most common mistake is skipping the prep — painting over oily nails, or over an old base coat, so the new manicure lifts within a day. The second is one thick coat instead of two thin ones, which never dries properly and dents at the first touch. And the third is skipping the top-coat refresh: a home manicure sealed once on day one has a thin seal by day four, and the tips start to wear. A two-minute refresh at day three fixes all three problems at once, because it reseals the edge before the wear starts.
Products and tools that help
A good base coat, a glossy non-yellowing top coat, cuticle oil, rubber gloves for cleaning, and a bottle of remover with cotton pads. A nail file for smoothing a chipped tip before the refresh, so the new top coat goes onto a clean edge rather than a ragged one. And a small bottle of the same top coat kept at home, not at the salon, because the refresh only happens if the top coat is in the drawer when you think of it.
What is the easiest Christmas nail design to do at home?
The easiest Christmas nail design to do at home is a milky base with a single gold dot on each nail, or one glitter accent nail against nine plain nails. Both need one tool — a dotting tool, a toothpick, or just a different polish — and neither needs a steady hand, because a dot has no edges to wobble and an accent nail has no pattern to keep straight. The milky base with a gold dot is the one this guide recommends first, because it looks elegant at work as well as at a party, and it takes about fifteen minutes from prep to top coat.
How can I make my nails look festive without nail art?
Use colour instead of art: a deep red manicure, a forest green accent nail, or a gold chrome tip all read as festive with no painting at all. A milky base with a gold dot is the smallest step up from plain colour, and a sticker on one nail is the step after that — both give you a festive detail without any hand-painting. The rule is one festive element per manicure: one colour, one dot, or one sticker is enough for the nails to read as Christmas.
How long does a DIY Christmas manicure last?
A DIY Christmas manicure in regular polish lasts three to five days, and a week with a top-coat refresh at day three and gloves for washing up. A gel version — either a full gel set or a gel top coat over regular polish — lasts one to two weeks, and two to three weeks with wrapped tips and a day-seven top-coat refresh. The design itself does not change the schedule much: a dot, a micro French and a sticker all last as long as the base underneath them, as long as they are sealed under a top coat.
Conclusion & Bottom Line
Simple Christmas nails are the designs that actually get worn: one accent nail, a milky base with a gold dot, a red or green micro French, a tiny tree on a toothpick, a sticker sealed under top coat. They take ten to fifteen minutes, they suit short nails, they survive work as well as parties, and they need a kit that fits in a small pouch — base, milky sheer, red, green, gold, top coat, a dotting tool and stickers. Pick one idea per manicure, keep the base sheer, seal the top coat over the edge, refresh it at day three, and the look lasts through the holidays.
Bottom line: one festive idea per manicure — a gold dot, one accent nail, or a hairline of red or green — on a clean milky base, sealed with a wrapped top coat, and it will look deliberate, festive and finished all season.