Party Updos for Winter: Sleek Buns and Sculptural Chignons for Coat Weather
You have the dress, the coat, the earrings — and then you look at your hair and realise winter has changed the rules. The updo that looked perfect in September collapses under a wool collar, frizzes in dry heated air, or comes undone the moment you take your coat off and put it back on again. Winter party hair is not harder, exactly; it is just a different problem. The hair has to sit low enough to clear the collar, hold firmly enough to survive a coat, a scarf and a cold walk to the venue, and still look intentional — not flattened — when you arrive. That is what this guide is for: eight winter-proof updo ideas built around two shapes that actually work in coat weather, the sleek low bun and the sculptural chignon, plus the grip, the accessories and the ten-minute refresh that carry them through the whole evening.
Quick answer: Keep the updo low at the nape so it clears coats and collars. A sleek low bun is the safest all-rounder; a sculptural chignon is the statement version. Build hold from the inside: a pinned base, crossed U-pins and flexible spray, not a hard shell. Keep face-framing pieces short and tucked, add one accessory, and allow a 10-minute refresh.
Why Winter Changes Updo Rules (Coats, Collars, Dry Air)
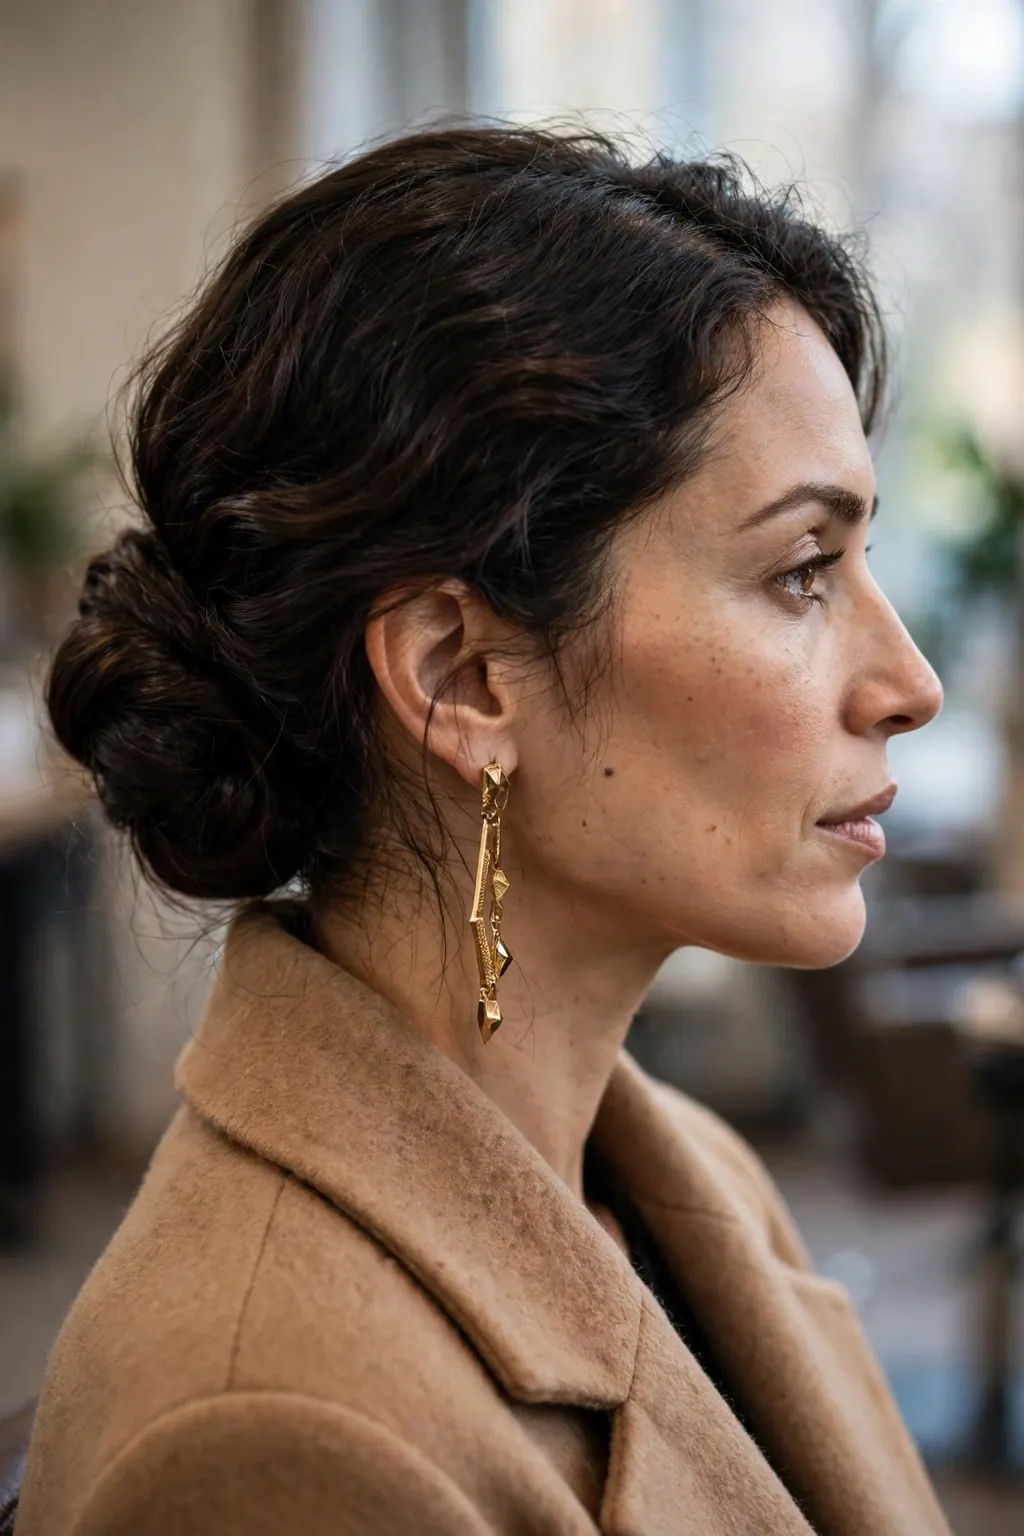
Summer updos fail in winter for three separate reasons, and each one needs a different fix. The first is mechanical: a high bun or a topknot sits exactly where a coat collar, a scarf and a hood all press against the head, so the style gets pushed, squashed and loosened before you even reach the door. The second is the air itself: heated rooms dry the hair out, the cuticle lifts, and the fine flyaways around the hairline stand up instead of lying flat — the same sleek style that held in humid summer air turns fuzzy by dessert. The third is static, and it is the one people blame on their hair when it is really the weather: wool, synthetic scarves and dry air build up charge, and the hair lifts toward the scarf the moment the two get close.
The answer is not more product. It is a lower centre of gravity. An updo that sits at or below the occipital bone — the bump at the back of the head — lives underneath the collar line instead of fighting it, and it survives the coat-on, coat-off cycle because nothing presses directly on it. The sleek finish comes from preparation rather than from hairspray: hair that is properly smoothed and lightly moisturised before it goes up will stay smooth, while hair that is sprayed into submission will crack, flake and frizz the moment the dry air gets to it. Everything in this guide follows that logic — low placement, internal structure, light finish.
What it looks like in real life
In real life, a winter-proof updo looks almost boring from the front — a clean hairline, a smooth crown, nothing sticking out — and then it earns its keep from the side and the back, where the shape is. That is the right trade. The front is what photographs with your face in it; the back is what everyone else sees all evening, and it is the part that has to survive the coat. When you test a style at home, check it the way winter will check it: put your coat on over it, take the coat off, put a scarf on, take it off again, and then look in the mirror. If the shape is still there after two rounds of that, it will survive a party. If it is not, the problem is placement or grip, not the style itself — lower it half an inch and add one more crossed pin before you give up on it.
Variations worth trying
If a low bun feels too plain for a party, the variation is not to raise it — it is to change the texture. A low bun with a twisted rope edge reads as evening; the same bun with a soft centre part and a single velvet bow reads as classic; a chignon with one sculpted roll at the nape reads as sculptural without adding any height. For very thick hair, split the bun into two twisted sections and pin them against each other — the weight distributes better and the style holds longer than one heavy knot. For fine hair, a small volumising powder at the roots before smoothing gives the crown enough grip for the pins to bite into, and a doughnut form under the bun gives it size without weight. The rule for every variation is the same: keep the silhouette below the collar line, and let the detail do the party work.
When to skip it
Skip the high, loose, undone updo for a winter party — the one with face-framing tendrils and a soft, airy crown. It is a beautiful summer style and a bad winter one: the tendrils frizz in heated air, the loose crown collapses under a scarf, and the whole thing photographs as “arrived in a hurry” rather than “effortless”. Also skip any updo that needs a hard-shell hairspray finish if you will be going in and out of the cold — the spray layer goes brittle, flakes onto dark clothes, and cracks when the hair moves. And skip the slicked-back wet look in freezing weather: damp hair in cold air is uncomfortable, and the style loses its shine the moment it dries. Save those three for spring; winter rewards the low, pinned, softly finished updo every time.
The Sleek Low Bun: Smooth Without Shellac
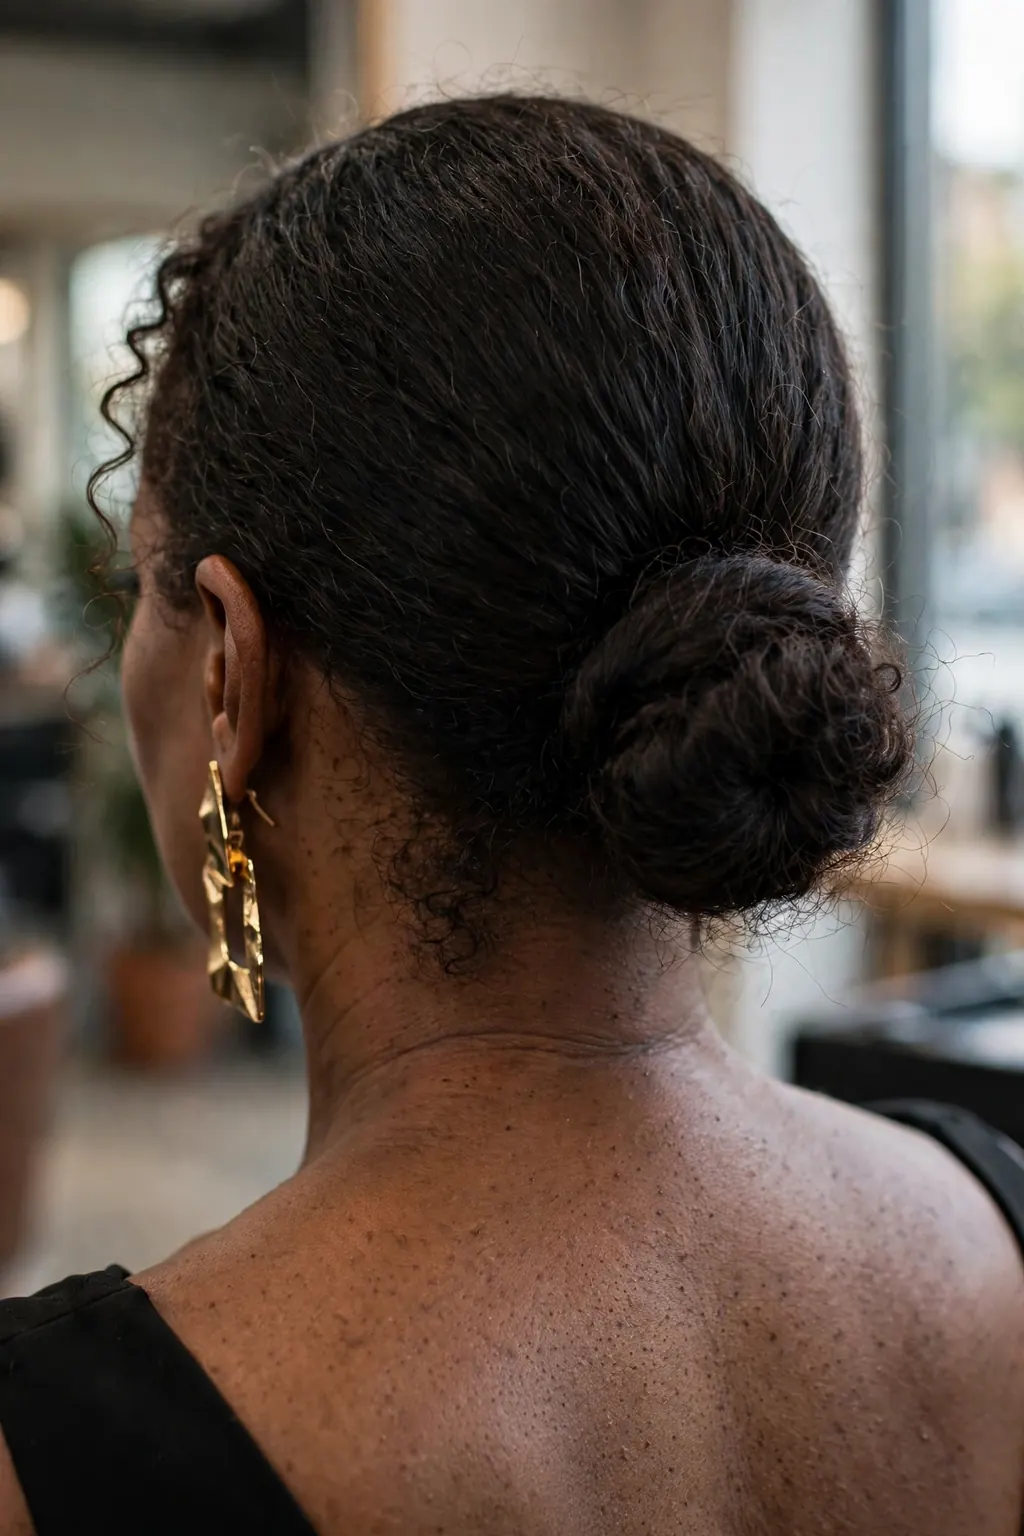
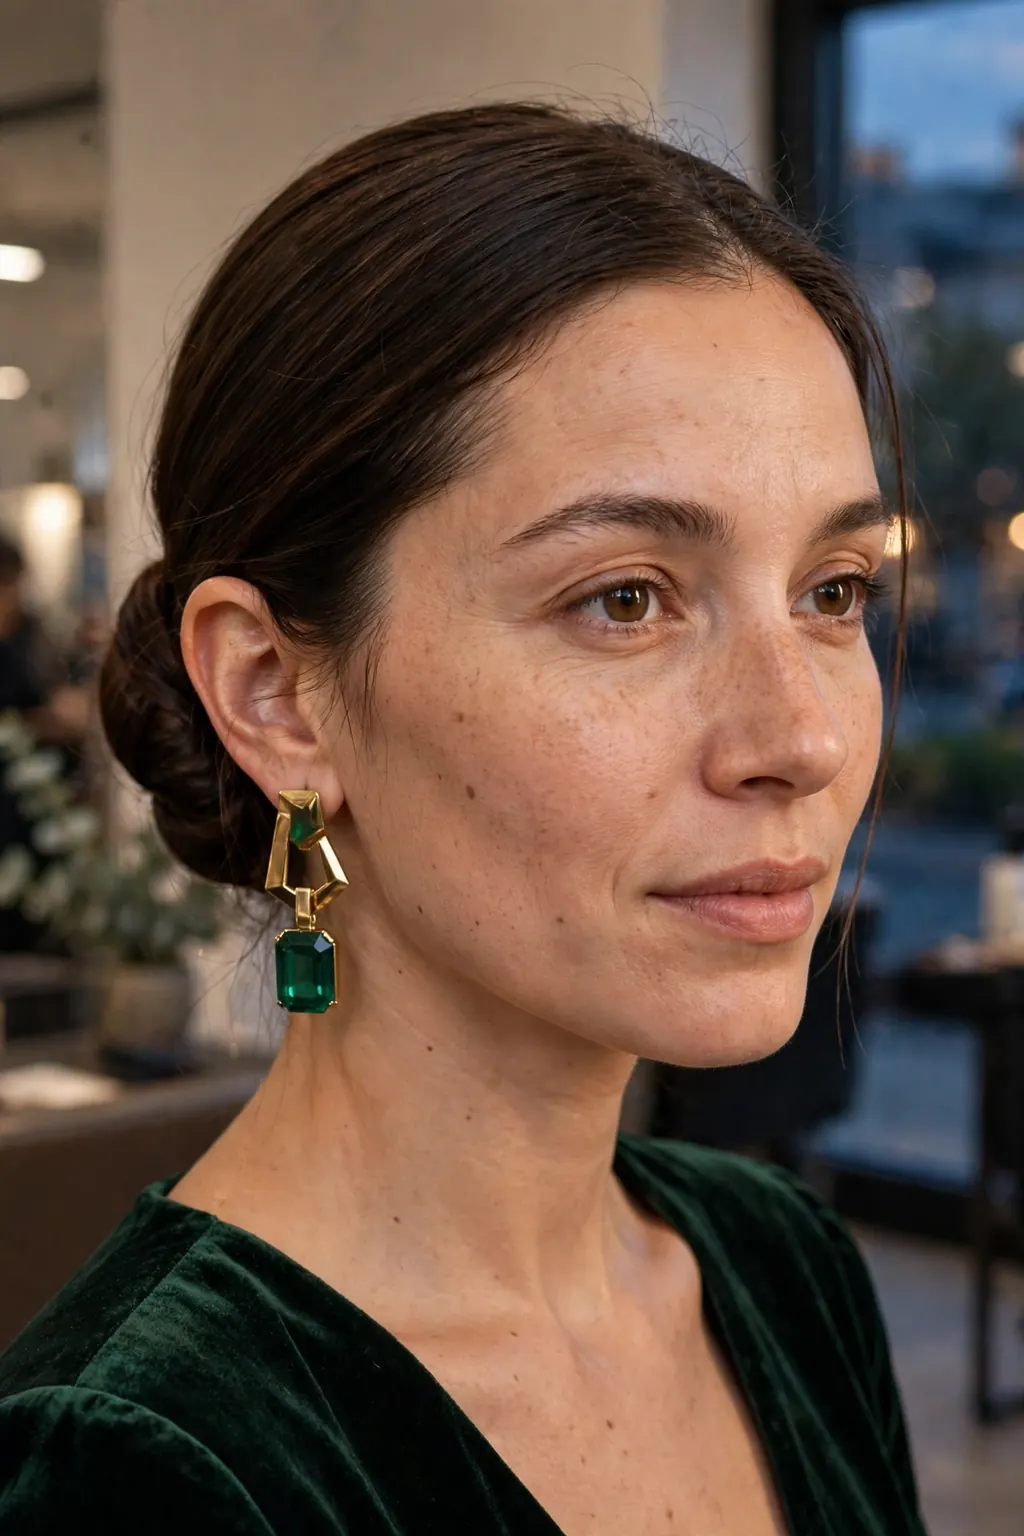
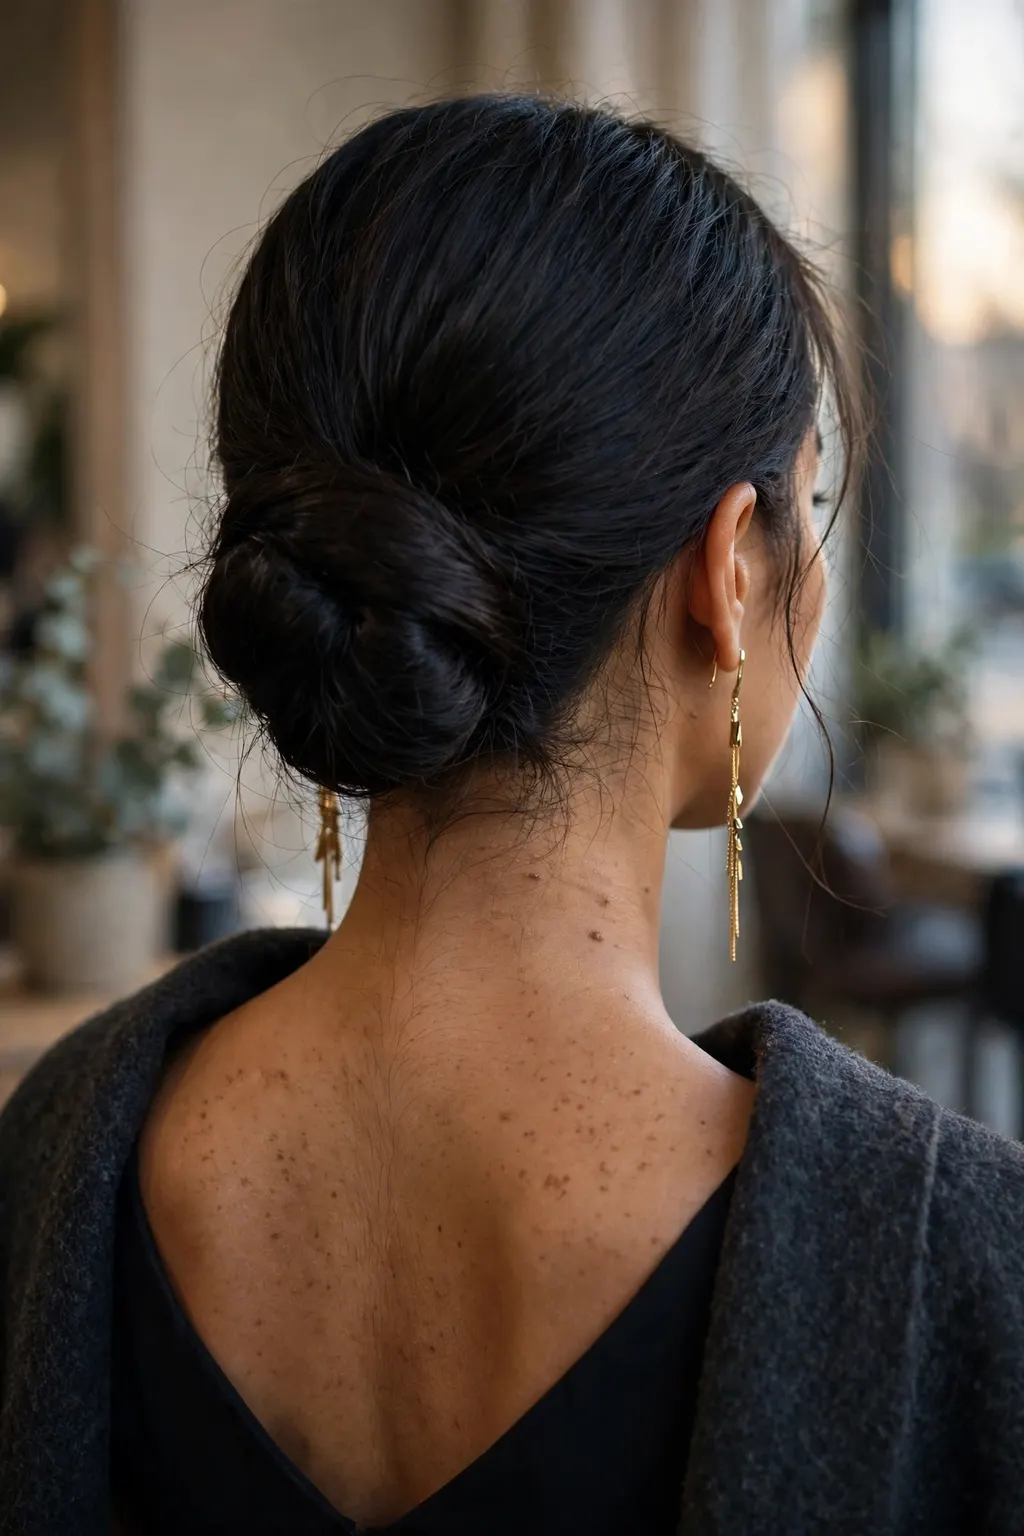
The sleek low bun is the workhorse of this whole guide, and the one to learn first. It suits almost everyone, it works on straight, wavy and curly hair once the texture is smoothed, and it is the style most likely to look the same at midnight as it did at seven. The secret is that the sleekness comes from the blow-dry, not from the bun: hair that is dried smooth with a round brush, or smoothed with a flat iron on a low heat, will hold a clean line with almost no product. Hair that is put up damp or rough and then sprayed will never look sleek — the spray sits on top of the roughness and highlights it. So the order matters: dry smooth first, add a pea-sized amount of smoothing cream or a light serum, brush it back with a boar-bristle brush, and only then gather it low.
Placement is the second decision, and it is the one people get wrong most often. The bun should sit at the nape, just above the collar bone line — low enough that a coat collar passes over it without pressing, high enough that it does not look like a ponytail that gave up. Gather the hair with your head tilted slightly back, which pulls the front smooth and keeps the nape tidy; if you gather it with your head down, the nape will puff out and the front will sag. Twist the length once, wrap it around its own base, and pin it with U-pins pushed in from opposite sides so they cross inside the bun — that crossing is what holds it, not the number of pins.
Who it suits best
The sleek low bun suits long faces best, because the low placement adds width at the jaw rather than height at the crown, and it suits oval faces almost automatically. Round faces benefit from a centre part and a little height at the very front — not a pouf, just a gentle lift before the hair is swept back — which lengthens the face without raising the bun itself. It suits thick hair beautifully, because the weight of the bun anchors it, and it suits fine hair too, provided the bun is built over a small form or a loosely twisted base so it does not read as a tiny knot. It is the best choice for anyone whose party involves a lot of moving between rooms, coats and cars, because it is the style with the fewest parts that can go wrong.
How to ask for it (or do it at home)
Say: “I want a sleek low bun that sits right at the nape — smooth on top, no height at the crown, and it has to survive a coat collar. Please dry it smooth first, then pin it with U-pins crossed inside the bun, and finish with a flexible spray, not a hard one.” That sentence gives the stylist the placement, the finish and the hold in one go, and it rules out the two most common mistakes: a bun placed too high, and a shellac finish that cracks. At home, the same words work as a checklist: dry smooth, brush back, gather low with the head tilted back, twist once, wrap, pin from opposite sides, and check the coat test before you leave. If you are building the look for a wedding as well as a party, the 10 Wedding Guest Hairstyle Ideas for 2025 guide is the next read — it covers the occasion styles that photograph well alongside a low bun.
Styling and upkeep
The upkeep of a sleek low bun is mostly about the front. Check the hairline after the coat comes off — a quick smoothing with the palms and a light mist of flexible spray is usually all it needs. Carry two U-pins and a small folding brush in your bag; the brush handles the flyaways, and the pins rescue the bun if one side loosens. If the nape starts to puff in dry heated air, press a tiny amount of serum between your palms and smooth it over the surface rather than spraying more product on top — serum flattens, spray builds up. And when the evening is over, take the pins out one at a time and brush the hair gently before bed: a bun that has been pinned all evening will kink if it is pulled apart roughly, and a gentle brush-out is the difference between waking up with soft waves and waking up with a dent.
📌 Save this before your party — the nape placement, the crossed U-pins, and the coat test are the three things to remember, and they are the difference between a bun that lasts all evening and one that gives up at the door.
Sculptural Chignon, Step by Step
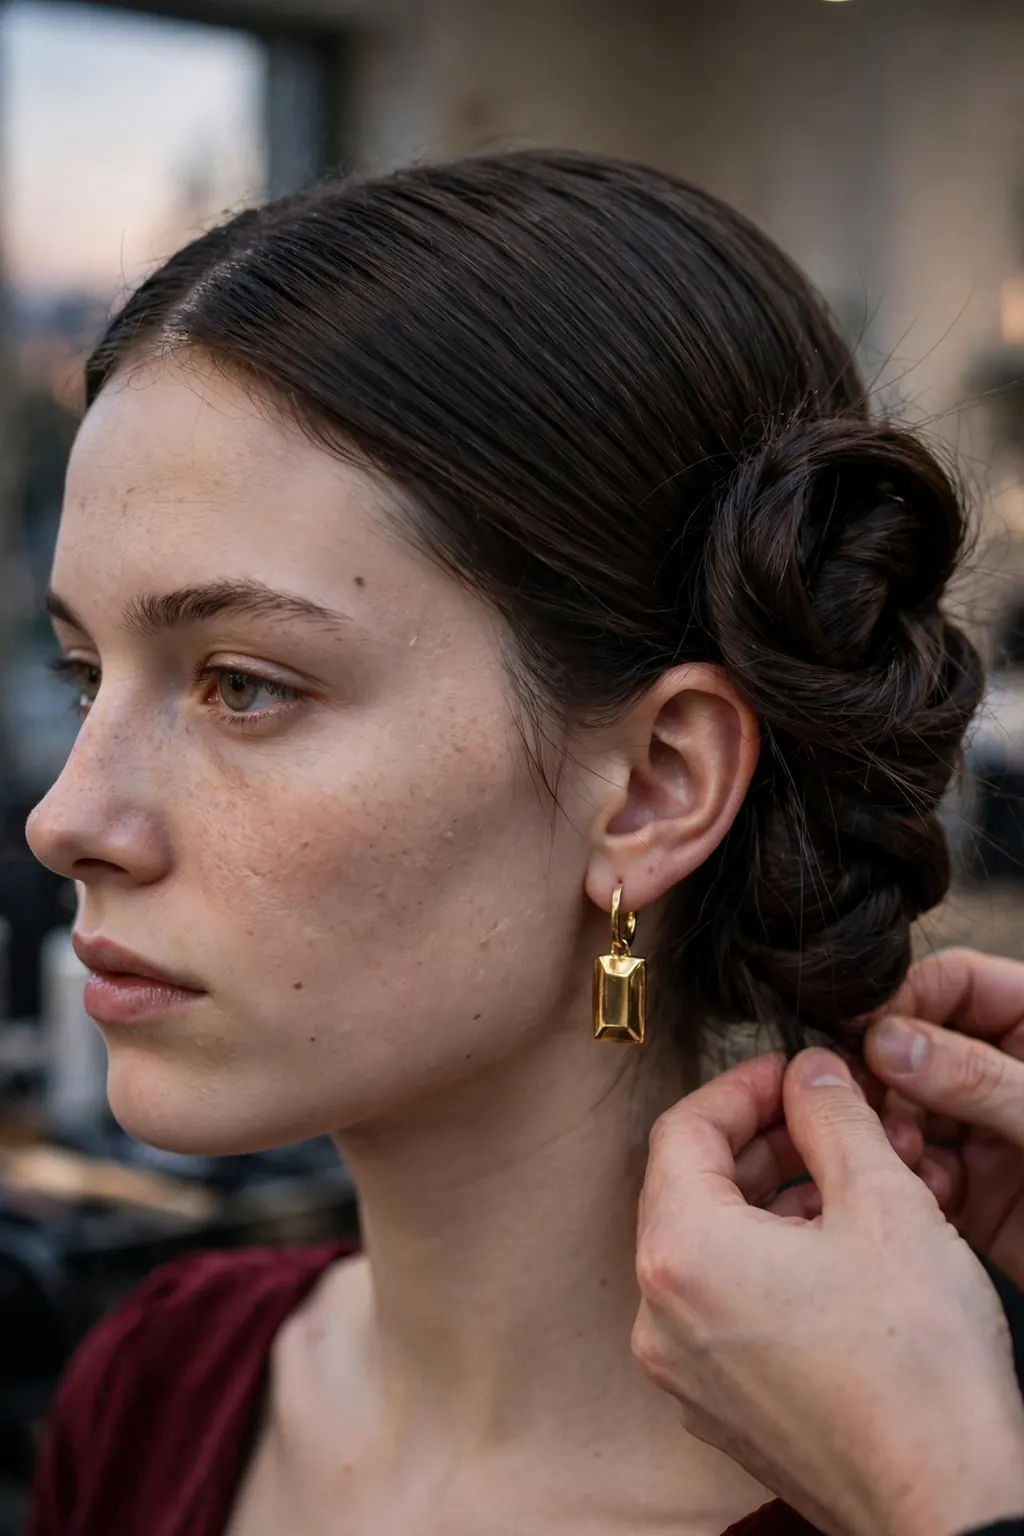
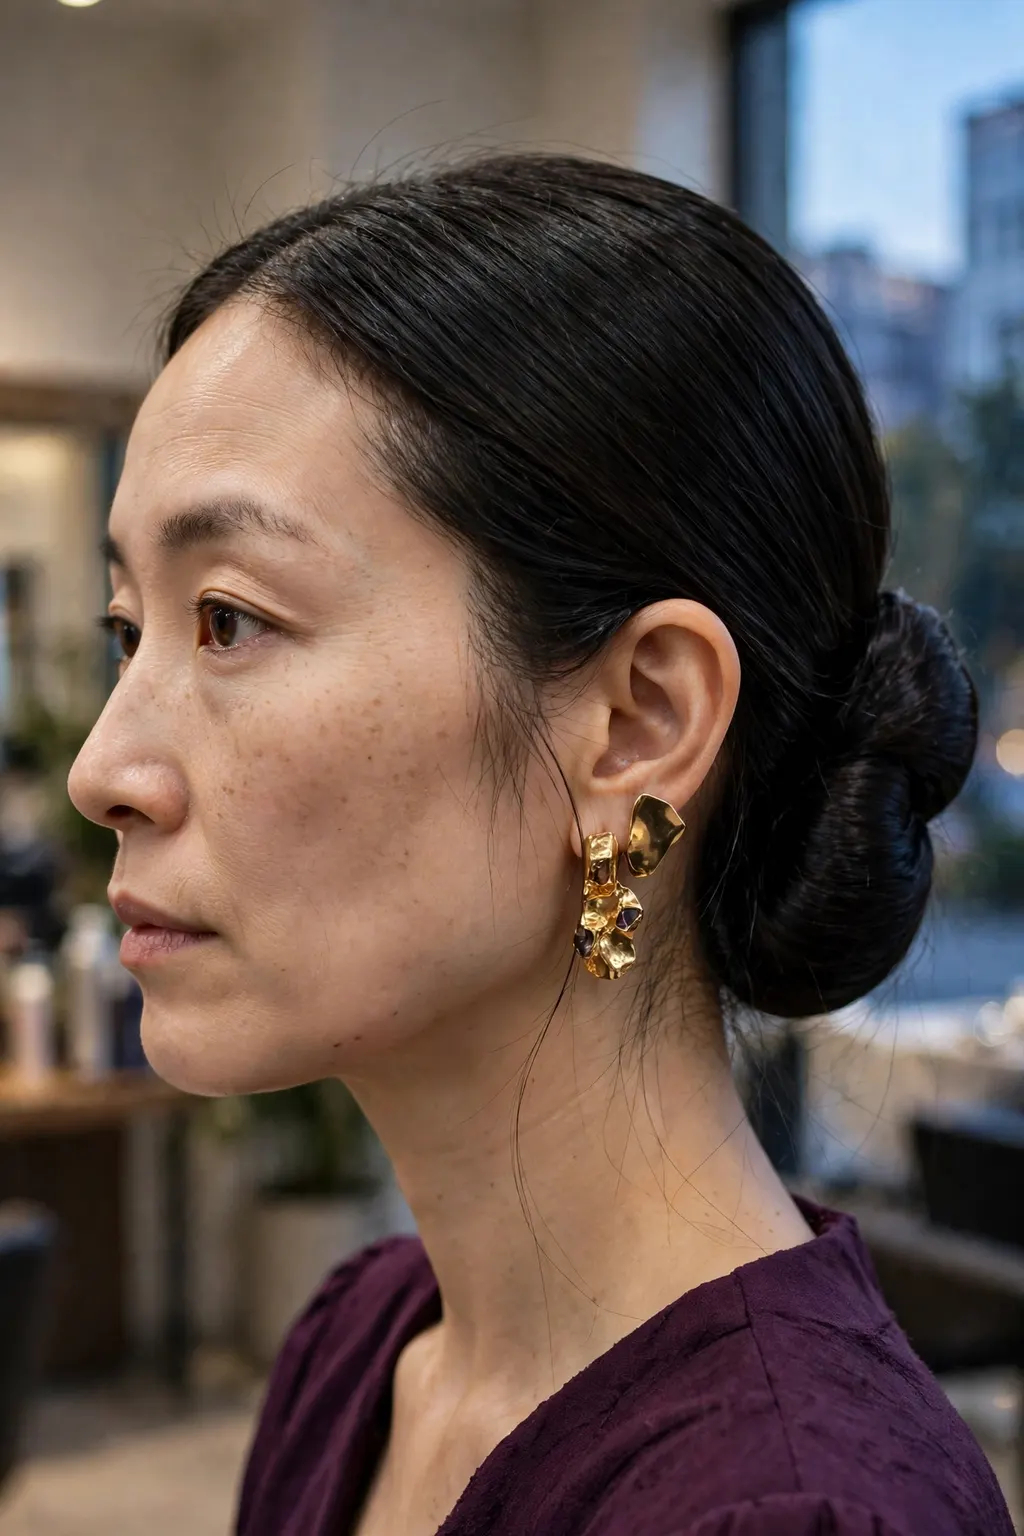
The sculptural chignon is the statement version of the low bun: same low placement, same coat-proof logic, but the shape is deliberate — a roll, a twist or a folded loop that reads as designed rather than gathered. It is the style to choose when the party is the main event of the evening and the hair is part of the outfit, not just tidy. The difference between a chignon and a bun is structure: a bun is hair wrapped around a point, while a chignon is hair folded and pinned into a shape, with the fold itself visible. That visible fold is what makes it look sculptural, and it is also what makes it hold — a folded shape distributes its weight across several pins instead of hanging from one.
Start with day-old hair if you can: freshly washed hair is too slippery for a chignon, and the pins will slide. If the hair is freshly washed, work a little texturising spray or dry shampoo through the lengths first — not for volume, for grip. Smooth the front as you would for a low bun, gather low, and then, instead of twisting and wrapping, fold the length up in a loop and tuck the ends inside the loop before pinning. The loop is the chignon. Pin the loop at its top, at its base, and at both sides, with the pins pushed in from opposite directions so they cross inside the shape. Then stand back and look at the silhouette from the side: a good chignon has one clean curve, not two bumps. If there are two, one of them is a stray section that needs tucking, not more spray.
What to ask your stylist: “Can you build this as a folded chignon, not a wrapped bun — a visible roll at the nape, low enough to clear my coat collar? I want the shape to hold from the pins inside, with a flexible finish, and I’d like to see the side silhouette before you spray it.” Bring a photo of the exact roll you want, and ask the stylist to show you the back in a hand mirror — the chignon is a back-view style, and the back is the view you never see at home.
The technique, step by step
Step one is the prep: dry the hair smooth, add a light cream through the lengths, and brush it back with a boar-bristle brush so the surface is clean. Step two is the gather: low, at the nape, head tilted slightly back, secured loosely with a thin elastic at the very base — the elastic is a scaffold, not the hold, and it will be hidden inside the fold. Step three is the fold: lift the length up, fold it over itself so the ends tuck into the pocket the fold creates, and hold it in place with one hand while the other hand places the first two pins — one from the left, one from the right, crossing inside. Step four is the shaping: with the pins holding the weight, use your fingers to smooth the outer curve and tuck any loose ends into the pocket, adding a pin wherever a section wants to escape. Step five is the finish: a light mist of flexible spray from about a foot away, never a close blast, and then the coat test — on, off, on, off — before you call it done.
Common mistakes to avoid
The most common mistake is pinning from one side only, so the whole shape hangs off a row of pins on the left and slowly rotates through the evening. Cross the pins: every pin should have a partner coming from the opposite direction. The second mistake is building the chignon too high — once it climbs above the occipital bone it is back in coat-collar territory, and no amount of pinning will save it from the scarf. The third is overloading it with product before it is shaped: spray on an unshaped chignon freezes the mistakes in place, and then the only fix is to take it down and start again. Shape first, spray last, and always last — that order is the whole technique. The fourth mistake is hiding the fold: if the roll is not visible, it is not a chignon, it is a bun with extra steps, so do not smooth the shape away in pursuit of sleekness.
Products and tools that help
You need fewer tools than you think: a boar-bristle brush, a thin elastic, four to six U-pins in a colour that matches your hair, and a flexible-hold hairspray. The U-pins matter more than the spray — buy the ones with a slightly wavy leg, which grip better than straight ones, and match the colour so a pin that peeks out does not catch the eye. A light smoothing cream beats a serum for this style, because cream gives the lengths something to hold onto while they are being folded; serum is for the final smoothing pass on the surface. A small amount of volumising powder at the roots helps fine hair, because it gives the pins something to bite into. And keep a silk scarf in your bag for the journey: draped loosely over the hair on the way to the venue, it protects the shape from wind and damp far better than a hood, and it comes off without disturbing a single pin.
The Twisted Nape Updo for Shoulder-Length Hair
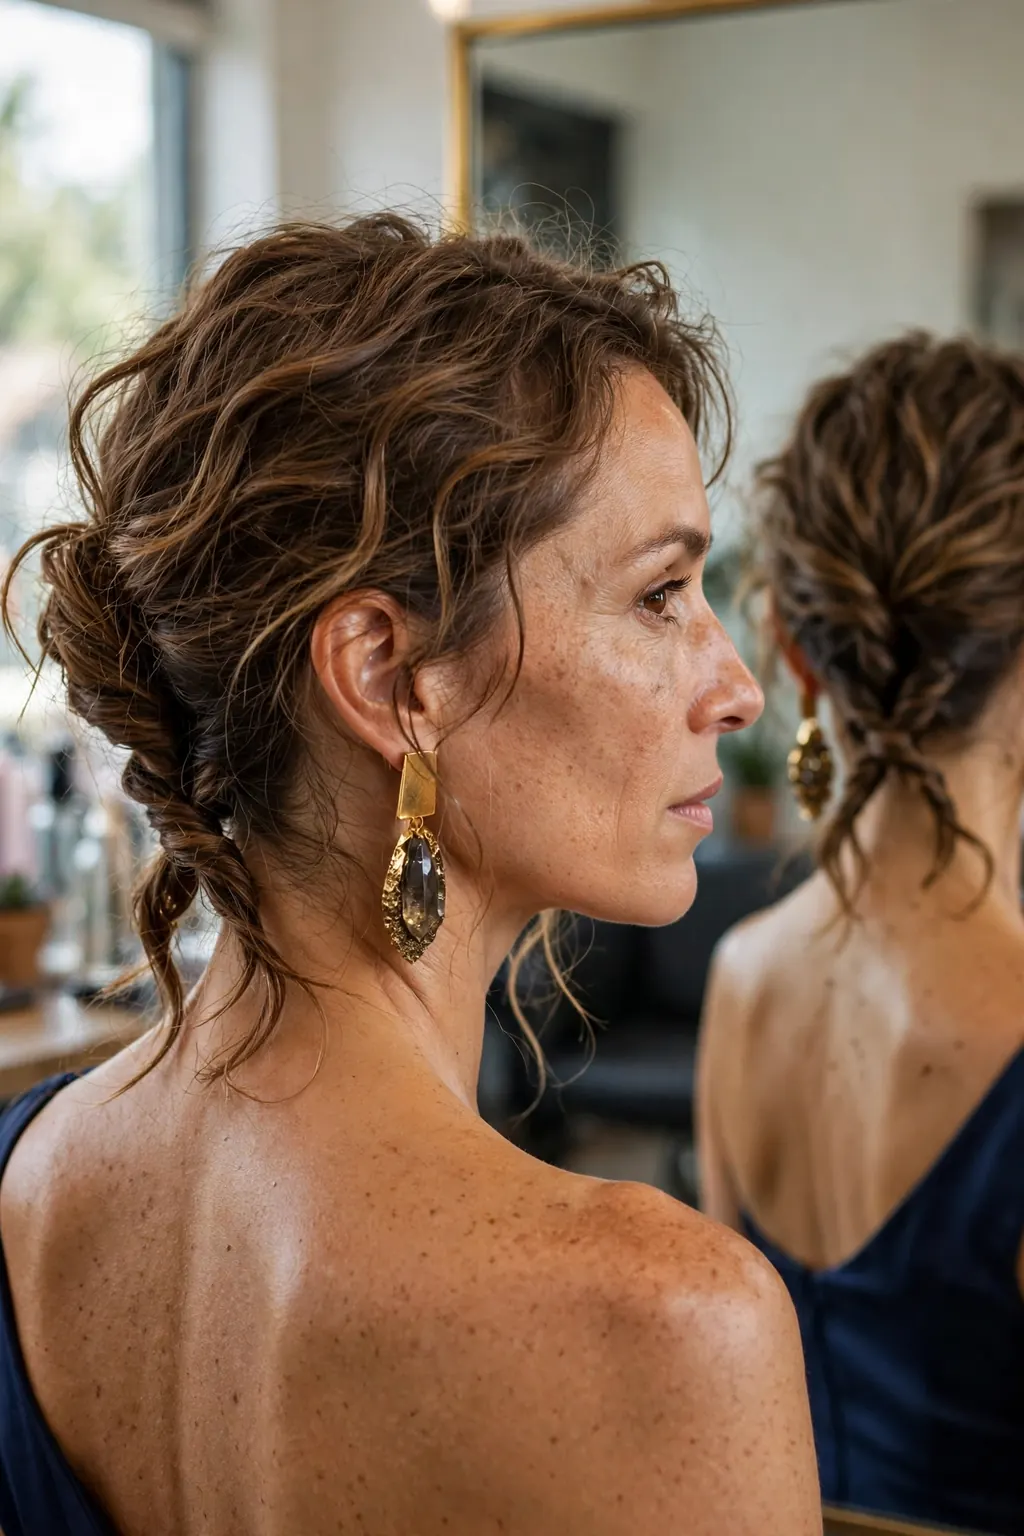
Shoulder-length hair is the hardest length for a party updo, because there is not quite enough length to wrap a bun and too much to leave down — and winter makes it worse, because the ends sit exactly where the collar rubs. The twisted nape updo solves that problem by using the twist itself as the structure: two sections twisted toward each other, crossed at the nape, and pinned flat. It needs less length than a bun, it lies flatter than a chignon, and it is the most coat-proof style in this guide, because there is almost nothing sticking out for a collar to catch on.
Part the hair where it falls naturally, then divide it into two sections at the nape. Twist each section inward, toward the centre, until it starts to coil on itself — that coiling is the grip, and it is what keeps the style from unravelling. Cross the two twisted sections over each other at the nape, like an X, and pin each one flat against the head with U-pins pushed in along the twist, not across it. Tuck the ends under the crossing point and pin them there. The result should look like a low, flat, sculpted knot — neat from the back, invisible from the front except for the smooth crown. If a section keeps escaping, the twist was not tight enough: take it down, twist it one more turn, and pin it again. A loose twist is a style that will not last the evening; a tight one will hold until you take it out.
Best for: hair types and face shapes
This is the best updo in the guide for shoulder-length hair, and for anyone growing out a bob who cannot quite get it into a bun yet. It suits wavy and curly hair particularly well, because the natural texture gives the twists grip and the finished shape has a soft, lived-in edge that suits the style. It suits straight hair too, but straight hair will need a little texturising spray through the lengths first, or the twists will slide open. Face-shape-wise it is generous: the low, flat placement suits long faces, and because the front can be parted in the middle or on the side, it adapts to round and square faces without changing the back at all. It is also the best choice for anyone who hates the feeling of a heavy bun — there is almost no weight hanging anywhere, just two flat twists pinned close to the head.
The exact salon wording
Say: “My hair is shoulder-length and it won’t go into a proper bun — can you do a twisted nape updo, two twists crossed at the nape and pinned flat? I need it low and flat so my coat collar doesn’t catch it, and I don’t want any height on top.” The words “twisted”, “crossed” and “pinned flat” are the whole brief: they tell the stylist the technique, the placement and the finish, and they rule out the bun you cannot quite make and the high updo you do not want. If the stylist suggests adding a doughnut form or a clip-in piece to make it bigger, say no unless you want the volume — the point of this style is that it is flat, and adding bulk defeats it.
Maintenance schedule
There is almost no maintenance to do during the evening, which is the point. Check the nape once after the coat comes off — one twist may have loosened, and a single U-pin pushed in along the twist will fix it. Do not re-twist anything at the party: the twists were set with the hair dry and smooth, and re-twisting damp or sprayed hair makes it fuzzy. When you get home, take the pins out in the reverse order you put them in, and let the twists fall out on their own — do not pull them apart, or you will pull out hair with them. Brush gently, and the hair will fall into soft waves from the twists, which is a perfectly good second-day style for the morning after. Trim the ends every six to eight weeks to keep the twists tidy: split ends catch on each other and make the twist unravel faster.
Face-Framing Pieces That Don’t Frizz in Heating
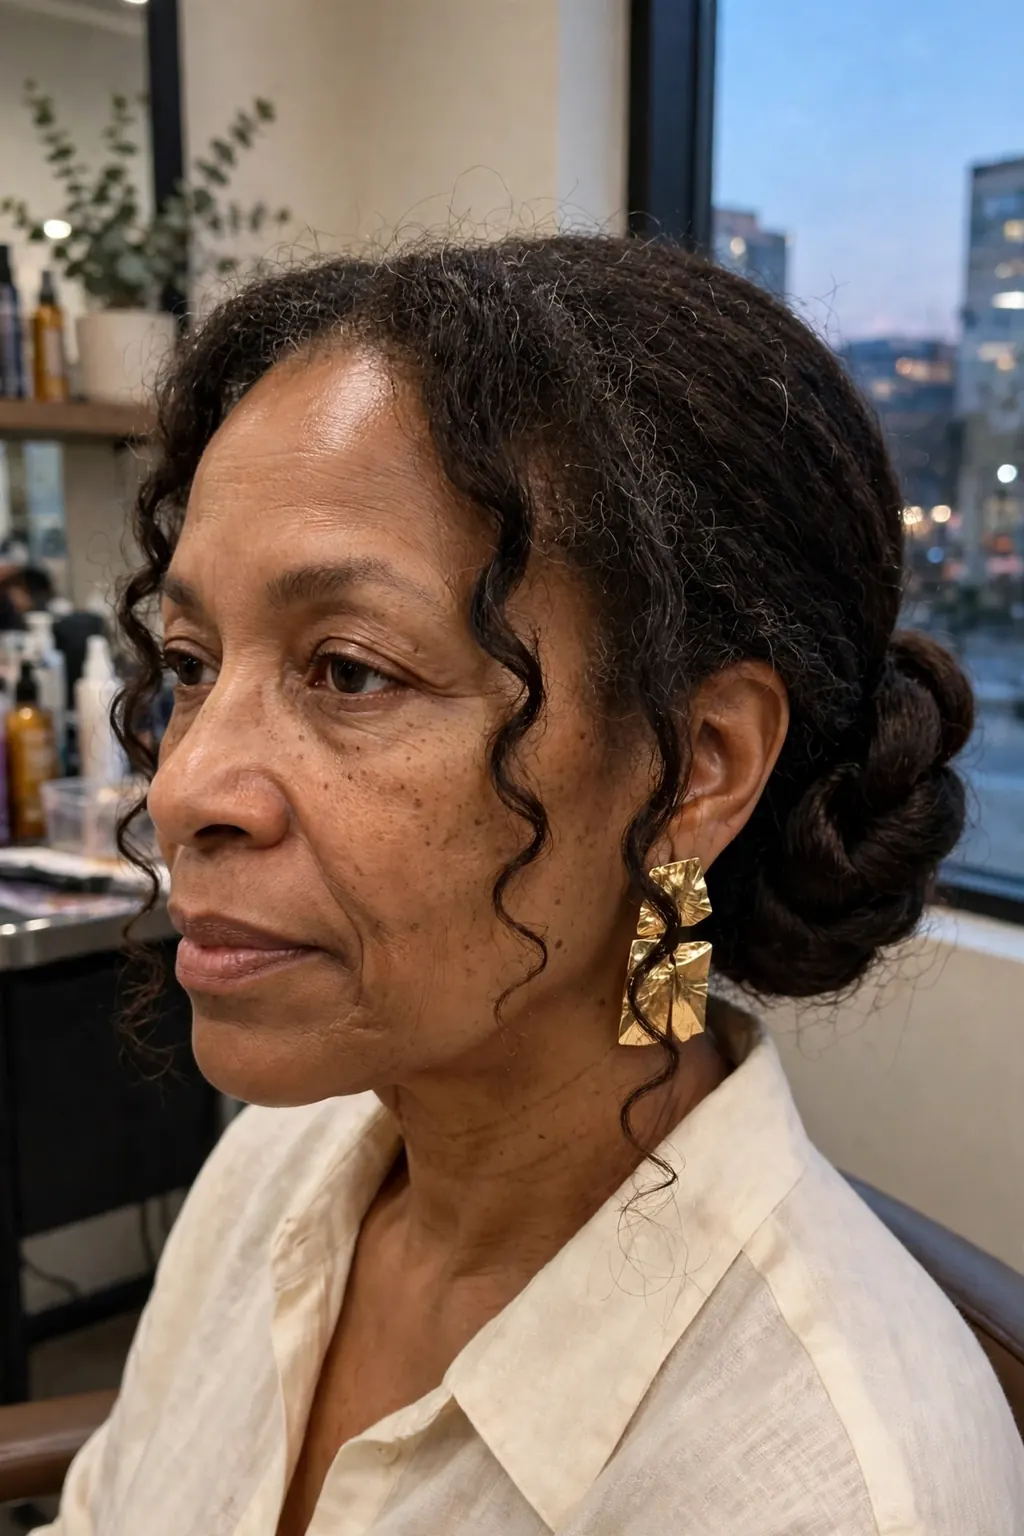
Face-framing pieces are the riskiest part of any winter updo, and the part most worth getting right, because they sit right next to your face in every photograph. In heated rooms, the fine hairs around the hairline dry out, lift, and frizz — and because they are short, they show every bit of it. The fix is not to eliminate them: a completely scraped-back hairline can look severe, and a little softness around the face is what makes an updo look like a party style rather than a gym style. The fix is to make the pieces deliberate — short enough to control, few enough to manage, and finished with something that seals them rather than something that holds them stiff.
The pieces that work in winter are short and tucked: a soft curtain piece that ends at the cheekbone and can be tucked behind the ear if it misbehaves, or a single wispy piece on each side that is no longer than the jaw. What does not work is a long tendril that hangs to the chin — it will frizz, it will catch on a scarf, and it will spend the evening in your line of sight. Before the party, smooth the pieces with a tiny amount of cream warmed between your palms, and press them into place with your fingers rather than a brush. A brush on short pieces creates static; fingers do not. And if the room is very dry, a light mist of water on your palms, pressed over the pieces, will calm them better than another layer of product — water rehydrates the hair, product just coats it. If static is your main winter problem, our winter curly hair care routine covers the wash-day and conditioning swaps that cut static at the source.
What it looks like in real life
In real life, good face-framing pieces look like they grew that way: a soft curve at the temple, a piece that follows the cheekbone, nothing sticking straight out. The test is the photograph test — take a photo of yourself in the venue light, not just in your bathroom mirror, because venue light is warmer and lower, and it shows frizz that bathroom light hides. If the pieces look soft in the venue photo, they will look soft all evening. If they look fuzzy, smooth them with cream and tuck one side behind the ear — an asymmetric tuck looks intentional, while two fuzzy pieces look unfinished. And remember that the pieces will relax as the evening goes on: hair that is slightly too neat at seven o’clock will look just right by nine, while hair that is already loose at seven will look undone by nine. Err on the side of neat.
Variations worth trying
If your hair is very fine, skip loose pieces entirely and go for a clean hairline with a soft side sweep at the front — the sweep gives the same softness without any short hairs to frizz. If your hair is curly, let one curl fall naturally at each temple and leave it alone: curly pieces frizz when they are touched, and they look best when they are allowed to be what they are. For a more formal party, a single face-framing piece on one side only, with the other side tucked, reads as deliberate and editorial. For a relaxed party, two short pieces with a centre part read as soft and friendly. And if the weather is damp rather than dry — rain, sleet, wet snow — skip the pieces altogether that night: damp air makes short pieces curl unpredictably, and a clean hairline in damp weather always looks better than a piece that has gone wavy on one side and straight on the other.
When to skip it
Skip face-framing pieces when the party is outdoors for any length of time, when it is raining, or when you will be walking any distance in the cold — the pieces will not survive the journey, and you will spend the evening pushing them back. Skip them if your hair is freshly coloured at the front, because the fine hairs around the hairline show colour unevenly and the pieces will draw the eye to it. And skip them if you are already worried about them before you leave the house: an updo you keep touching is an updo that falls apart, because every touch adds oil, friction and frizz. A clean hairline with a beautiful bun is a complete look on its own — the pieces are an option, never a requirement.
Pins, Grip and the Invisible Structure Underneath

Every updo in this guide is held up by something you cannot see, and that invisible structure is the difference between a style that lasts and one that slowly slides. The structure has three parts: a base, a crossing, and a finish — and if any one of them is missing, the style will fail in the same way every time. The base is the thing the pins grip into: for a bun it is the twisted root, for a chignon it is the folded pocket, for a twisted nape it is the crossing point. Without a base, pins slide through smooth hair and out the other side. The crossing is the rule that every pin has a partner from the opposite direction, so the pins lock against each other inside the style instead of all pulling the same way. And the finish is the light flexible spray that holds the surface, not the structure — it is the last step, never the first.
Most updos fail because the pins are doing a job they were never meant to do: holding the weight of the hair on their own. Pins are not hooks; they are locks. They work by crossing through a fold and holding it closed, the way a stitch holds fabric. If you push a pin into a smooth bundle of hair with nothing to cross, it will hold for twenty minutes and then slide out — and no amount of extra pins will fix it, because ten pins doing the wrong job are worse than two doing the right one. The test is simple: after you pin a section, tug it gently. If it moves, the pin has nothing to bite into, and you need to re-fold the section so the pin crosses a fold, not just pierces a bundle.
Who it suits best
The invisible-structure approach suits everyone, but it suits two groups most: people with fine, slippery hair, who have always assumed their hair “won’t hold” an updo, and people with very thick, heavy hair, who have always assumed their updos fail because of the weight. Fine hair fails because there is nothing for the pins to grip — the fix is texture, from dry shampoo or volumising powder at the roots, and a folded base for the pins to cross. Thick hair fails because one pin is asked to hold too much — the fix is to split the weight across several pinned sections, so no single pin carries the load. Both groups end up with the same answer: structure first, pins second, spray last. If your hair has never held an updo, it is almost certainly a structure problem, not a hair problem.
How to ask for it (or do it at home)
At the salon, say: “I want the hold to come from the pins inside, not from spray on the outside — can you build a base for the pins to cross into, and finish with a flexible spray?” A stylist who understands that sentence will build the style differently from one who just pins and sprays, and the difference will show at hour four. At home, the routine is: make a fold, cross a pin through it, add a partner pin from the opposite side, tug to test, and only then move on to the next section. Count your pins as you go — four to six U-pins is enough for a bun, six to eight for a chignon — and if you find yourself reaching for the tenth pin, stop: the problem is the fold, not the pin count, and another pin will only add weight.
Styling and upkeep
The upkeep of the structure is to leave it alone. Do not keep touching the bun to check whether it is still there — every touch loosens a pin a fraction, and a fraction is all it takes over four hours. If a section does loosen, find the pin that belongs to it and push it back in along its original path; do not add a new pin on top, because the new pin will sit on the surface and slide out. Carry two spare U-pins that match your hair colour, and know where they are in your bag before you need them — the middle of a party is a bad time to discover that your spares are at the bottom under your phone. And at the end of the night, remove the pins in the reverse order you put them in, one at a time, without pulling: a pin pulled out roughly will snag, and a snagged pin is how an updo ends with a broken strand on the bathroom floor.
Accessory Finishes: Velvet, Pearl and Gold
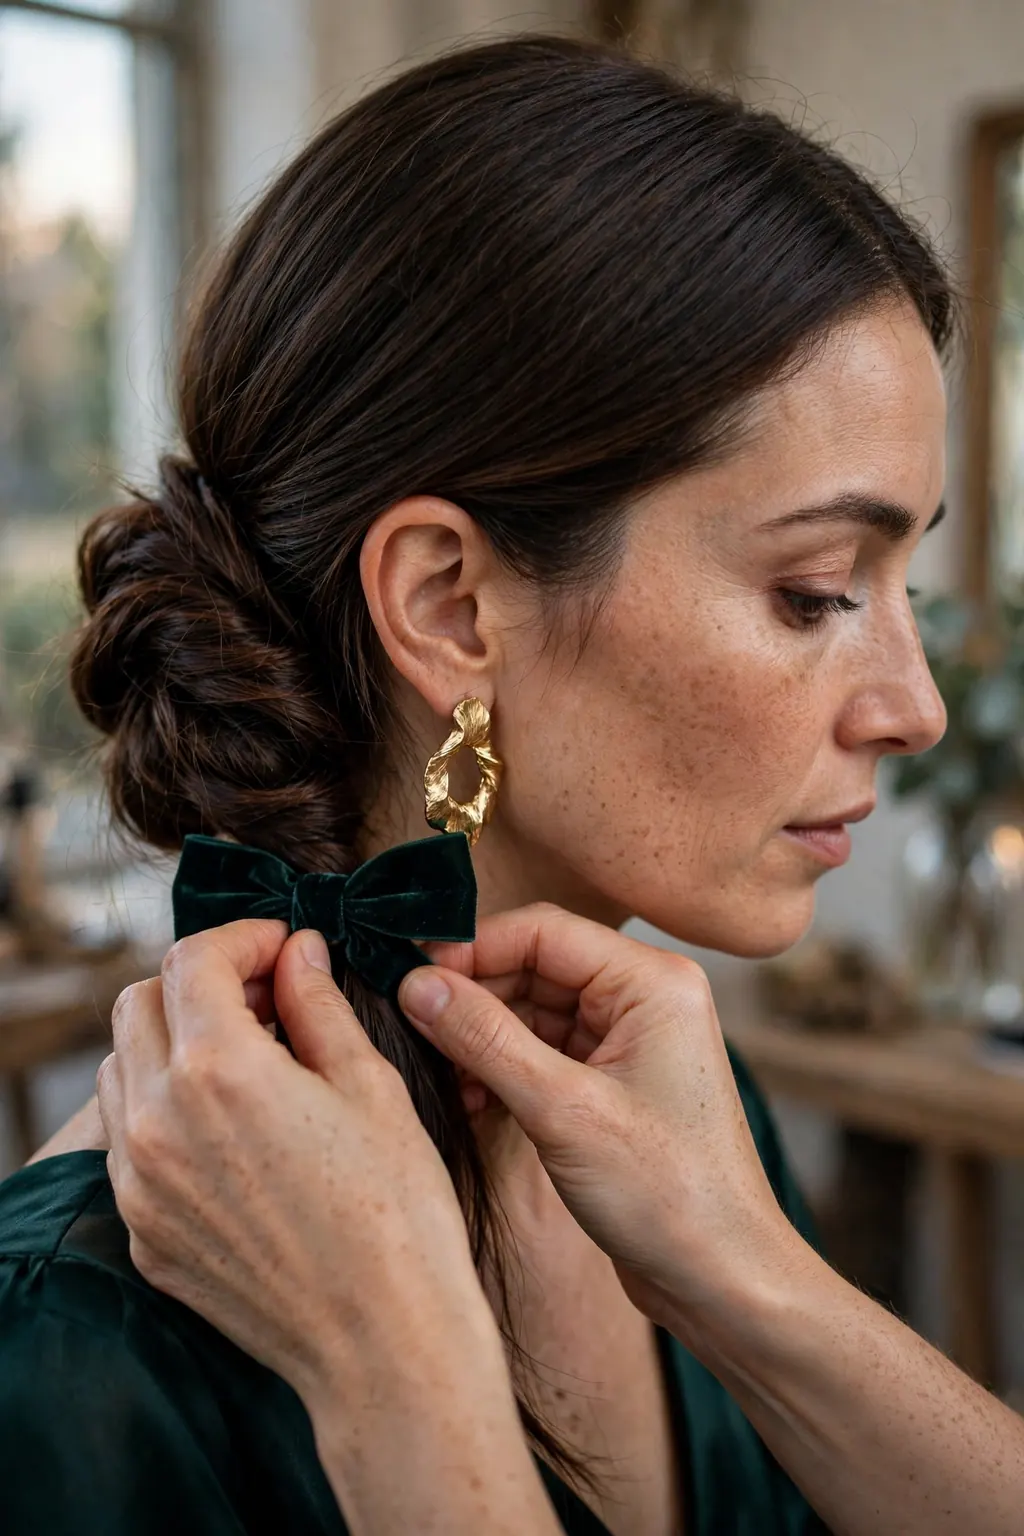
One accessory is the difference between an updo and a party updo. Two accessories is a costume. That is the whole rule, and it is worth stating plainly, because the temptation at a winter party is to add a bow and a clip and a pair of statement earrings and a sparkly pin, and then the hair disappears under the decoration. Choose one: a velvet bow at the base of the bun, a pearl pin slid into the chignon’s fold, or a slim gold cuff around the twist. The accessory should sit where the style already has a natural junction — the base of the bun, the top of the fold, the crossing point of the twists — because that is where it looks like it belongs, and where it will stay put without extra pins.
Velvet is the most forgiving winter choice: it is soft, it does not slip, it photographs warmly, and it suits the season without trying. A velvet bow in black, deep green or burgundy works with almost any outfit, and it hides the elastic and the pin ends at the base of a bun, which is a practical bonus. Pearl is the most elegant: a single pearl pin or a small cluster reads as evening without reading as bridal, and it catches the light in photographs in a way that flat metal does not. Gold is the boldest: a slim gold cuff or a gold pin suits dark hair best, where the contrast shows, and it pairs naturally with gold earrings — but keep the earrings small if the hair accessory is gold, or the two will compete. Whichever you choose, put it on last, after the spray, and pin it through the accessory’s own loop or backing rather than through the hair alone, so it cannot slide.
The technique, step by step
Step one is to finish the updo completely before the accessory goes anywhere near it — shape, pins, spray, coat test, all done. Step two is to choose the junction: the base of the bun, the fold of the chignon, or the crossing point of the twists. Step three is to place the accessory and look at it from the side, not just the front: an accessory that looks perfect from the front and crooked from the side will be crooked in half the photographs. Step four is to secure it with its own pin, pushed through the accessory and into the base of the style, so the accessory and the updo move as one piece. Step five is the coat test again, with the accessory on — a velvet bow survives a collar, a tall pearl pin does not, and it is better to find that out at home than at the venue door.
Common mistakes to avoid
The most common mistake is placing the accessory too high, where it competes with the crown and catches on the collar — accessories belong at the base of the style, not on top of it. The second is choosing an accessory that is heavier than the style can carry: a large metal clip on fine hair will drag the bun down over the evening, and a heavy bow on a small twist will pull it sideways. The third is mixing metals and textures without thinking: gold hair accessory with silver earrings, velvet bow with a satin dress in a clashing shade — each piece is fine on its own, and together they argue. Pick one metal, one texture, and let it be the accent. The fourth mistake is pinning the accessory only to the hair’s surface, so it slides off the moment you move: always pin through the accessory into the base of the style, where the structure is.
Products and tools that help
You need one spare U-pin in the accessory’s colour and, for a velvet bow, a small clear elastic to keep the bow’s loops in shape on the journey — take the elastic off when you put the bow on. A little hairspray on the velvet itself, from a distance, will keep it from picking up lint from a wool coat, which is a small trick worth knowing. For pearl pins, check the backing before you leave: a loose backing is how a pearl ends up on the floor of a taxi. And if you are choosing between two accessories at home, photograph both: the camera shows what the mirror hides, and the one that photographs better is the one to wear — because the photographs are what you will keep.
The 10-Minute Refresh Before Photos

Every winter updo needs a refresh before the photographs, and the refresh is a ten-minute routine, not a rebuild. The hair has been through a coat, a scarf, a cold walk and a warm room by the time the photos happen, and it will show it: the front will have loosened, the flyaways will be up, and the accessory may have shifted a fraction. None of that is a failure — it is just what winter does — and ten minutes in a bathroom with a mirror, a brush and two pins will put it right. The mistake is to try to redo the whole style at this point: a rebuild on hair that already has product in it will look worse than the original, because the hair is no longer clean and the pins no longer bite cleanly. Refresh, do not rebuild.
Start with the front: smooth the hairline with your palms, press the face-framing pieces back into place with a little cream, and tuck one side behind the ear if it will not behave — an asymmetric tuck photographs as intentional. Then the crown: a soft brush over the surface, in the direction the hair was smoothed, will lay the flyaways down without disturbing the pins. Then the accessory: check it from the side, straighten it, and re-pin it if it has shifted. Then the back: a hand mirror held up to the bathroom mirror will show you the bun or chignon from behind — check that the shape is still one clean curve, and push one spare pin into any section that has loosened. Finish with a light mist of flexible spray from a foot away, and then stop. Ten minutes, five steps, and the photographs will look like you arrived five minutes ago.
Best for: hair types and face shapes
The refresh suits every hair type and every face shape, because it is not a style — it is a maintenance routine. It suits fine hair most, because fine hair shows flyaways first and benefits most from the palm-smoothing step. It suits thick hair too, because thick hair’s refresh is mostly about the accessory and the back shape, which are the parts that shift under a coat. It is the routine to teach anyone who has ever looked at their party photographs and thought “my hair looked better when I left the house” — it did, and the difference between the two photographs is exactly these ten minutes. If you only remember one thing from this whole guide, remember the refresh: it is the cheapest, fastest improvement in the entire article.
The exact salon wording
You do not need a salon for the refresh, but you do need to plan for it: when you book the appointment, say “I’ll be refreshing this myself before photos — can you show me the back in a hand mirror before I leave, so I know what it’s supposed to look like?” That one request does two things: it gives you a mental picture of the finished shape to check against later, and it tells the stylist to finish the back as carefully as the front. At home before the party, do a practice refresh: put the coat on, take it off, and run the ten-minute routine, so you know how long it takes and what you need. Pack the kit — two spare U-pins, a folding brush, a travel-size flexible spray — in the bag you will actually carry, not the bag you leave in the car.
Maintenance schedule
The refresh happens once, about ten minutes before the photographs, and then the hair is done for the evening — do not keep refreshing it every hour, or you will add product on product until the hair looks coated. If the photographs are at the start of the evening, refresh when you arrive; if they are later, refresh when they are announced. After the photographs, leave the hair alone except for the occasional palm-smoothing of the front. When the evening ends, take the pins out in reverse order, brush gently, and let the hair fall — it will have soft waves from the updo, and that is a perfectly good look for the journey home. And the next morning, wash the hair properly: a night of pins, spray and accessory is not a night to sleep on without washing, because the product residue will make the hair feel coated and look dull.
📌 Save this before your party — the 10-minute refresh, the one-accessory rule, and the crossed pins are the three things that carry a winter updo from the door to the photographs and back again.
Frequently Asked Questions
How do you make an updo last all evening?
Build the hold from the inside: fold the hair so the pins cross through a base, and cross every U-pin with a partner from the opposite side. Finish with flexible spray, never a hard shell. Keep the style low, below the occipital bone, so collars cannot press on it. Refresh before photos: smooth the front, re-pin anything loose, mist lightly.
What updo works with a high coat collar?
A low updo: a sleek low bun or a sculptural chignon, anything at or below the nape, under the collar line. A high bun sits where the collar presses and will be squashed. Keep face-framing pieces short and tucked. Test it at home: coat on, coat off, twice. If the shape survives, it will survive the party.
Can you do a chignon on shoulder-length hair?
Yes, a chignon needs a fold, not length, and shoulder-length hair folds at the nape. Work with day-old hair or add texturising spray; freshly washed hair slips. Fold the length into a loop, tuck the ends inside, and pin it all round with crossed U-pins. Too short to fold? Use the twisted nape updo instead, and finish with flexible spray.
Conclusion: Party Updos for Winter — Your Next Step
Winter party hair comes down to three decisions: keep it low, build the hold from the inside, and refresh it before the photographs. The sleek low bun is the safe all-rounder that works for almost everyone; the sculptural chignon is the statement version for the evenings that matter; the twisted nape updo is the answer for shoulder-length hair that will not go into a bun. Around those three shapes, the details do the work: short, tucked face-framing pieces that do not frizz in heated air; crossed pins and an invisible base that hold the style without a shell of spray; one accessory — velvet, pearl or gold — at the natural junction of the style; and a ten-minute refresh that makes the photographs look like you just arrived.
Start with the smallest step that helps most: practise the sleek low bun at home this week, and run the coat test on it — coat on, coat off, twice — before you decide whether it is the one. If it passes, you have your party style, and the rest of this guide is the detail that makes it last. If it does not, lower it half an inch, add one more crossed pin, and test it again — the fix is almost always placement or structure, never more product. And when the night comes, pack the kit — two spare pins, a folding brush, a travel spray — and give yourself ten minutes before the photographs. Your hair will thank you, and so will the pictures.
📌 Save this before your party — the low placement, the crossed pins, the one accessory and the 10-minute refresh are the whole guide in four lines, and they are the parts you will want in the bathroom mirror, not in your memory.