
Long Layered Bob for Wavy and Curly Hair That Air-Dries Properly (No Triangle Bottom)

A long layered bob — a lob — should be the easiest cut in the world for wavy and curly hair. It is long enough to pull the curl down, short enough to keep its shape, and layered enough to move. But most curly lobs do the opposite of what they promise: they dry into a triangle, wide at the bottom, flat at the top, with the ends sticking out like a bell. The problem is almost never your hair. It is the layer map — where the layers start, how long they are, and whether the cut was planned for hair that shrinks and springs as it dries. Get the map right and a curly lob air-dries into shape with almost no styling at all.
Quick answer: Ask for long layers that start at or below the chin, with the shortest layer no shorter than collarbone length when dry, weight removed from the bottom third by internal layering rather than by thinning the ends, and a perimeter cut dry or on stretched curls so the length accounts for shrinkage. Then air-dry with a leave-in and a little gel, raked through and scrunched, hands off until fully dry. The triangle disappears when the bottom stops being the heaviest part of the cut.
Why Curly Lobs Go Triangular (It’s the Layer Map, Not Your Hair)

Picture a triangle: narrow at the top, wide at the bottom. That is what happens when the top of a cut is heavy and the bottom is heavier still. On wavy and curly hair, the curl springs up as it dries, the top contracts towards the head, and the ends — where all the length and bulk sit — flare out. The result is a silhouette that is flat at the crown and wide at the jaw, and it looks like a styling failure when it is actually a cutting failure: the layers were too short at the top, or too long everywhere, so the cut is really a one-length bob with the word “layered” attached to it.
The other culprit is the perimeter. A blunt, heavy perimeter on curly hair acts like a shelf: every curl ends at the same line, and that line becomes the widest point of the whole shape. A lob cut wet and straight, then left to spring up, will always be shorter and wider than the stylist planned — wet curls stretch, dry curls spring, and a cut that looked balanced on wet hair can be two inches shorter and visibly wider once it dries.
Best for: hair types and face shapes
The long layered bob suits wavy (2a–2c) and curly (3a–3c) hair best, because those textures have enough bend to show the layers and enough weight to hold the length. It suits oval, round and heart faces well — the length past the chin elongates a round face, and the layers soften a strong jaw. Very tight coils (4a–4c) can wear it too, but the layer map changes: the cut needs shaping on stretched or blown-out hair, with a bigger shrinkage allowance.
The exact salon wording
“I want a long layered bob for wavy hair that air-dries without going triangular. Long layers only — the shortest layer at or below my chin when dry — weight taken out of the bottom third from the inside, not by thinning my ends, and the perimeter cut so it doesn’t sit as one heavy shelf. Please cut it with my curl pattern in mind, and check the shape dry before we finish.” Say “when dry” out loud, because a layer that starts at the chin on wet hair starts at the cheekbone once it springs up.
Maintenance schedule
A curly lob holds its shape for eight to ten weeks, longer than a short bob, because the length forgives a little growth. Book a shape-up at eight weeks: a dusting of the perimeter and a check of the bottom layers, not a full re-cut. Between visits, the shape is maintained by the wash-day routine in this article, not by heat — the moment you start straightening the bottom to fix the triangle, you are fighting the cut instead of wearing it.
The Air-Dry Layer Map for Type 2 Wavy Hair
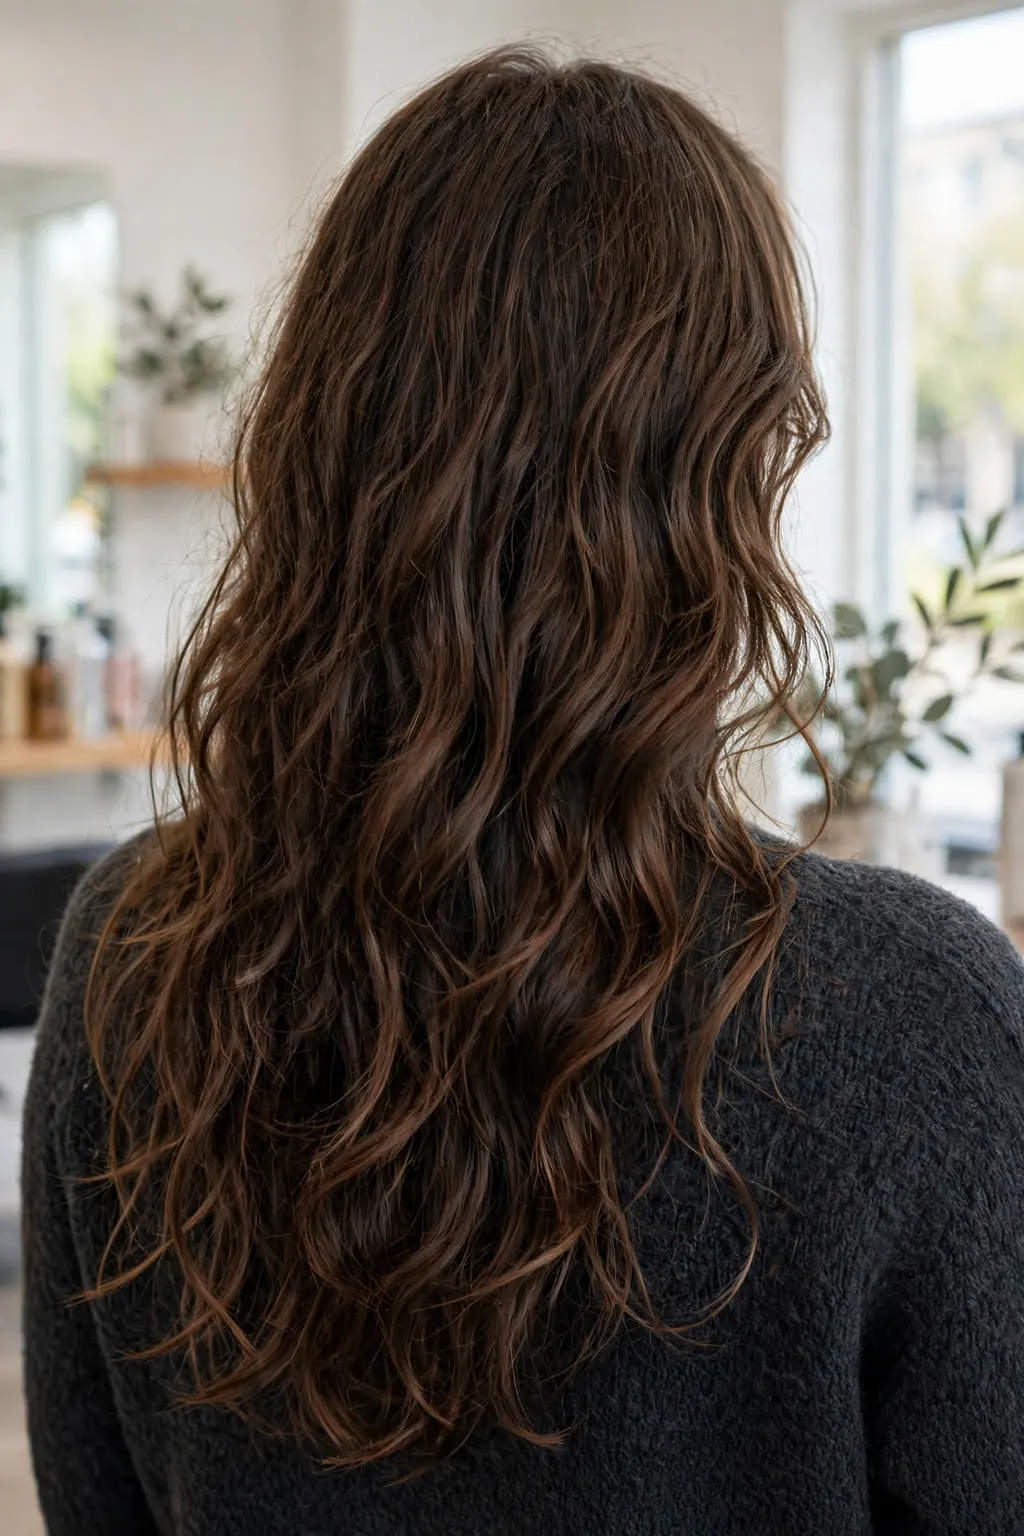
Type 2 wavy hair is the texture most likely to be given a lob that is too layered. Waves need weight to form — take too much out and the wave goes limp, the ends go stringy, and the cut looks thinner than the hair actually is. The map for waves is: long layers, and fewer of them than you think. The shortest layer sits at the chin or just below it when dry, the next layer at the collarbone, and the length finishes past the shoulder or at the collarbone. The layers should be invisible when the hair is still — you should see movement and a soft, tapered bottom, not steps.
The weight removal for waves happens in the interior, not at the ends. A good stylist takes weight out of the mid-lengths with long, sliding layers, so the bottom keeps its density and the wave has something to hold on to. If your last lob went stringy at the ends, the layers were too short or the ends were thinned — both remove the very weight that makes a wave read as a wave. Ask for the ends to be left full, and for the layering to live above them.
What it looks like in real life
Dry, a type 2 lob looks like hair that was never cut at all — just long, wavy hair that happens to end in a clean, slightly tapered line at the collarbone. The wave starts around the cheekbone, builds through the lengths, and the ends curve gently instead of flipping out. On a good day it needs nothing: wash, leave-in, scrunch, walk out of the door. On a flat day the fix is a root clip while it dries, not a re-cut.
Variations worth trying
A centre part with the front layers starting at the cheekbone, for a softer frame. A deep side part with the heavier side falling past the shoulder, for more volume at the crown. And a lob with one hidden shorter layer underneath at the nape — it removes bulk where the hair is thickest without touching the visible shape, and it is the single most useful variation for thick wavy hair that goes wide at the bottom.
When to skip it
Skip the long layered lob if your wave is very fine and very straight at the root — type 2a hair with almost no bend at the top will not hold the layer shape, and the cut will read as a one-length bob with wispy ends. Skip it too if you wash and straighten every day: the layers are designed for air-drying, and on straightened hair they can look disconnected. In both cases a blunt lob with no layers is the better cut.
The Air-Dry Layer Map for Type 3 Curly Hair
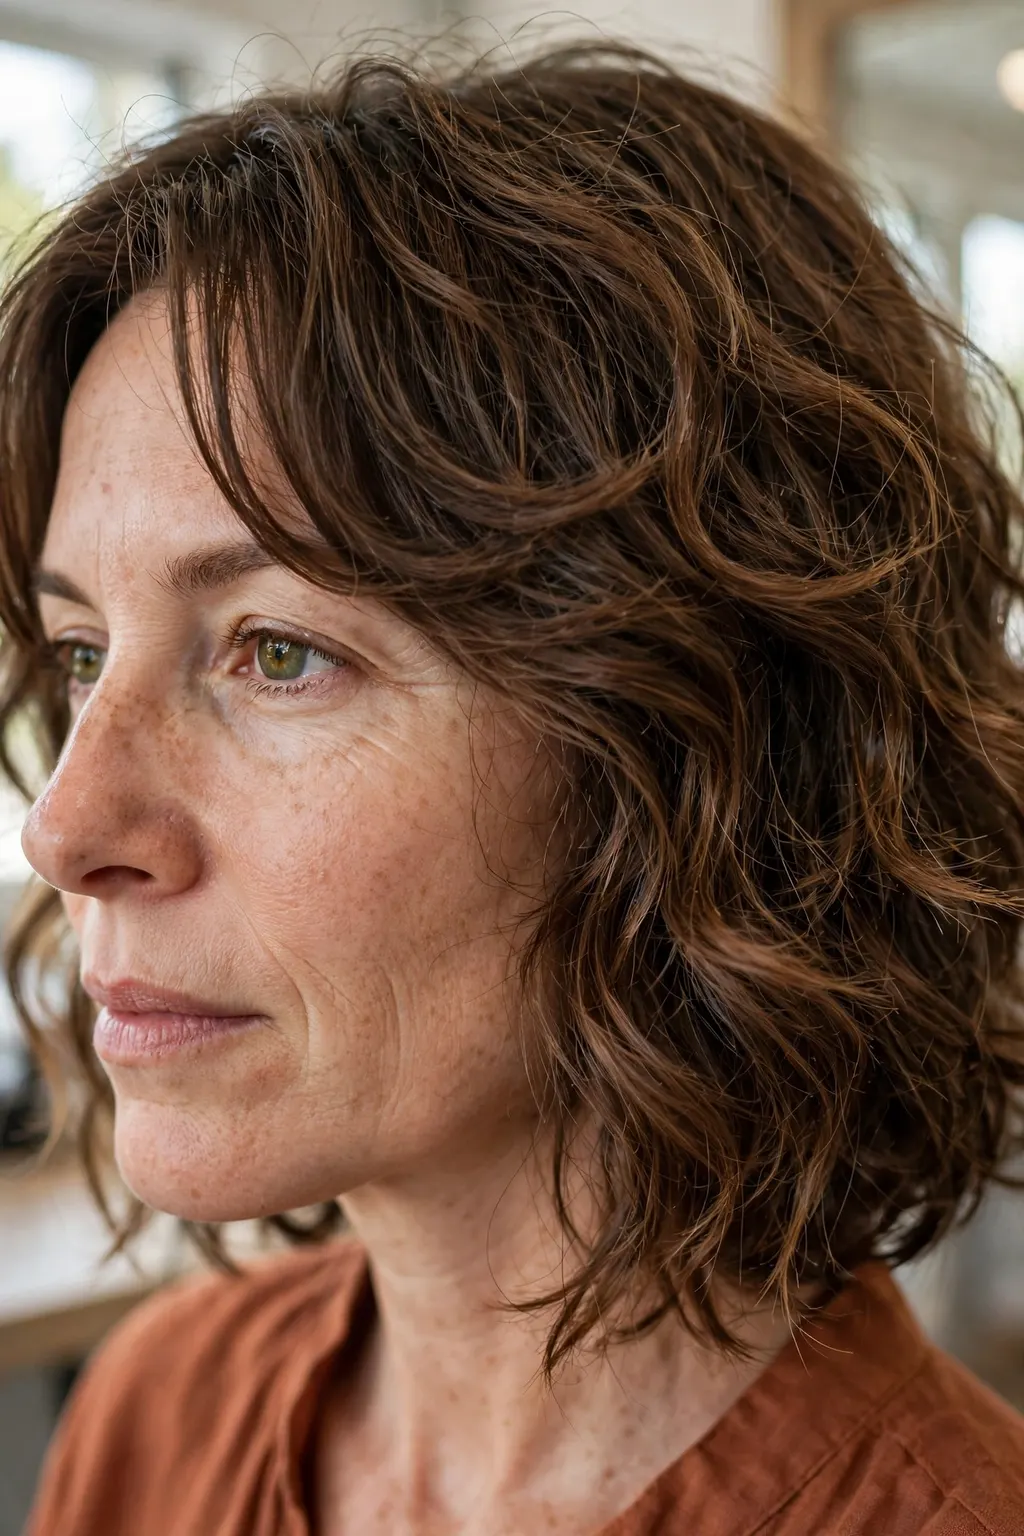
Type 3 curly hair needs the opposite of what type 2 needs: more layering, placed higher, because curls stack. A curl that starts at the root and springs all the way down will pile volume at the bottom unless the layers break it up, and a one-length curly bob is a triangle waiting to happen. The map for curls is: the shortest layer at the cheekbone or chin when dry, the layers staggered through the mid-lengths, and the perimeter broken up — cut curl by curl, or point-cut — so the bottom edge is a soft, uneven line instead of a shelf.
Shrinkage is the number to plan around. Type 3a shrinks about 20–30%, 3b about 30–40%, 3c up to 50% or more. That means a lob that should sit at the collarbone dry needs to be cut at the shoulder or below when wet, and a stylist who cuts to the dry length on wet hair will give you a bob two inches shorter than you asked for. The safest version of this cut is shaped dry, or on hair stretched straight and then allowed to spring — either way, the length is judged on the hair as you will actually wear it.
Who it suits best
Anyone with defined curls who wants a cut they can wash and wear without a diffuser every morning. It suits thick curly hair especially well, because the layers give the volume somewhere to go instead of piling at the bottom. It suits round and square faces too — the vertical length and the staggered layers draw the eye down, which balances width at the jaw.
How to ask for it (or do it at home)
At the salon, say “cut it curl by curl, dry if you can, and leave it longer than you think — my curls shrink about a third. I want the shortest layer at my chin when dry, and the bottom edge broken up, not blunt.” At home, do not try to re-layer this cut yourself: the layer map is a salon job. What you can do at home is the maintenance — a dusting of the very ends every ten weeks, one curl at a time, stretched gently, never pulled straight.
Styling and upkeep
Curly lobs are maintained by moisture, not by cutting. A leave-in and a gel, applied to soaking-wet hair, hold the curl pattern while it dries and keep the layers from separating into frizz. Refresh on day two with water and a little leave-in, not with more product — product build-up is what makes curly layers go limp and the bottom go wide. Clarify once a fortnight, deep-condition weekly, and the cut will hold its shape until the next shape-up.
Length Rules: Collarbone vs Shoulder on Shrinkage
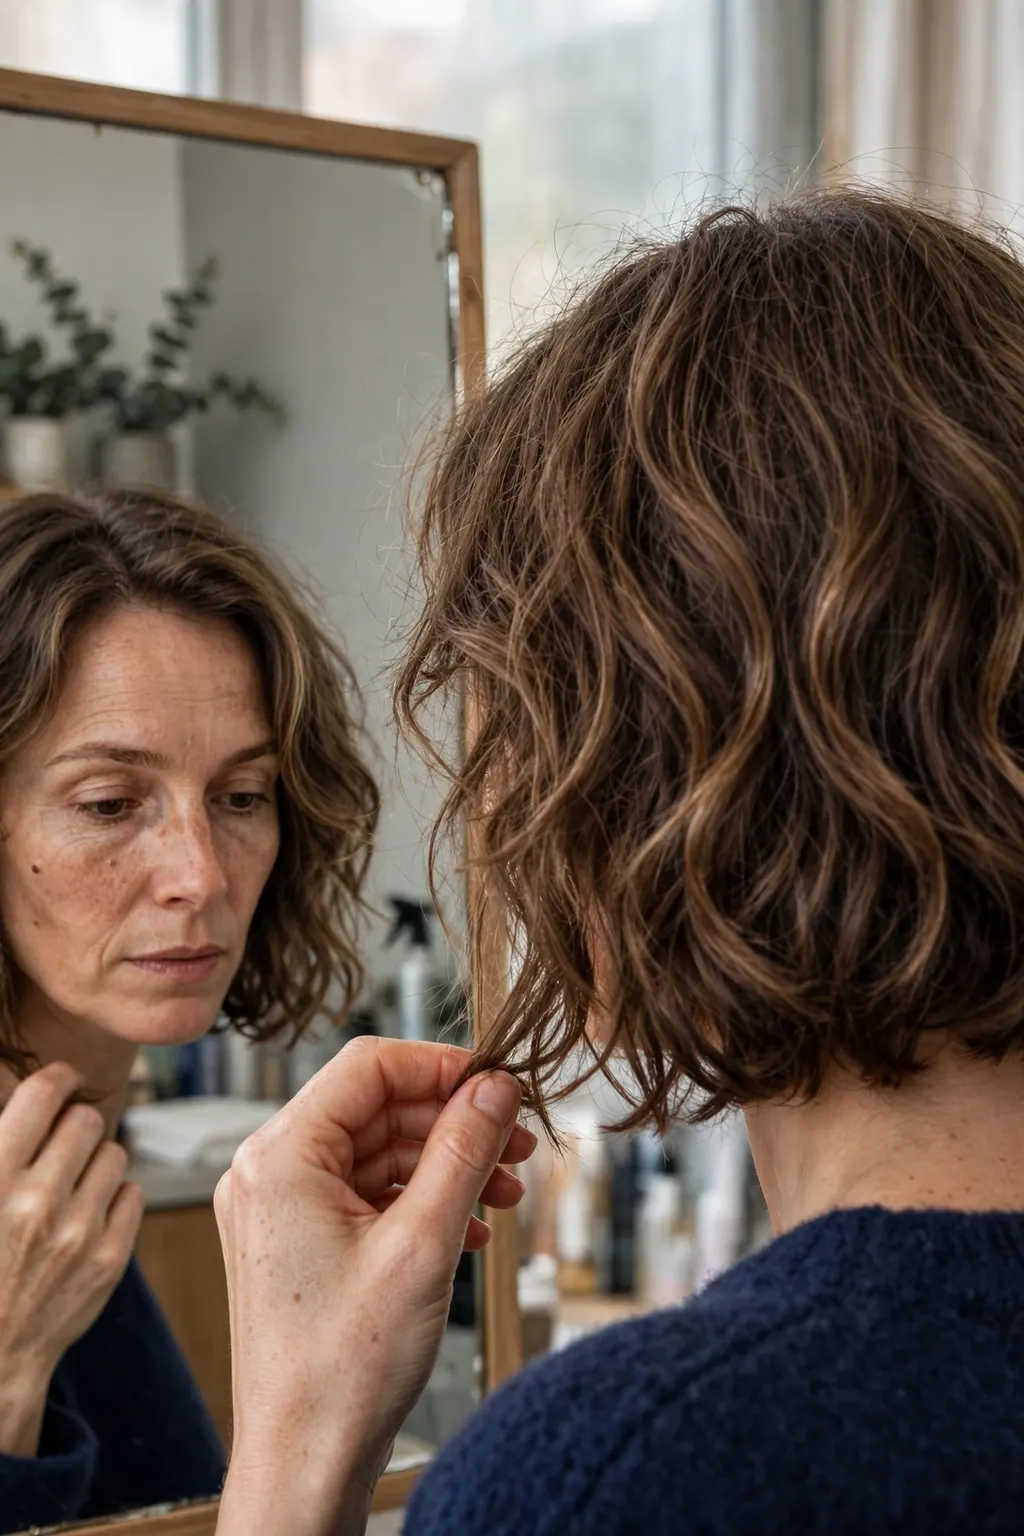
The two lengths that matter in a curly lob are collarbone and shoulder, and the choice between them is really a choice about shrinkage. Collarbone length — the lob finishing just below the collarbone when dry — is the safer, more versatile length: it is long enough to tie up, long enough to pull the curl down, and short enough that the bottom cannot get too heavy. Shoulder length — finishing at the shoulder dry — is the bolder version: it shows the layer map more clearly, it moves more, and it is the length that goes triangular fastest if the layers are wrong, because there is less weight pulling the curl down.
The rule of thumb: if your shrinkage is under 30%, either length works, and the choice is about styling — collarbone for wash-and-go, shoulder for more movement. If your shrinkage is over 30%, choose collarbone and cut wet to below the shoulder, so the dry length lands where you want it. And if you are between lengths, always go longer: a curly lob that is too long can be shaped at the next visit, but a lob cut too short has to grow out, and the grow-out of a triangular bob is the worst phase of all.
The technique, step by step
Decide the dry length first, with your hand on your own hair, in the mirror, on dry hair. Add the shrinkage back on — a third for type 3, a quarter for type 2 — and that is the wet cutting length. Cut the perimeter first, then the layers, then check the shape dry before any finishing. The dry check is not optional: it is the moment a too-short layer or a heavy corner gets caught, while it can still be fixed.
Common mistakes to avoid
Cutting to the dry length on wet hair — the classic error, and the reason so many curly lobs come back an inch shorter than the photo. Cutting the layers too short at the crown, which makes the top go flat and the bottom go wide. And thinning the ends to “remove weight” — it removes the density that holds the curl pattern together, and the ends go wispy while the middle stays wide.
Products and tools that help
A leave-in conditioner, a light curl cream or gel, a microfibre towel or cotton T-shirt for plopping, and root clips for lift while the hair dries. That is the whole kit for the length decision: the products hold the pattern, the clips hold the root, and the cut does the rest. No straighteners, no round brushes — the lob is designed to be worn as it dries.
What to ask your stylist: “I want a long layered bob that air-dries without going triangular, so I need the layer map planned for my shrinkage, not just my length. Can you show me where the shortest layer will sit when my hair is dry, how much length I lose to spring, and where you will take the weight out so the bottom stays light? I would rather leave it longer this visit and shape it next time than have it cut too short and grow out triangular.”
Face-Framing Without a Shelf: Front Layers Done Right
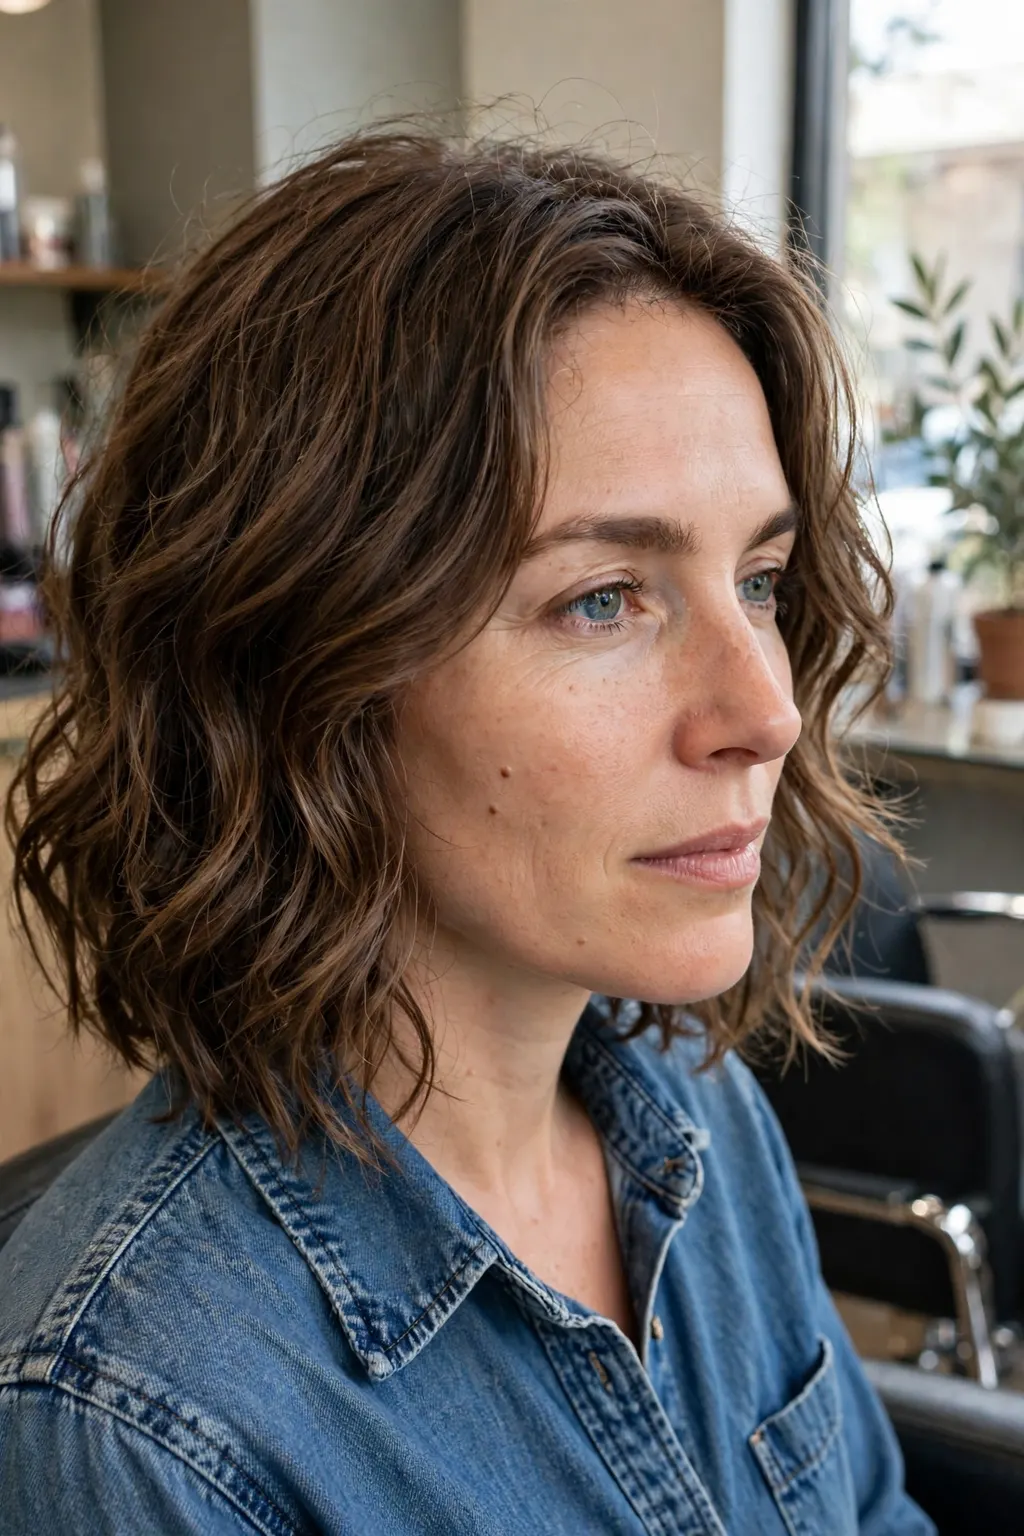
The front layers are where a curly lob succeeds or fails as a haircut rather than a shape. Done right, they open the face, frame the cheekbones and give the curls a place to fall that is not the jawline. Done wrong, they form a shelf: a hard, horizontal line of short layers across the front that sticks out, separates from the rest of the hair, and makes the whole cut look like two haircuts joined together. The difference is length and blending. Front layers should start at the cheekbone at the earliest — chin is safer — and they should be cut so each layer melts into the next, with no visible step between them.
The test is the ponytail test: pull the hair back loosely, and the front layers should fall in soft pieces around the face, not in a stiff curtain. And the test on dry hair: shake your head, let the hair settle, and the front should look like part of the same cut, not an addition to it. If the front layers only look right when the hair is straightened, they are too short for your curl pattern, and they will need growing out before the cut works air-dried.
Best for: hair types and face shapes
Face-framing layers suit every face shape when they start low enough — cheekbone for oval and long faces, chin for round faces, where a lower start elongates. They suit wavy hair particularly well, because the wave gives the frame movement without bulk. Fine hair can wear them too, but needs them kept long and few — and for volume at the front, the cuts in our bob hairstyles for thin hair guide show how a bob can add fullness without short layers.
The exact salon wording
“I want face-framing layers, but no shelf — start them at my chin when dry, blend them into the lengths, and keep them long enough that they fall with the rest of the hair when it air-dries. No short pieces at the front, and please check them dry, with my curl pattern, before we finish.” If the stylist reaches for thinning shears at the front, ask them to stop: thinning at the face makes the frame wispy and the shelf worse, not better.
Maintenance schedule
Front layers grow out faster than the rest of the cut, because you see them every day. A quick face-frame tidy every six weeks — a ten-minute appointment, not a full cut — keeps them at the right length without disturbing the layer map behind them. Between visits, the frame is maintained by the wash-day routine: scrunch the front pieces last, with the most product, so they hold their curl instead of going straight and stringy.
Wash-Day Styling for Air-Drying: Rake, Scrunch, Hands Off

The wash-day routine for a curly lob has three moves and one rule. The moves: rake, scrunch, hands off. The rule: do not touch the hair again until it is completely dry. Start on soaking-wet hair — not damp, wet — and rake a leave-in through with your fingers, section by section, so every curl gets coated. Follow with a gel or curl cream, raked the same way, then scrunch upwards, gently, to encourage the curl to form. Then stop. Wrap the hair in a microfibre towel or a cotton T-shirt for ten minutes, take it down, clip the roots if you want lift, and leave it alone.
The hands-off rule is the hardest part and the most important. Every time you touch drying curls you break the cast — the light gel shell that holds the curl as it dries — and each break is a little frizz that cannot be fixed without re-wetting. The hair will look wet and stringy for the first twenty minutes and you will want to fix it. Do not. When it is fully dry, scrunch out the crunch with your hands, once, and the curls fall into the layer map the way the cut intended.
What it looks like in real life
Dry, a wash-day lob looks like the cut in the salon photo: defined curls, a tapered bottom, movement through the lengths, and no triangle. The crown has lift from the root clips, the front frames the face, and the ends curl inwards rather than flaring out. On day two the same routine, shortened — water in a spray bottle, a little leave-in, scrunch, hands off — brings back about 80% of wash day.
Variations worth trying
Plopping — piling the wet hair into a T-shirt on top of the head for twenty minutes — for more volume at the crown and a tighter curl at the ends. Diffusing just the roots for five minutes, on low heat, for lift without disturbing the lengths. And a silk pillowcase at night, which keeps the curl pattern intact until morning better than any refresh product.
When to skip it
Skip the full rake-and-scrunch routine when the hair is already well-defined from the day before — a water refresh is enough, and more product will just build up. Skip the gel entirely on very fine wavy hair, where a gel cast weighs the wave down; a light mousse holds the pattern without the weight. And skip plopping if your hair is thick and takes hours to dry: piling it up keeps the inside wet longest.
📌 Save this one before your next wash day — the rake, scrunch, hands-off order and the shrinkage lengths for your curl type are the parts you will want open on your phone while your hair is still wet.
The Diffuser Compromise for Cold Mornings
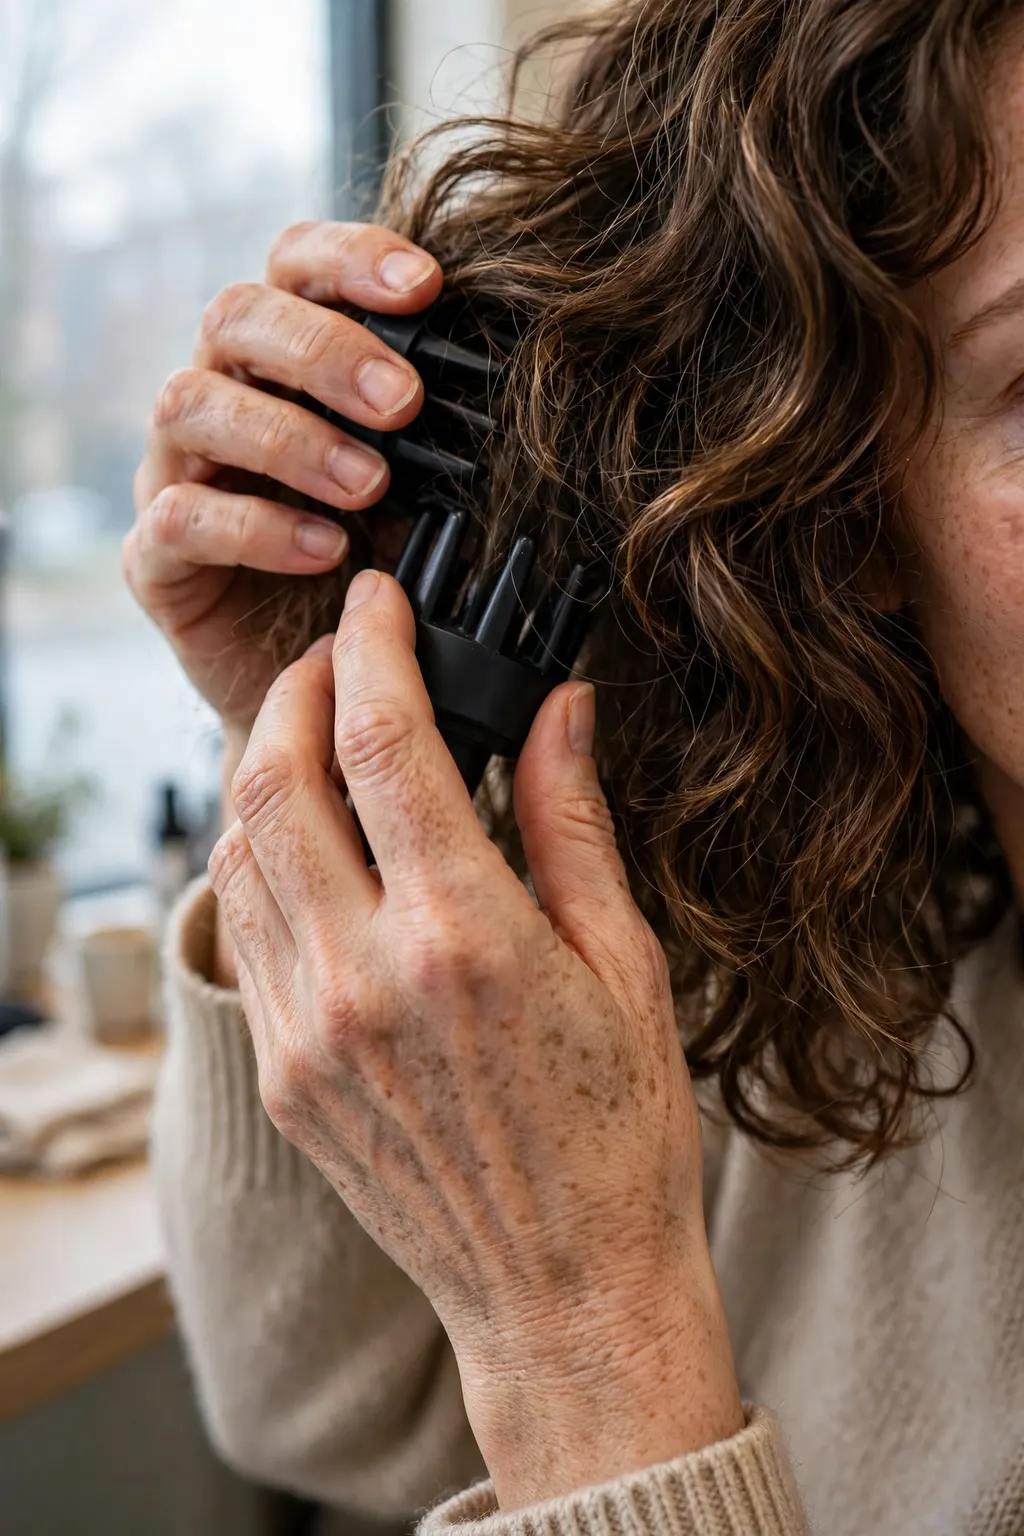
Air-drying is the ideal for a curly lob, and in November it is also the coldest option. The diffuser compromise is: diffuse the roots only, for five minutes, on low heat and low speed, and let the lengths air-dry. The roots are where the lift lives and where the cold is felt most — drying them gives the cut its shape and gets you out of the door without wet hair on your neck, while the lengths, left alone, keep the curl pattern the cut was designed for. A full diffuse, done fast and hot, will blow the layers apart and bring back the triangle in a different form.
After scrunching, tilt your head to one side and hold the diffuser at the roots on that side for a minute, then the other side, then the back — never the ends, never with the diffuser moving through the lengths. When the roots feel dry and the lengths are still damp, stop, clip the roots if you want more lift, and let the rest dry on its own.
Who it suits best
Anyone who washes their hair in the morning in winter, anyone whose roots go flat while the lengths take an hour to dry, and anyone with thick hair whose lob never quite dries before they have to leave. It suits type 3 curls especially well, because the roots are where the curl is tightest and the lift is hardest to get without heat. It suits fine wavy hair less — the diffuser can blow a fine wave apart, and a root clip while air-drying is the gentler fix.
How to ask for it (or do it at home)
At home, the discipline is the same as the wash-day rule: roots only, low heat, low speed, and stop while the lengths are still damp. If the ends start to frizz, you have diffused too far down — next time, hold the diffuser further from the hair and for less time. At the salon, ask the stylist to show you the root-diffuse on your own cut, once, so you can copy the angle and the timing at home instead of guessing.
Styling and upkeep
The diffuser is a tool, not a habit to build on. Use it on cold mornings and wash days when time is short, and air-dry fully on the days you can. Keep the diffuser clean — product build-up on the bowl blows dust into the curls — and check the heat setting every time, because a diffuser left on high from a straightening session will undo a week’s good wash days in five minutes.
Trims and Shape-Ups: Keeping the Bottom Light
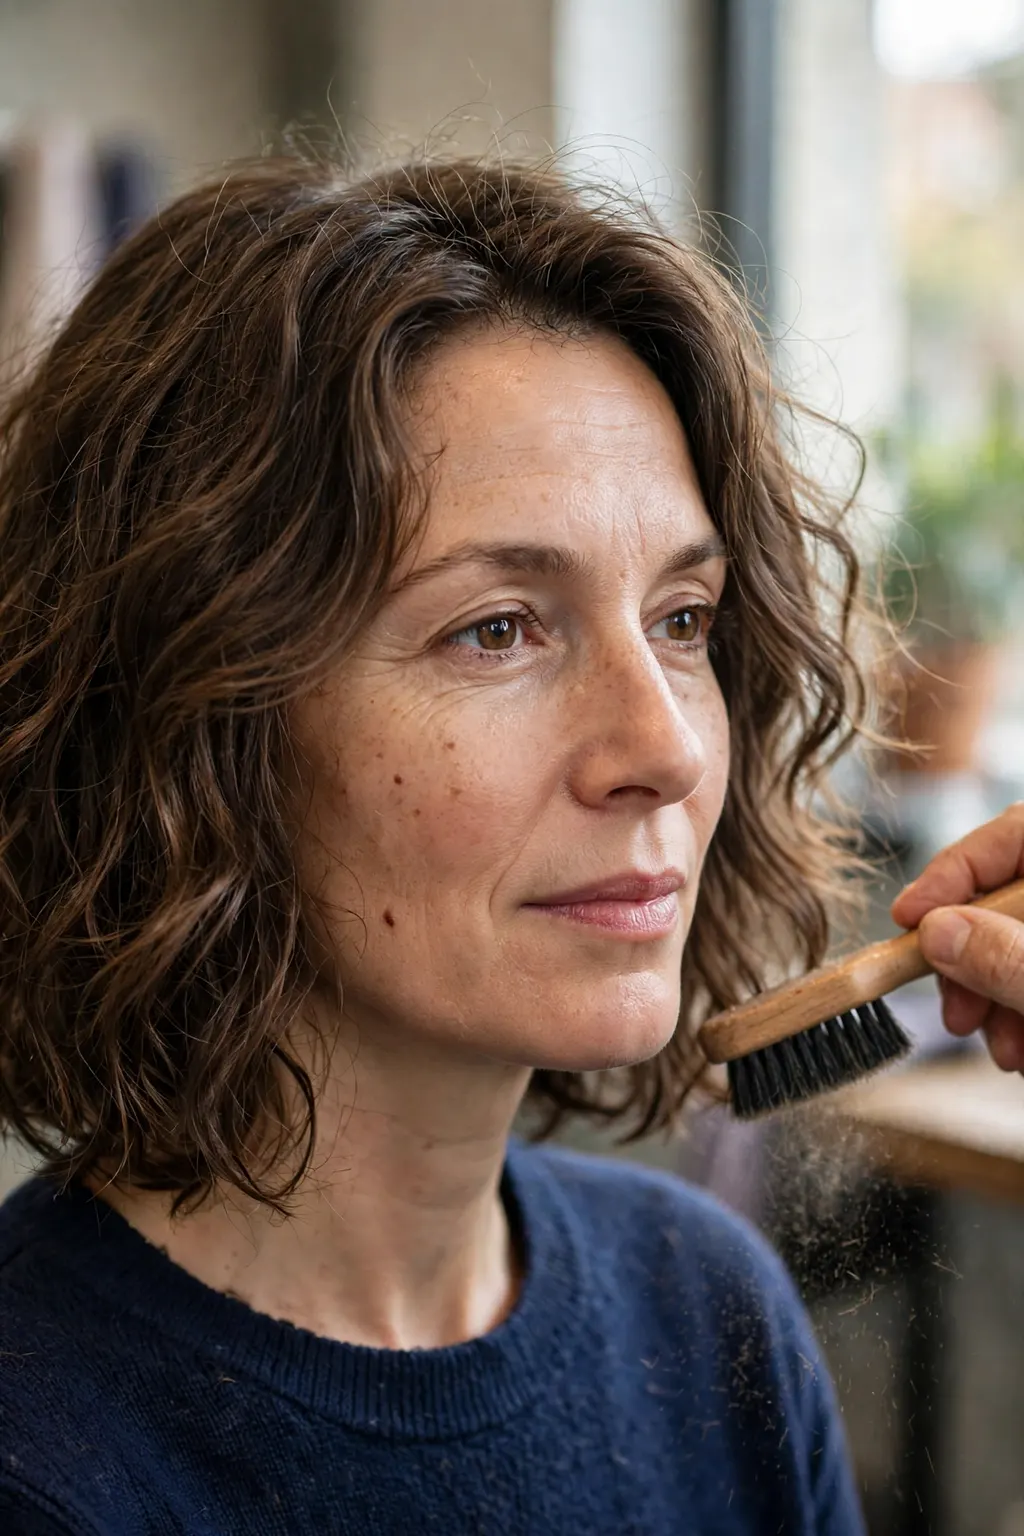
A curly lob does not go triangular overnight. It goes triangular slowly, as the bottom grows heavier and the layers grow out, and the first sign is the ends starting to flare on wash day when they used to curl in. That is the shape-up signal, and it usually arrives at eight to ten weeks. The shape-up is a small appointment: a dusting of the perimeter — a quarter inch, no more — a check of the bottom layers, and a re-breaking of the perimeter edge so it does not sit as a shelf. It is not a re-cut, and it should not be priced or timed like one.
What the shape-up must not do is thin the ends. Thinning shears at the bottom of a curly lob are the fastest way to create the exact problem the cut was designed to solve: the ends go wispy, the curl pattern breaks up, and the middle of the cut — still full — becomes the widest point. Weight comes out from the inside, length comes off the perimeter, and the two jobs should never be confused.
The technique, step by step
Book the shape-up at eight weeks, before the flare starts, not after. Ask for a dry check first: the stylist looks at the shape dry, marks the heavy corners, and cuts only those. The perimeter is dusted curl by curl or point-cut, the bottom layers are checked against the layer map, and the front frame is tidied if it has grown past the chin. Ten to fifteen minutes, and the lob is back to its wash-day shape.
Common mistakes to avoid
Waiting until the triangle is obvious — by then the shape-up is a re-cut, and the length you lose is twice what a timely dusting would have taken. Letting a shape-up become a full re-layering every visit, which keeps the cut in a permanent state of growing out. And cutting the shape-up wet and straight, which repeats the original error: the shape is judged dry, on your curl pattern, every time.
Products and tools that help
Nothing new for this section — the shape-up is a cutting appointment, and the maintenance between visits is the same wash-day routine, the same weekly deep-condition, the same fortnightly clarify. The one product that matters here is a good leave-in, because a well-moisturised curl holds its pattern through the grow-out, and a dry curl goes wide at the bottom weeks before the cut actually needs attention.
Frequently Asked Questions

Why does my curly bob go triangular?
Because the layer map puts the weight at the bottom: layers too long or too short at the top, a blunt heavy perimeter that acts as a shelf, and a cut planned on wet hair that springs shorter and wider when dry. The fix is long layers starting at or below the chin when dry, weight removed from the bottom third from the inside, and a broken-up perimeter — the map in this article, not more styling.
Is a long layered bob good for wavy hair?
Yes, with long layers and few of them — wavy hair needs weight to form its wave, so the layers should be long, the ends left full, and the weight taken out of the mid-lengths rather than the ends. Very fine, very straight-at-the-root waves (2a) are the exception: they often read better as a blunt lob with no layers.
How do you air-dry a layered bob without frizz?
Rake leave-in and gel through soaking-wet hair, scrunch upwards, wrap in a microfibre towel or cotton T-shirt for ten minutes, then hands off until fully dry — do not touch the curls while they dry, or you break the gel cast and create frizz that cannot be fixed without re-wetting. When dry, scrunch out the crunch once with your hands.
Conclusion: Long Layered Bob for Wavy and Curly Hair That Air-Dries Properly (No Triangle Bottom) — Your Next Step

The triangle is not your hair’s fault. It is a layer map that was planned for straight hair, cut on wet hair, and finished at a length that only existed while the hair was stretched. A long layered bob that works for wavy and curly hair is planned the other way round: dry length first, shrinkage added back, layers starting at or below the chin, weight out of the bottom third from the inside, and a perimeter that is broken up instead of blunt. Then the wash-day routine — rake, scrunch, hands off — lets the cut do what it was designed to do, which is dry into shape with almost no styling at all.
Your next step is the salon conversation, not a product. Take the wording from this article, show the stylist where the shortest layer should sit when your hair is dry, and ask them to check the shape dry before you leave. If the lob air-dries into a tapered shape with the ends curling in instead of flaring out, you have it — and the next eight to ten weeks will be wash, scrunch, and walk out of the door.
📌 Save this before your appointment — the layer map, the shrinkage lengths and the exact salon wording are the parts you will want in the chair, not in your memory.