
Hat Hair, Fixed: Cuts and Styles That Survive Wool Hats, Scarves and Static

You style your hair in the morning, you step outside, you pull on a wool beanie — and by the time you take it off, the hair you styled is gone. The crown is flat, the sides are sticking out, the ends are crackling with static, and the part has wandered somewhere it never sits. It is not vanity: it is the most common winter hair complaint there is, and it happens to every length, every texture and every budget. The good news is that hat hair is not a mystery and it is not inevitable. It is physics — compression, friction and static — and once you know which of the three is doing the damage, you can pick a cut, a style and a two-minute revival routine that survives the hat instead of surrendering to it.
Quick answer: Yes — you can wear a wool hat and keep your hair. Choose a cut with layers that bounce back instead of one flat length, wear a low braid or twist under the hat instead of loose hair, line the hat with silk so wool never touches your hair, and carry a 2-minute revival kit: a wide-tooth comb or your fingers, a pea-sized amount of cream or a water mist, and a quick root lift at the crown. Prevent static by moisturising the hair first — dry hair crackles, conditioned hair does not. The full guide below covers the physics, the cuts, the part placement, the silk-liner trick and the static emergencies, in that order.
The Physics of Hat Hair: Compression, Friction, Static

Hat hair has three causes, and they do three different kinds of damage, which is why one fix never works on its own. Compression is the hat pressing the hair flat against the head: the crown loses its lift, the roots bend in the wrong direction, and the bend sets while the hat is on, so it stays bent when the hat comes off. Friction is the wool rubbing against the hair shaft as you walk, talk and turn your head: it roughs up the cuticle, creates flyaways and tangles the lengths where the scarf meets the ends. Static is the charge that builds when dry winter air and wool rub together: fine hairs lift and repel each other, the hair crackles, and the flyaways stand up instead of lying down. Three causes, three fixes — and the order matters: stop the compression with the right cut, stop the friction with a liner and a contained style, and stop the static with moisture before you ever leave the house.
The other thing to understand is that hat hair is worse on some days than others, and the difference is almost always moisture. Hair that is well conditioned, with a leave-in or a cream on the lengths, has a smoother cuticle and holds less charge. Hair that is dry — from winter air, from central heating, from too much clarifying shampoo — is a static magnet, and no amount of smoothing after the fact will fix it, because the charge keeps rebuilding. That is why the revival kit in this guide comes after the prevention sections, not before them: the two-minute fix works best on hair that was moisturised in the morning, and it works worst on hair that went out dry. If you take one thing from this section, take this: hat hair is a morning decision, not an afternoon rescue.
The technique, step by step
Start the night before, not the morning of. Wash or refresh the hair, add a leave-in conditioner to the mid-lengths and ends, and let it dry fully before bed — damp hair under a hat the next morning is the worst combination there is, because it dries in the compressed shape and sets that way. In the morning, add a pea-sized amount of cream or a light oil to the ends only, never the roots, and brush the hair in the direction you will wear it under the hat. Put the hat on by placing it on the crown first and pulling it down gently, rather than dragging it forward over the hairline, which bends the front pieces backwards. When you take the hat off, lift it straight up off the crown instead of pulling it forward — the forward pull is what drags the part sideways and flattens the front. Then run the revival routine from the kit section: fingers at the roots, a mist if there is static, and a quick shake-out from underneath.
Common mistakes to avoid
The most common mistake is wearing the hat over damp hair, because damp hair sets in whatever shape the hat gives it and stays there. The second is choosing a tight, heavy beanie and pulling it low over the forehead, which maximises compression exactly where the hair is most visible. The third is overloading the hair with product in the morning to “hold” it under the hat: heavy product plus compression equals flat, greasy roots, and the product makes the static worse, not better, because it coats the hair and stops it moving freely. The fourth is taking the hat off and immediately brushing the hair flat with a bristle brush, which spreads the static charge through the whole head — fingers first, brush only once the charge is gone. And the fifth is blaming the hat when the real culprit is the scarf: a wool scarf rubbing the ends all day does as much damage as the hat, and it is the part nobody thinks to line with silk.
Products and tools that help
You need very little, and the list is short on purpose. A leave-in conditioner or a light cream for the lengths, applied in the morning, is the single best anti-static product there is — it is moisture, and moisture is the fix. A silk scarf or a silk hat liner is the second: silk does not create friction the way wool does, so it stops the rubbing at the source. A wide-tooth comb, or just your fingers, is the third: it revives the roots without spreading static the way a bristle brush does. A small water mist or a leave-in spray is the fourth, for the revival kit — water discharges static on contact, and a light mist is enough. A wooden or metal comb is a useful extra, because it creates less charge than a plastic one. Everything else — the serums, the sprays, the dry shampoos — is optional. These four, used in the morning, are the whole prevention kit.
📌 Save this before your next hat day — compression, friction, static: three causes, three fixes. Layers for the compression, silk for the friction, moisture for the static.
Cuts That Bounce Back: Layers vs One-Length Under a Hat
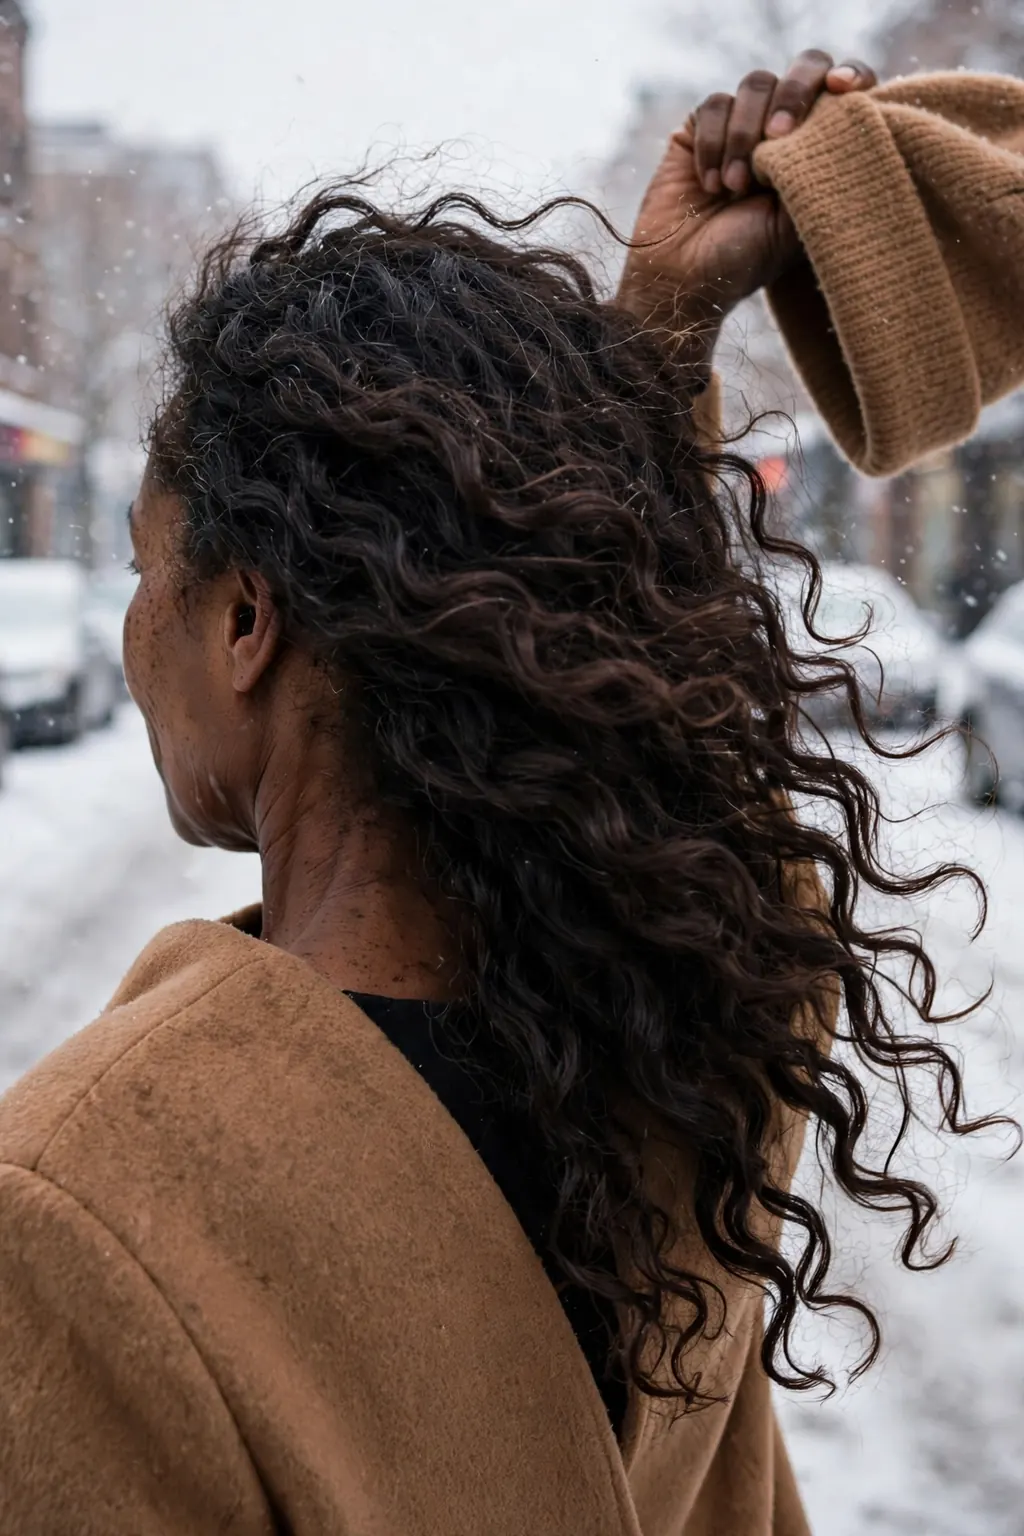
The cut is the first line of defence, because a cut either springs back when the hat comes off or it does not — and no styling trick can give bounce to a cut that has none. Layers bounce back. A long layered cut, with the shortest layers starting at the cheekbone or the jaw, has movement built into it: when the hat compresses the hair, the layers bend, and when the hat comes off, the different lengths fall back at different angles, which reads as volume. One-length hair does the opposite: it is a single heavy sheet, it bends in one place under the hat, and when the hat comes off it stays bent in that one place, flat at the crown and flipped at the ends. That is the whole difference, and it is why the long layered bob in this plan’s Day 6 article is such a good hat cut — it was designed to air-dry without a triangle bottom, and the same layer map that stops the triangle also stops the hat flat.
That does not mean one-length hair cannot survive a hat. It means it needs a different strategy: a one-length cut survives best when it is worn in a low braid or twist under the hat, so the compression works on the braid instead of on the loose hair, and the braid is undone afterwards for a wave that looks deliberate. The layered cut survives best loose, because the layers do the work. The worst combination is one-length hair, worn loose, under a tight beanie — flat at the crown, flipped at the ends, and nothing in the cut to disguise either. If you are due a cut and you wear a hat every day from November to March, ask for layers. It is the single highest-return change in this whole guide, and it costs nothing extra at the appointment.
What to ask your stylist: “I wear a wool beanie every day in winter and I get flat hat hair. Can you cut long layers that bounce back — shortest layer at the cheekbone, no blunt one-length weight at the ends — so the hair springs back when the hat comes off? I want movement, not a triangle, and I don’t want the crown cut short to fake volume.” Bring a photo of your hat, not just your hair: a stylist who can see the hat’s band and depth can cut around it, and one who only sees the hair will cut for a hat-free head you do not have in winter.
Best for: hair types and face shapes
Layers that bounce back suit almost everyone, but they suit wavy and curly hair best of all, because the wave pattern already gives the layers something to spring back into — a layered wavy cut under a hat comes off looking like a styled wave, while a one-length wavy cut comes off looking like a bent sheet. Straight hair benefits too, but the layers need to be longer and softer, or the ends can look wispy after compression. Fine hair needs the layers kept long: short layers on fine hair go flat under a hat and stay flat, because there is not enough hair to spring back. Thick hair can take shorter, more visible layers, because the bulk pushes back against the compression. Face-shape-wise, the cheekbone layer is the workhorse: it frames the face when the hat comes off and gives the eye something to look at besides the flat crown, on round, oval, square and heart faces alike.
The exact salon wording
Say: “Long layers, shortest at the cheekbone, blended through the lengths, no blunt weight at the ends. I wear a beanie daily, so I need the cut to bounce back when the hat comes off — not a cut that only looks good freshly blow-dried.” The words “bounce back” and “beanie daily” are the whole brief: they tell the stylist the problem and the test, and they rule out the two mistakes that ruin a hat cut — a blunt one-length finish, which bends in one place, and a crown cut short to fake volume, which goes flat under a hat and stays flat. If the stylist suggests a heavy fringe, think twice: a fringe under a beanie is pressed flat against the forehead all day and is the hardest piece of hair to revive, so a curtain fringe or a side-swept front piece survives a hat far better than a blunt one. And ask how the layers will grow out: a good hat cut still looks good at week eight, because the layers keep their shape as they grow.
Maintenance schedule
A bounce-back layered cut needs a trim every 8–10 weeks to keep the layer ends clean — split, feathered ends do not spring back, they frizz, and under a hat the frizz is worse. Between trims, the maintenance is the morning routine from the physics section: leave-in on the lengths, cream on the ends, hat on gently, hat off straight up. In the deep-winter weeks, when the hat is on for hours at a time, add a weekly deep-conditioning treatment: conditioned hair holds less static and the layers move more freely, which is the whole point of the cut. And keep one rule from the salon: do not try to “fix” a flat crown by backcombing it after the hat comes off — backcombing roughs up the cuticle, creates more static, and the volume it gives lasts about ten minutes. Use the revival kit instead: fingers at the roots, a mist, a shake-out, and let the layers do their job.
The Low Braid and Twist Styles That Unravel Well

The low braid is the hat-day classic for a reason: it takes the compression, the friction and the static and gives them a braid to work on instead of loose hair. A loose, low braid — started at the nape, not at the crown — sits flat under a beanie, does not create a bump, and when you take the hat off and undo the braid, the hair falls into a soft wave that looks like you styled it on purpose. A low twist does the same thing with less structure: two sections twisted together, pinned low, undone for a looser, more lived-in wave. Both work because the hair is contained while the hat is on, so the hat cannot bend it in random directions, and the wave that comes out of the braid is the revival — you do not need a separate fix, because the undoing is the fix.
The key word is low and the key word is loose. A high braid creates a bump under the hat that shows through the wool and leaves a dent in the hair when it comes out. A tight braid creates a crimp pattern that is too sharp to pass as a wave and is hard to soften without heat. A low, loose braid — three sections, gentle tension, tied with a soft fabric band, not a tight elastic — comes out as a wave, not a crimp. The same goes for the twist: twist loosely, pin it low at the nape, and let the ends stay free for the last few centimetres, so the ends do not kink. And start the braid on hair that is fully dry, with a little cream on the lengths first: a braid on damp hair sets the crimp too hard, and a braid on dry, unconditioned hair frizzes at the edges where the hat rubs it.
What it looks like in real life
In real life, a low braid under a hat looks like nothing at all — the hat covers it, the scarf covers the rest, and nobody knows it is there. When the hat comes off and the braid comes out, it looks like a soft, undone wave: movement through the lengths, a little volume at the crown where the hair was not compressed, and ends that curl gently instead of flipping. It is the most forgiving hat style there is, because even if the braid is a little messy, the wave it makes is messy in a good way — it reads as texture, not as a mistake. On wavy and curly hair it is almost invisible as a technique: the braid wave blends into the natural wave, and the result looks like the hair’s own pattern. On straight hair it is more obvious, in a good way: the wave is the style, and it is the style that a straight-haired person cannot get from a hat alone.
Variations worth trying
If a three-strand braid feels too neat, try a low fishtail: it is looser by nature, it unravels into a softer, more broken-up wave, and it takes the same two minutes. If a braid feels too structured for the day, try a low twist: two sections, twisted together, pinned at the nape with a single pin, undone for a looser wave with less pattern. If your hair is short — shoulder-length or above — try a half-braid: braid only the top section back and low, leave the rest loose underneath, so the hat compresses the braided part and the loose part stays free. And if you want the wave to last into the evening, braid the hair slightly damp with a leave-in, not soaking wet: the wave sets a little stronger and holds longer, without the hard crimp that wet braiding gives. For more low, contained styles that survive a hat day, the 50 Powerful Hairstyles for Women guide is the next read — it covers the low buns, twists and braids that hide flyaways and keep their shape under winter layers.
When to skip it
Skip the low braid if your hair is very short — above the chin — because there is not enough length to braid low without the braid sticking out sideways under the hat, and the bump it makes is worse than the flatness it prevents. Skip it if your hair is very fine and the braid is visible through a thin beanie as a ridge: on fine hair, a low twist pinned flat is a better choice, because it lies flatter than a braid. And skip it on the days you want the hair to look freshly blow-dried when the hat comes off — a braid wave is a wave, not a blow-dry, and if the occasion needs sleek, the silk liner and the layered cut are the better tools. In all three cases the braid is not wrong, it is just the wrong tool for that day — and the guide’s other sections are there for exactly those days.
Part Placement: Why a Centre Part Flattens Worst
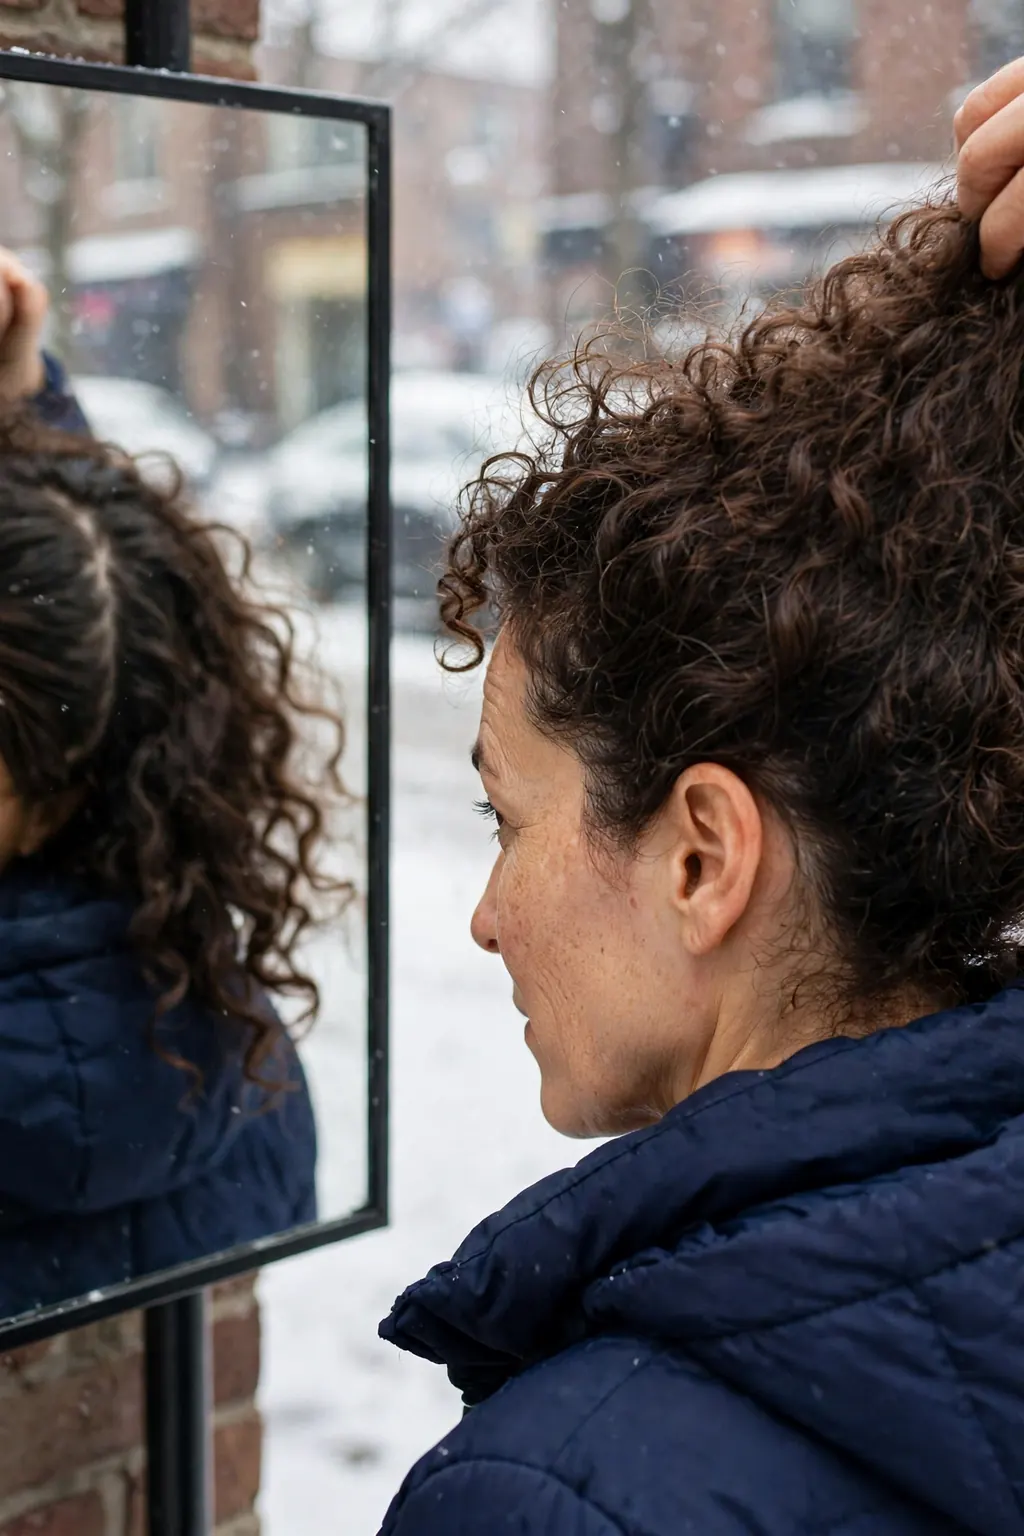
The part is the smallest decision in this guide and the one that makes the biggest difference on the day. A centre part flattens worst under a hat, and the reason is simple: the hat band sits across the crown and presses the hair down on both sides of the part at once, so when the hat comes off, the hair on both sides is bent flat in opposite directions and the part itself has disappeared into a flat sheet. A side part survives better, because the hat presses the heavier side down in one direction and the lighter side has less hair to flatten — and when the hat comes off, flipping the part back to the other side gives you instant volume, because the roots have been bent the wrong way all day and spring back the right way. A deep side part survives best of all, for the same reason, turned up: more hair on one side means more hair to flip, and the flip is the revival.
The practical version is this: on a hat day, wear the part on the opposite side from where you normally wear it, or wear it deeper than usual, and flip it back when the hat comes off. The hair has spent the day bent one way; flipping it the other way uses that bend instead of fighting it. It is the cheapest volume trick in the guide — it costs nothing, it takes three seconds, and it works on every length that has enough hair to flip. The only people it does not help are the people with a very short cut, where there is not enough length to flip, and the people with a fringe, where the fringe is pressed flat regardless of the part. For everyone else, the part flip is the first thing to try when the hat comes off, before the mist, before the comb, before anything else.
Who it suits best
The part flip suits medium and long hair best, because there is enough length for the flip to show as volume rather than as a wisp. It suits thick hair particularly well, because thick hair holds the bend and then holds the flip — the volume lasts into the evening, not just for ten minutes. It suits fine hair too, but the flip needs to be deeper: a shallow side part on fine hair does not move enough hair to make a difference, while a deep side part moves a visible section and the volume is real. It suits wavy hair best of all, because the wave pattern hides the part line itself — on wavy hair, a flipped part looks like the hair just fell that way, while on very straight hair the part line is more visible and the flip needs a quick finger-comb to soften it. Face-shape-wise, a deep side part flatters round and square faces by breaking up the symmetry, and it flatters oval faces by adding height at the crown, which is exactly where a hat takes height away.
How to ask for it (or do it at home)
At home, the routine is: before the hat goes on, part the hair on the opposite side from your usual part, or two fingers deeper than usual, and smooth it into place with your fingers, not a comb — a comb makes a hard line that the hat will press into a dent. Put the hat on gently, crown first, and leave it alone. When the hat comes off, lift it straight up, shake the hair out from underneath with your fingers, and flip the part back to your usual side in one movement. Do not brush it first: brushing spreads the static and flattens the flip before it has a chance to spring. If the part line is visible as a hard line, soften it with your fingertips, not a brush, and add a mist only if there is static. At the salon, the ask is even simpler: “Can you cut my layers so they work with a deep side part? I flip my part on hat days and I need the layers to fall well on both sides.” A cut that only works on one side is a cut that fails on hat days.
Styling and upkeep
Style the flipped part the way you would style any volume: from underneath, not from on top. Lift the roots with your fingers at the crown, shake the hair out from the nape upwards, and let the lengths fall where they fall — the flip has already done the work, and over-styling it will flatten it again. Upkeep is nothing at all: the part flip is a daily habit, not a product, and it needs no maintenance schedule beyond remembering to part the hair on the wrong side before the hat goes on. The one thing to watch is the hat band itself: if the band leaves a dent across the crown, the dent will sit on the part line and show when you flip it. A silk liner under the hat stops the dent as well as the friction, because the silk slides instead of gripping — which is the next section, and the reason the liner is worth its own place in this guide.
Liners and Under-Layers: Silk Scarves as Hat Lining
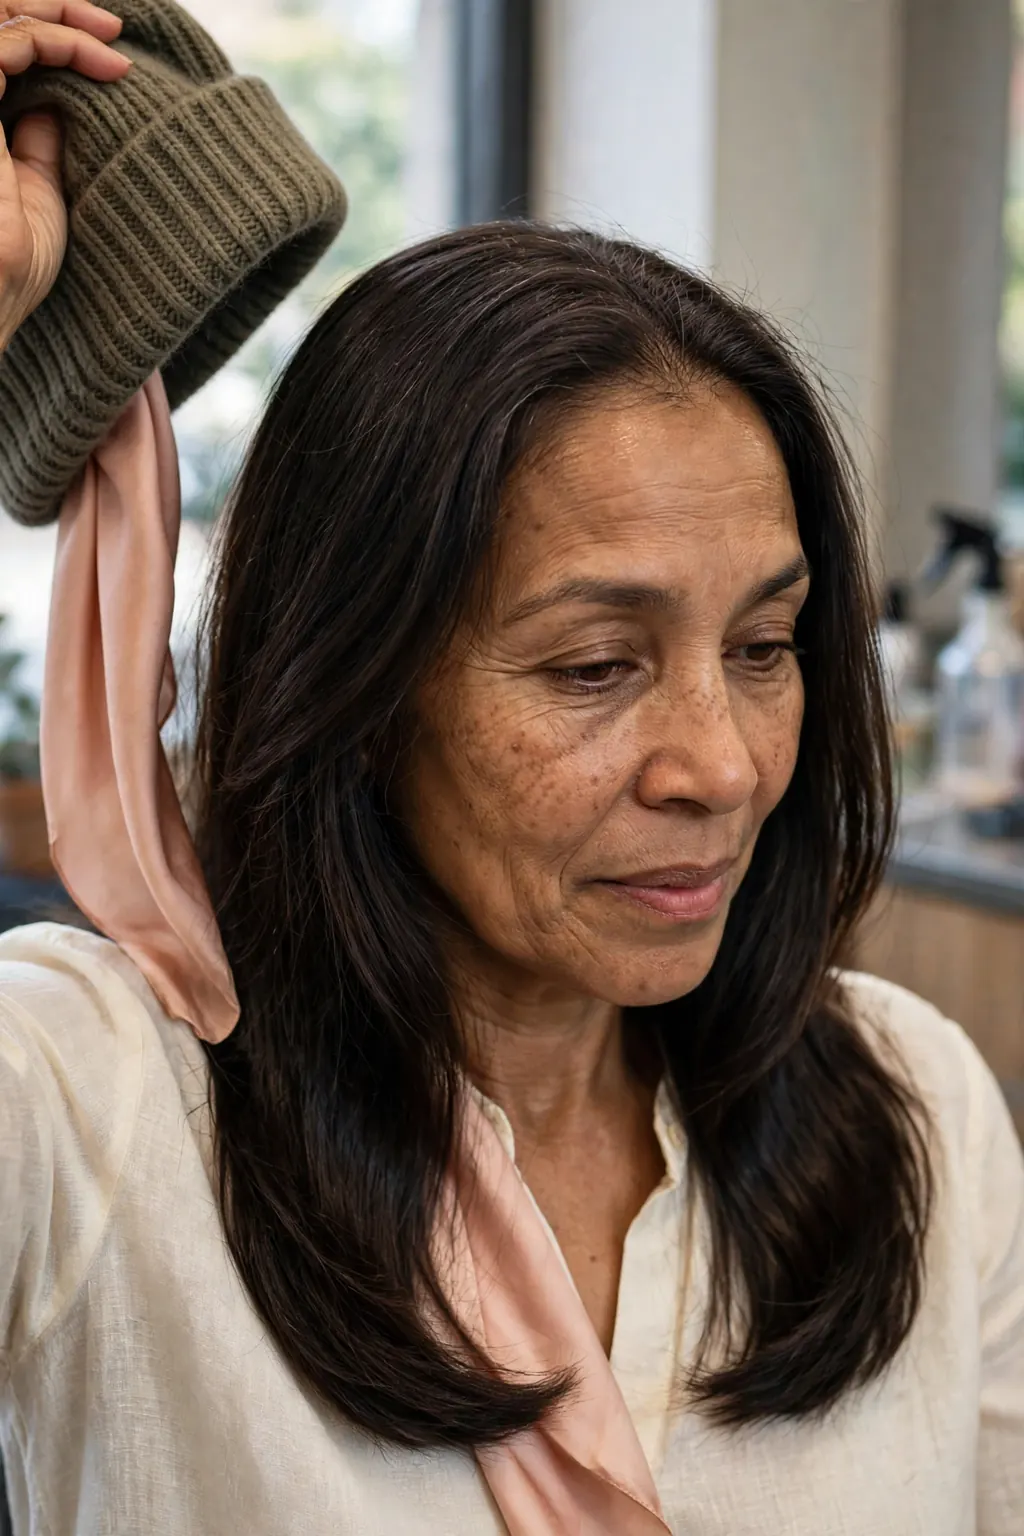
The silk liner is the quietest trick in this guide and the one that does the most work for the least effort. Wool rubs hair. That is the whole problem with friction: every time you turn your head, the wool moves against the hair shaft, roughs up the cuticle, and builds static. Silk does not rub hair — it slides. Put a silk scarf between the wool and the hair, and the friction stops at the source: the hat still keeps you warm, the wool still does its job on the outside, but the hair only ever touches silk. The result is less frizz, less static, no hat-band dent, and hair that comes out of the hat looking much closer to how it went in. It is the same principle as a silk pillowcase, applied to the hat, and it works for the same reason: smooth fibre against hair, instead of rough fibre against hair.
The method is simple and it takes thirty seconds. Take a square silk scarf — a large one, not a small neck scarf — fold it into a triangle, place the folded edge at the hairline, and tie it loosely at the nape, over the hair but under the hat. The knot sits at the nape, where the hat covers it, and the silk covers the crown and the sides, which are the parts the hat touches. Alternatively, sew or clip a silk lining into the hat itself, if it is a hat you wear every day: a strip of silk around the inside band is enough, because the band is where the friction and the dent happen. Either way, the silk should be real silk or a smooth satin, not a textured fabric — the point is the slide, and a rough satin does not slide. And the scarf should be tied loosely: a tight knot creates its own dent, and the dent is what you are trying to avoid.
The technique, step by step
Step one is the hair: dry, conditioned, with a little cream on the lengths, parted on the opposite side as the part section describes. Step two is the scarf: fold the square into a triangle, place the long folded edge at the front hairline, and bring the two ends back to the nape. Step three is the knot: tie it loosely at the nape, flat, so it does not create a bump under the hat — a flat knot, not a bow. Step four is the hat: place it on the crown first, pull it down gently over the silk, and check in the mirror that no silk is showing at the front — the folded edge should sit just behind the hairline, not in front of it. Step five is the removal: lift the hat straight up, then untie the scarf and let the hair fall — do not pull the scarf forward over the hair, because that drags the part and recreates the friction you just avoided. Five steps, thirty seconds, and the hat never touches the hair at all.
Common mistakes to avoid
The most common mistake is using a cotton scarf instead of silk, because cotton absorbs moisture from the hair and creates friction of its own — it is better than bare wool, but it is not the fix, and on a dry day it can make the static worse. The second is tying the scarf too tight, which creates a dent at the nape and a line across the crown where the folded edge pressed in. The third is letting the silk show at the front: the folded edge should sit behind the hairline, and if it is visible it looks like a headscarf, not a liner, which is a different look entirely. The fourth is forgetting the scarf ends: the hair at the nape, where the scarf is tied, is the hair the scarf rubs most, so the knot must be flat and the ends tucked, not left to rub. And the fifth is wearing the liner only on the coldest days: friction happens on every hat day, not just the cold ones, and the liner is a daily habit, not a deep-winter exception.
Products and tools that help
You need one thing: a large square silk scarf, in a colour close to your hair or a neutral that disappears under the hat. Real silk is best, because it slides most freely and does not build static itself; a smooth satin is a good second choice, and it is cheaper and easier to wash. A silk-lined beanie, bought ready-made, is the zero-effort version: the lining is already sewn in, there is nothing to tie, and it works every time you put the hat on. A silk pillowcase is the companion purchase, for the same reason — the hair spends the night on silk and the day under silk, and the frizz has nowhere to start. Everything else in this section is optional: a small clip to hold the scarf flat at the nape, a second scarf in the bag for the days you forget the first. One scarf, worn daily, is the whole product list.
📌 Save this before you buy another hat — a silk liner costs less than a blow-dry and stops the friction at the source. Wool on the outside, silk on the inside, hair untouched in between.
The 2-Minute Revival Kit for Your Bag

The revival kit is the part of this guide you will actually use every day, because prevention is never perfect and the hat always wins a little. The kit lives in your bag, it takes two minutes, and it has four items: your fingers, a water mist or leave-in spray, a pea-sized amount of cream, and a wide-tooth comb. That is all. The routine is: hat off, straight up. Shake the hair out from underneath with your fingers, lifting at the roots. Flip the part back to your usual side. Mist lightly if there is static — one or two sprays, not a soaking. Smooth the cream over the ends only, never the roots. Comb through once with the wide-tooth comb, from the mid-lengths down, never from the roots. Two minutes, and the hair looks like it was styled that morning, because the revival is not creating a new style — it is releasing the style that was compressed, and letting it spring back.
The reason the kit works is that it works with the compression instead of against it. The roots were bent one way under the hat; the finger-lift and the part flip bend them back the other way, and the bend itself becomes the volume. The static was built by dryness and friction; the mist discharges it on contact, and the cream seals the cuticle so it does not rebuild. The ends were flipped by the hat band; the comb, used from the mid-lengths down, straightens the flip without dragging the roots flat again. Every step has a reason, and every step is gentle — the kit fails when it gets aggressive, when the brush comes out, when the product goes on the roots, when the mist becomes a soaking. Gentle, from underneath, two minutes, and stop while it still looks good.
Best for: hair types and face shapes
The revival kit suits everyone, because it is a routine, not a cut — but it suits long and medium hair best, because there is enough length for the finger-lift and the part flip to show as volume. It suits wavy and curly hair particularly well, because the mist reactivates the wave pattern: a light mist on wavy hair brings the wave back to life, while on straight hair the mist only discharges the static and the volume has to come from the flip. It suits fine hair with one adjustment: use less cream, and use it only on the very ends, because cream on fine roots goes flat and greasy in minutes. It suits thick hair with the opposite adjustment: use a little more mist, because thick hair holds more charge and needs more water to discharge it. Face-shape-wise the kit is neutral — it restores the hair you had, rather than creating a new shape — which is exactly what a revival should do.
The exact salon wording
The revival kit needs no salon wording, because it is a bag routine, not a salon service — but the cut that makes it work does, and that wording is in the cuts section: long layers that bounce back, shortest at the cheekbone, no blunt weight at the ends. If you are at the salon and you want the kit to work better, say: “I take my hat off at work every day and I revive my hair in two minutes in the bathroom. Can you cut it so the revival works — layers that spring back, a part that flips, ends that don’t flip out when they’re compressed?” That sentence tells the stylist the real test of the cut, which is not how it looks in the chair but how it looks after the hat, the scarf and the two-minute kit. A cut that passes that test is a winter cut. A cut that only passes the chair test is a summer cut, and you do not need it in November.
Maintenance schedule
The kit itself needs almost no maintenance: refill the mist bottle when it runs out, replace the cream when it runs out, and keep the wide-tooth comb in the bag, not in the bathroom drawer at home, because a kit at home is not a kit. The hair it revives needs the maintenance from the earlier sections: a trim every 8–10 weeks to keep the layer ends clean, a weekly deep-conditioning treatment in the deep-winter weeks, and the morning routine — leave-in, cream on the ends, hat on gently. The kit is the afternoon half of a morning routine, and it works best when the morning half happened. If the morning half did not happen — the hair went out dry, the hat went on damp, the liner stayed at home — the kit can still help, but it will be a rescue rather than a revival, and the result will show it. Two minutes, every hat day, and the kit pays for itself by the second week.
Static Emergencies: Creams, Sheets and Water Mists

Static is the emergency, because it is the one part of hat hair that looks like a problem rather than a style — flyaways standing straight up, hair crackling when you take a jumper off, ends that will not lie down no matter how much you smooth them. The emergency fixes are all the same idea in different forms: add moisture, or add something that conducts the charge away. Water is the fastest: a light mist over the hair discharges the static on contact, and the hair lies down immediately. Cream is the longest-lasting: a pea-sized amount smoothed over the lengths seals the cuticle and stops the charge rebuilding for hours. A dryer sheet, wiped lightly over the hair, is the improvised version: it leaves a thin coating that reduces the charge, and it works in a pinch, though it is not a hair product and should not be a daily habit. And the oldest fix of all is the wet hands trick: run damp hands over the hair, and the water on your hands does the same job as the mist.
The order matters, and the order is: water first, cream second, sheets last. Water discharges the charge that is already there. Cream stops the next charge building. Sheets are for when you have neither water nor cream, and they are a one-off, not a routine. What does not work is brushing: a bristle brush spreads the charge through the whole head and makes the flyaways worse, and a plastic comb does the same thing on a smaller scale. What also does not work is more product on dry hair: product on dry, charged hair coats the flyaways in place, standing up, which is worse than flyaways that move. The emergency rule is one sentence: wet it first, then smooth it. Every fix in this section follows that rule, and every fix that breaks it makes the static worse.
What it looks like in real life
In real life, a static emergency looks like hair that will not behave: fine hairs lifting off the crown, ends crackling, the hair clinging to a scarf or a jumper and then flying away from it. After the water-first fix, it looks like the same hair, calm: the flyaways lie down, the ends sit together, the hair moves as one piece instead of as a hundred separate charged strands. The difference is visible in a mirror and audible in the lack of crackle, and it lasts until the hair dries out again — which is why the cream goes on second, to keep the moisture in. On a very dry day, the fix may need repeating in the afternoon: the air is dry, the heating is on, the hat goes back on for the journey home, and the static rebuilds. That is normal, not a failure of the fix — static is a condition of the air, and the fix is a routine, not a cure.
Variations worth trying
If a water mist feels too wet for the moment, try a leave-in spray instead: it is water plus a little conditioning, it discharges the charge the same way, and it leaves the hair softer afterwards. If cream feels too heavy for fine hair, try a single drop of hair oil on the ends only, warmed between the palms first: the oil seals the cuticle without the weight of a cream, and on fine hair the difference matters. If you are out and have nothing at all, try the damp-hands trick, or breathe on the hair through cupped hands — the moisture in your breath is enough to discharge a light charge, and it is better than brushing. And if the static is chronic — every day, all winter, no matter what you do — try a humidifier at home and a leave-in conditioner every morning: chronic static is a sign the hair and the air are both too dry, and the fix is moisture in both, not a stronger product on the hair alone.
When to skip it
Skip the dryer-sheet fix if you have a sensitive scalp or you use it every day: dryer sheets are not made for hair, they leave a coating that builds up, and daily use can irritate the scalp and dull the hair. Skip the heavy cream if your hair is fine and the occasion is in the next hour: cream on fine roots goes flat fast, and a flat crown is worse than a few flyaways. Skip the water mist if the hair is already damp from rain or snow: wet hair plus more water is just wet hair, and the static will return as it dries — wait until the hair is dry, then mist lightly. And skip all of the emergency fixes if the real problem is the hat itself: a hat that is too tight, too heavy or made of the roughest wool will rebuild the static faster than any fix can discharge it, and the answer is a looser hat, a silk liner, or both — not a stronger cream.
Styles to Avoid on Hat Days (and Why)

Not every style survives a hat, and knowing which ones do not is as useful as knowing which ones do — because the styles to avoid are the ones that look best in the morning and worst in the afternoon. The high ponytail is the first: it creates a bump under the hat, the hat presses the ponytail flat against the head, and when the hat comes off the ponytail has a dent where the band sat and a kink where the elastic was. The sleek, straight blow-dry is the second: it has no texture to hide the compression, so the flat crown and the flipped ends show in full, and there is nothing in the style to disguise them. The tight topknot is the third: it is a bump under the hat, it pulls the hairline tight all day, and it comes out with a dent and a headache. The blunt fringe is the fourth: it is pressed flat against the forehead for hours, and no revival kit can lift a fringe that has been compressed that long without heat. And the half-up, half-down style is the fifth: the top half is compressed and the bottom half is not, so the two halves come out looking like two different hairstyles.
The pattern is simple: anything high, anything tight, anything sleek and anything with a fringe fails under a hat, because the hat presses on exactly the part that makes the style work. The styles that survive are the opposites: low, loose, textured, and with the front pieces swept to the side rather than cut straight across. That is not a limitation — it is a brief. A hat day is a low-braid day, a low-twist day, a loose-wave day, a deep-side-part day. The sleek blow-dry and the high ponytail will still be there on the days you do not wear a hat, and they will look better for having been saved for those days.
Who it suits best
This section suits everyone who wears a hat, because the styles to avoid fail on every hair type — but they fail differently, and knowing how they fail helps you spot them. On thick hair, the high ponytail fails as a bump and a dent; on fine hair, it fails as a flat, limp tail with a kink. On curly hair, the sleek blow-dry fails as frizz, because the compression roughs up the curl pattern and the blow-dry’s smoothness is gone; on straight hair, it fails as flatness, because there is no texture to hide behind. On long hair, the topknot fails as a heavy bump that pulls; on short hair, it fails as a tiny knot that the hat crushes completely. The blunt fringe fails on everyone, on every length, because a fringe is the one piece of hair that cannot be hidden, flipped or braided away — it is always at the front, always under the hat band, and always flat when the hat comes off.
How to ask for it (or do it at home)
At home, the rule is a checklist before the hat goes on: is anything high? Is anything tight? Is anything sleek that needs to stay sleek? Is there a fringe that will be pressed flat? If the answer to any of those is yes, change the style before the hat goes on, not after it comes off — a low braid takes two minutes in the morning and saves twenty minutes of rescue in the afternoon. At the salon, the ask is the same as the cuts section, turned around: “I wear a hat every day. Please don’t cut me a style that only works without one — no blunt fringe, no cut that needs a sleek blow-dry to look right, nothing that falls apart if it’s compressed for an hour.” That sentence rules out the hat-day failures at the cut stage, before they become a daily styling problem, and it is the cheapest way to avoid them — because a cut that needs no hat is a cut you cannot wear in winter.
Styling and upkeep
Style a hat day the way the rest of this guide describes: low, loose, textured, part flipped, silk liner in, revival kit in the bag. Upkeep is the morning check, every day: before the hat goes on, look in the mirror and ask whether the style you have chosen can survive being compressed for an hour. If it cannot, change it now — the braid, the twist, the loose wave — and the afternoon will take care of itself. And keep one rule for the days you get it wrong: do not try to rescue a failed hat style with heat at work. A flat iron on compressed, statically charged hair just presses the flatness in harder and bakes the static into the cuticle. Use the revival kit — fingers, mist, cream, comb — and let the hair spring back on its own. Heat is for the morning, before the hat. The afternoon belongs to the kit.
Frequently Asked Questions

How do you prevent hat hair?
Prevent it in the morning, not in the afternoon: start with dry, conditioned hair, add a leave-in or a cream to the lengths, part the hair on the opposite side from usual, wear a low braid or twist instead of loose hair, and line the hat with silk so wool never touches the hair. Put the hat on gently, crown first, and lift it straight up when you take it off. The three causes are compression, friction and static — layers stop the compression, silk stops the friction, and moisture stops the static — and the prevention works best when all three are in place before you leave the house.
What hairstyles work best under a beanie?
A low, loose braid or a low twist works best, because it sits flat under the beanie, creates no bump, and unravels into a soft wave when the hat comes off. A deep side part is the second-best choice, because flipping it back when the hat comes off gives instant volume. Long layered cuts survive best loose, because the layers bounce back; one-length cuts survive best braided, because the braid does the work the cut cannot. Avoid high ponytails, tight topknots, sleek blow-dries and blunt fringes on beanie days — they are the styles the hat defeats most completely.
How do you revive hair after wearing a hat?
Use the 2-minute kit: lift the hat straight up, shake the hair out from underneath with your fingers, flip the part back to your usual side, mist lightly if there is static, smooth a pea-sized amount of cream over the ends only, and comb through once with a wide-tooth comb from the mid-lengths down. Do not brush first — brushing spreads the static — and do not put product on the roots. If the hair was braided, undo the braid and shake it out; the wave is the revival. Two minutes, gentle, from underneath, and stop while it still looks good.
Conclusion: Hat Hair, Fixed — Your Next Step

Hat hair comes down to three causes and a two-minute kit. Compression is fixed by layers that bounce back. Friction is fixed by a silk liner between the wool and the hair. Static is fixed by moisture in the morning and a mist in the afternoon. The styles that survive are low, loose and textured — a low braid, a low twist, a deep side part — and the styles that do not are high, tight, sleek and fringed, saved for the days you do not wear a hat. Around those choices, the details do the work: dry hair before the hat, hat on gently, hat off straight up, part flipped, fingers before brush, water before cream.
Start with the smallest step that helps most: put a silk scarf in your hat tomorrow, and carry the revival kit in your bag. The scarf costs less than a blow-dry and the kit costs two minutes, and together they fix the two causes you can feel — the friction and the static — while the layers in your next cut fix the third. Take the hat off, lift it straight up, shake the hair out from underneath, flip the part, mist, cream, comb — and walk into the room with the hair you styled this morning, not the hair the hat gave you. That is hat hair, fixed, and it is a routine you can use every winter day until spring.
📌 Save this before your next hat day — silk liner in the hat, low braid under it, part flipped, kit in the bag. Two minutes when the hat comes off, and the morning’s style comes back with it.